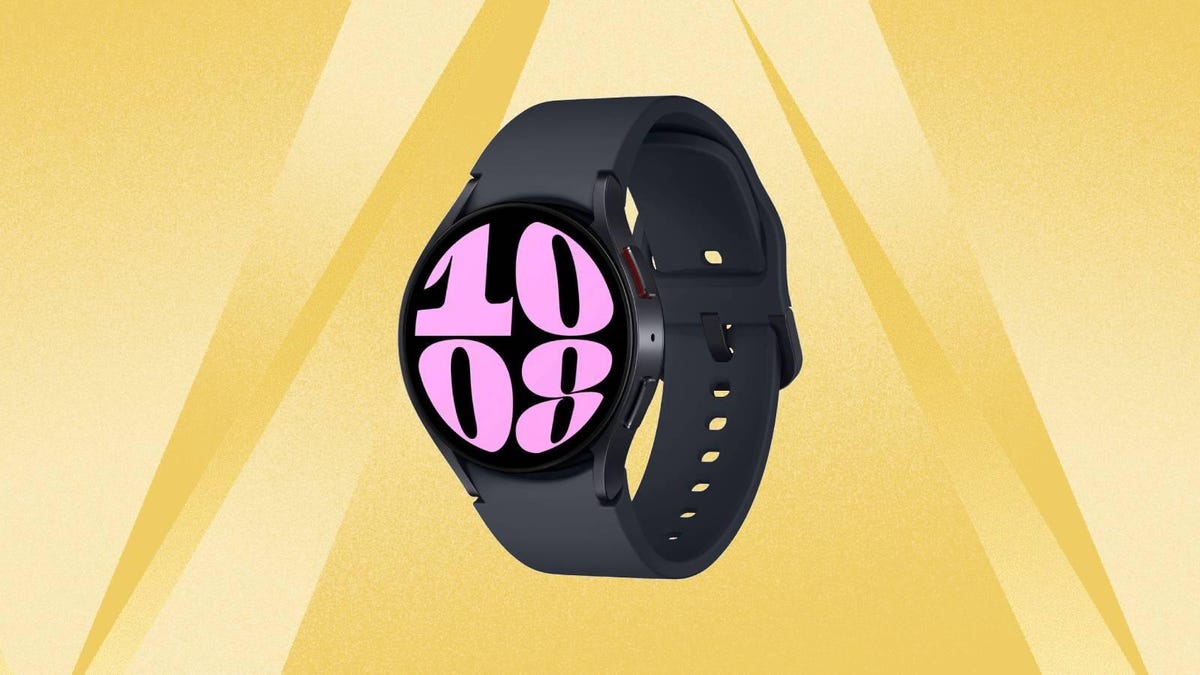
For Android users, Samsung’s latest Galaxy Watch 6 and 6 Classic are our overall favorite smartwatches on the market right now. Deals have been pretty slim since they first hit shelves this summer, but right now, you can save $50 on nearly all configurations at Best Buy. That drops the starting price down to just $250. These deals are only available today. They expire at 9:59 p.m. PT (12:59 a.m. ET), so be sure to get your order in before then if you don’t want to miss out on these savings.
The new Galaxy Watch 6 lineup comes equipped with 2GB of RAM, 16GB of built-in storage and is powered by Samsung’s latest WearOS 4. These updated Samsung smartwatches also feature a rugged design with IP68 weather resistance, and are waterproof up to 50 meters. They’re also equipped with solid fitness tracking capabilities, and allow you to monitor your speed, distance, heart rate, sleep patterns and more, and can even give you a breakdown of your BMI, skeletal muscle, body water and more right from your wrist.
There are quite a few different configurations to choose from. Prices start at $250, which scores you the basic 40mm Galaxy Watch 6, and you can upgrade to the larger 44mm display for $280. The Galaxy Watch 6 Classic has a more heavy-duty stainless steel frame and a rotating bezel, and starts at $350 for the 43mm model and $380 for the 47mm model. If you want cellular connectivity, prices jump up by $50 for the basic Galaxy Watch 6 and $70 for the Galaxy Watch 6 Classic (which are only discounted by $30). It’s also worth noting that you’ll find select configurations discounted at Amazon right now as well, but most are only around $30 off.
Last week, Amazon announced that it would be hopping on the Passkey train. This means that you’ll now be able to use passkeys to log in to some of your Amazon accounts (we’ll get to which ones later). The tech giant joins a slew of other companies who are saying goodbye to passwords and opting for passkeys instead.
Switching to passkeys isn’t mandatory for Amazon customers, the shopping giant said, so if you’re not ready to make the switch, you can keep using your passwords. But if you’re interested in ditching your passwords for good, you can go ahead and set up your Amazon passkey right now.
Here’s what to know about Amazon’s adoption of the password alternative. For more, here’s how Apple’s adopting passkeys and what Google is doing to ditch passwords.
What is a passkey?
Passkeys are a new, secure and easier way to log in to a service or website using biometric authentication like a fingerprint or face scan (or other methods, like a PIN) instead of a password. You might already have a bit of experience with passkeys. For example, if you have Face ID set up on your iPhone, some apps allow you to to use Face ID to sign in instead of typing your account password.
According to backers of passkeys, it’s a more secure method of logging into your accounts than with traditional passwords and is much less susceptible to phishing attacks. Passkeys can be more convenient than keeping track of all of your passwords, let you log in usually with just a click instead of several taps and eliminate the need for two-factor authentication codes, which can clog up your inbox or messages app.
Who else is implementing passkeys?
Amazon is the latest in a string of tech companies that have either axed passwords or given customers the option to use a passkey instead of a password. In adopting passkeys, the online retailer joins the likes of Google, Nintendo and Apple in passwordless support.
Which Amazon services work with passkeys now?
Right now, Amazon has only rolled out passkeys to its primary retail website.
In a response to CNET’s request for comment on where users could take advantage of passkeys, Amazon said “Passkey support is available globally today for all Amazon customers using browsers.” The company indicated that more support would be rolling out to the iOS Amazon Shopping app and that the Android Amazon Shopping app would be receiving passkey support in the near future.
The company also said that it “will be adding passkeys to more apps in the future,” so users of Amazon-owned companies like Goodreads and Twitch could expect to see passkey support at some point in their future, too.
How to set up a passkey on your Amazon account
If you’re interested in ditching your password and opting to use a passkey for your Amazon account, it’s easy to set up. Again, passkeys aren’t mandatory for Amazon customers, so if you feel more comfortable using your password, you won’t have to worry about changing over right away.
To set up a passkey, all you have to do is go to your Account page and select Login & Security.
Once in the Login & Security menu, scroll down to the Passkeys tab and select the Set Up button.
This should bring you to another screen, where you will select Set Up again.
After selecting Set Up a second time, follow the onscreen instructions that are specific to your device or browser to set up your passkey.
After completing these steps, you can say goodbye to your passwords and use your passkey to log in to your Amazon account.
For more, here’s how to use passkeys to login to your Google account and the best password manager for 2023.
It’s been a busy fall for Apple. The company has introduced a slew of new features and products this fall, from a flurry of Apple hardware and software upgrades to brand-new Apple Watches, iPhones, Apple Pencils and new editions of all of Apple’s flagship softwares. Most recently, the tech giant unveiled it’s brand-new M3 chip, the new 14-inch and 16-inch MacBook Pros, and a refreshed version of the iMac at it’s “Scary Fast” Event held earlier this week.
Even though MacOS Sonoma’s smaller updates didn’t get the pomp and circumstance that they deserved earlier this year, several brand-new Macs hitting the scene this fall will be sure to shake things up. So if you’re looking to upgrade your Mac and your iPhone in one fell swoop this year, you’re gonna want them to work together seamlessly.
Luckily for those who plan on upgrading both their computer and their phone, MacOS Sonoma’s update brings features that iPhone users have enjoyed for several years and some brand-new ones that iPhone users first saw in iOS 17.
Check out these new Mac features that I think make my phone and computer work better together. For more, check out how to fix the most annoying iOS 17 features and the Mac keyboard shortcuts you need to know.
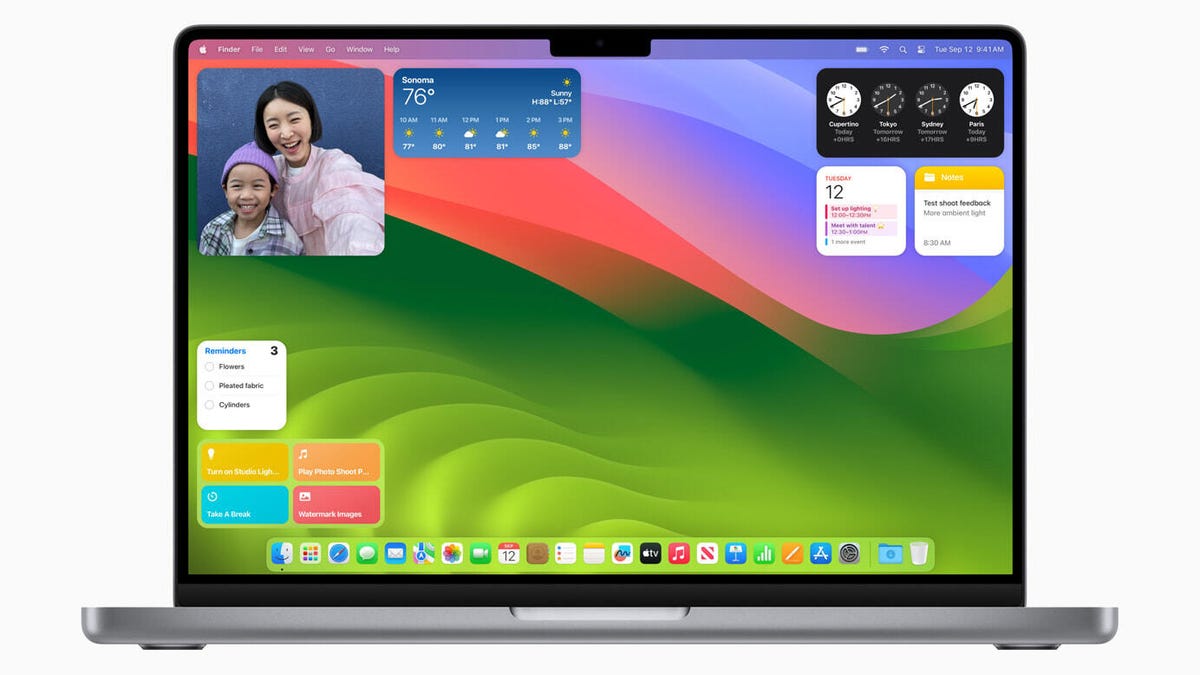
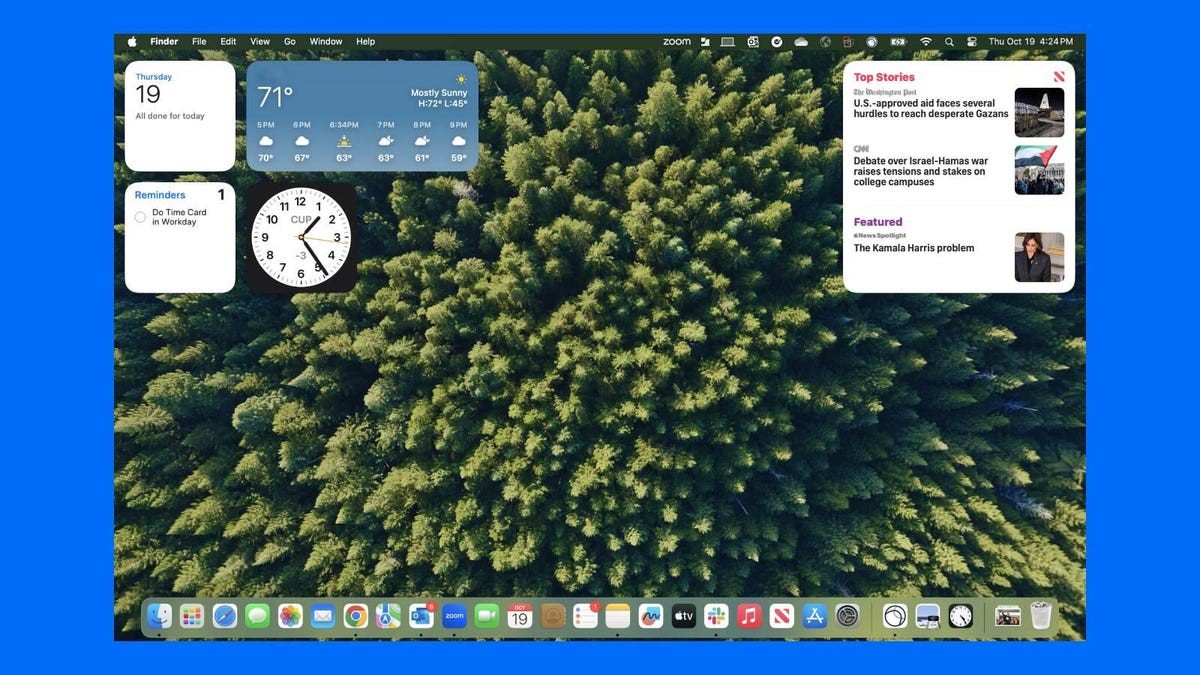
Widgets come to your desktop
While widgets aren’t an earth-shattering productivity feature, or even new to Apple fans, having them on your desktop is pretty helpful. For instance, some of my co-workers work on the west coast, while I work on the east coast, so I have a clock widget that displays what the current time is in Pacific Standard Time that makes coordinating with my coworkers a bit simpler.
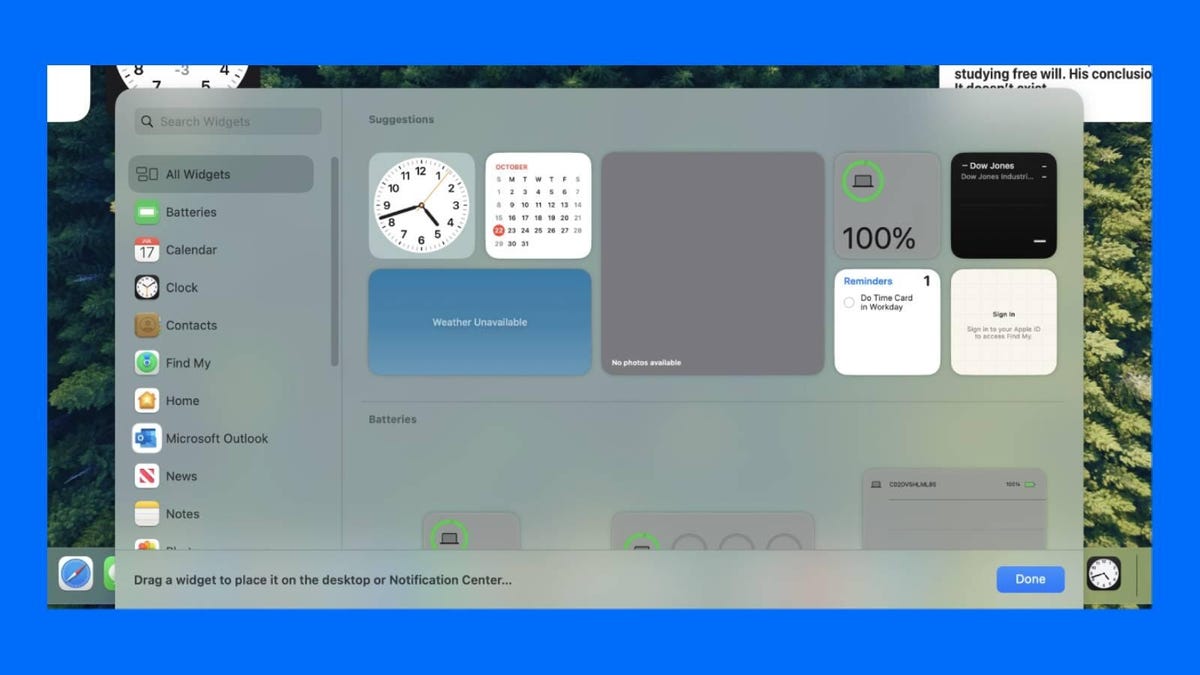
The widgets are also super simple to use — all you have to do is right-click with your mouse or double-click your trackpad on your desktop and a menu will pop out. You can select Edit Widgets and a widget menu will appear where you can select small, medium or large widgets for a variety of applications. If you want to remove a widget, you can either right-click or use two fingers to click your trackpad and select Remove Widget,or you can click the small red button that appears after selecting Edit Widget to remove your widget.
You can also drag and drop widgets from your Notification Center to your desktop. If you want to add widgets to your notification center, all you need to do is scroll to the bottom of your notification center and click Edit Widgets. You remove widgets from your notification center in the same way you would from your desktop.
You can also add your iPhone widgets to your Mac’s desktop, even if you don’t have the widget’s corresponding app downloaded to your computer. To enable this, you will need to go to System Settings, then scroll down to Desktop and Dock and from there scroll to the Widgets section. Once in the widgets section, simply toggle the Use iPhone Widgets option on. Your iPhone widgets will be available from the widget browser that appears when selecting Edit Widget on your desktop or notification center.
Auto-sorting grocery lists
I’m a pretty organized person, but to be honest, I’ve never turned to Apple’s Reminders app for help with this. The app didn’t make much sense to me and I traditionally have opted for third-party organization apps. While these new reminders features aren’t enough to sway me away from my preferred organization apps, there are some additions that have gotten me to make use of the app.
The changes to reminders are pretty easy to take advantage of. The most major update is the auto-sorting grocery list feature. To make use of this feature, click the Add List button at the bottom of the reminders page. Give your list a name (and change the color of the list and the icon if you’d like). Then, under the List Type drop-down menu, select Groceries.
Once in the list, create the categories you want for your list. For example, my list had three categories: meats, produce and miscellaneous. After you create your categories, you should be able to start putting your list together, and the items you add should be automatically sorted. Be warned — this feature seems to be a bit buggy. My best advice is to keep trying the feature, and you can always drag and drop your items to their correct category if nothing else works.
Messages that mirror your phone
One of my favorite things about having an Apple family of products is that I can text from my computer. This sounds small, but this has proven super-helpful in my day-to-day life. When I’m working on my computer, I can put my phone completely away so I can focus, but it’s nice to still be able to be reached.
One thing that has always frustrated me about iMessage on my computer is that it feels years behind my phone. For the longest time, I couldn’t use tap-back reactions or even reply to messages like I could when I would text on my phone. Sonoma has changed this for the better — there is finally parity between phone and computer when it comes to the messages experience.
The biggest feature that I had been missing was the reply function. Essentially, this function allows you to swipe across on a message and reply directly to that specific message. I’ve found this feature particularly helpful when making complicated plans or in noisy group chats.
All you have to do to use the reply function is swipe two fingers to the right until you can reply to the message. If you don’t want to swipe, you can click the message you wish to reply to with two fingers and select Reply from the drop-down menu.
There’s no denying that we live in a constantly connected world, where losing your cellphone signal doesn’t just mean you can’t check Twitter and Instagram — it could be a matter of life and death. It doesn’t matter what type of phone you use or even which cellular service provider you have, you’re bound to run into service disruptions, either from bad weather or remote areas that might weaken your phone signal.
As travel is ramping up for the winter holidays, losing your cellphone signal can get you into a real jam. If you want to avoid getting lost or missing important calls this holiday season, there are several tips and tricks you can use to improve your cellphone signal.
The tried-and-true approach of turning on Airplane mode, waiting a few seconds, and then turning it off again can definitely help with reception. But when that doesn’t work, you might need to take more drastic steps, like removing your SIM card or resetting your network settings.
Before you dive into your phone’s settings, take a few minutes to perform some basic troubleshooting steps that could get your phone working at peak performance.
Note: Although software across different iPhone models is relatively the same, Samsung Galaxy, Google Pixel and other Android devices may have different software versions, and so certain settings and where they are located might differ from device to device.
To improve your cellphone service, try these steps first
The settings on your phone can help you get better cell service, but there are other tricks for improving your reception without even touching your phone’s software.
Move yourself so that there are no obstructions between your phone and any cell towers outside. That might involve stepping away from metal objects or concrete walls, which both kill reception. Instead, get to a window or go outside if possible.
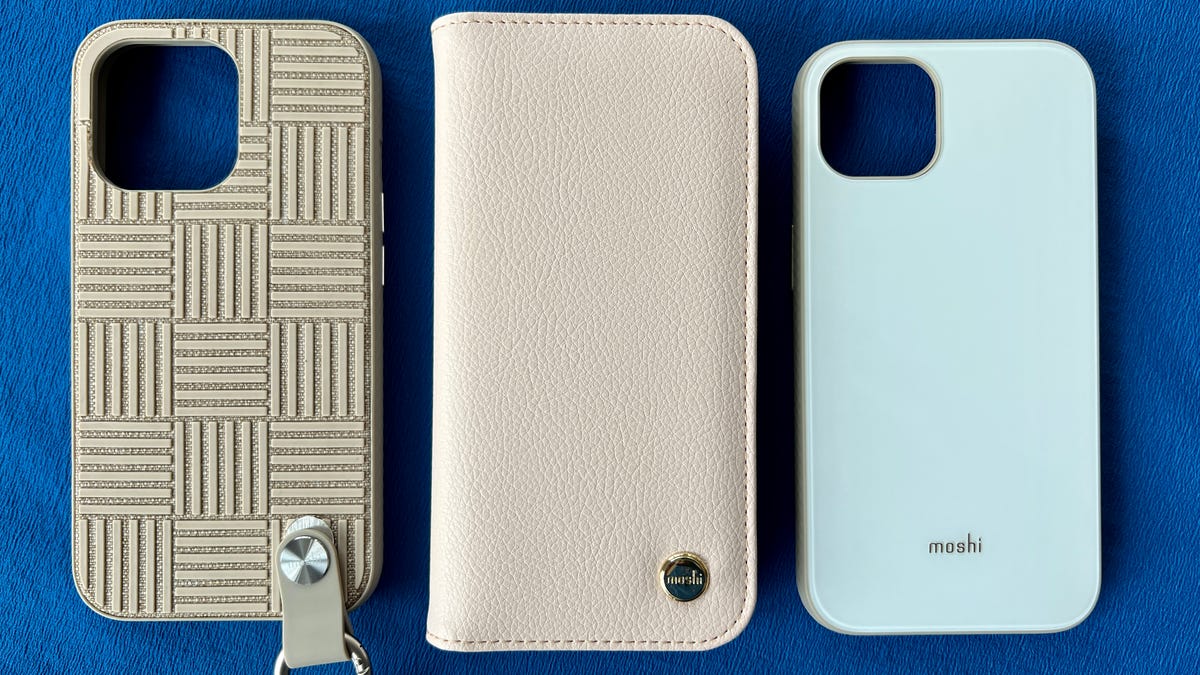
Remove your phone case. It doesn’t hurt to remove whatever case you have on your phone, especially if it’s thick, so that the phone’s antenna isn’t blocked by anything and can get a better signal.
Make sure your phone is charged. Searching for and connecting to a stronger signal drains power, so if your phone battery is already low on charge, you may have a difficult time getting good service.
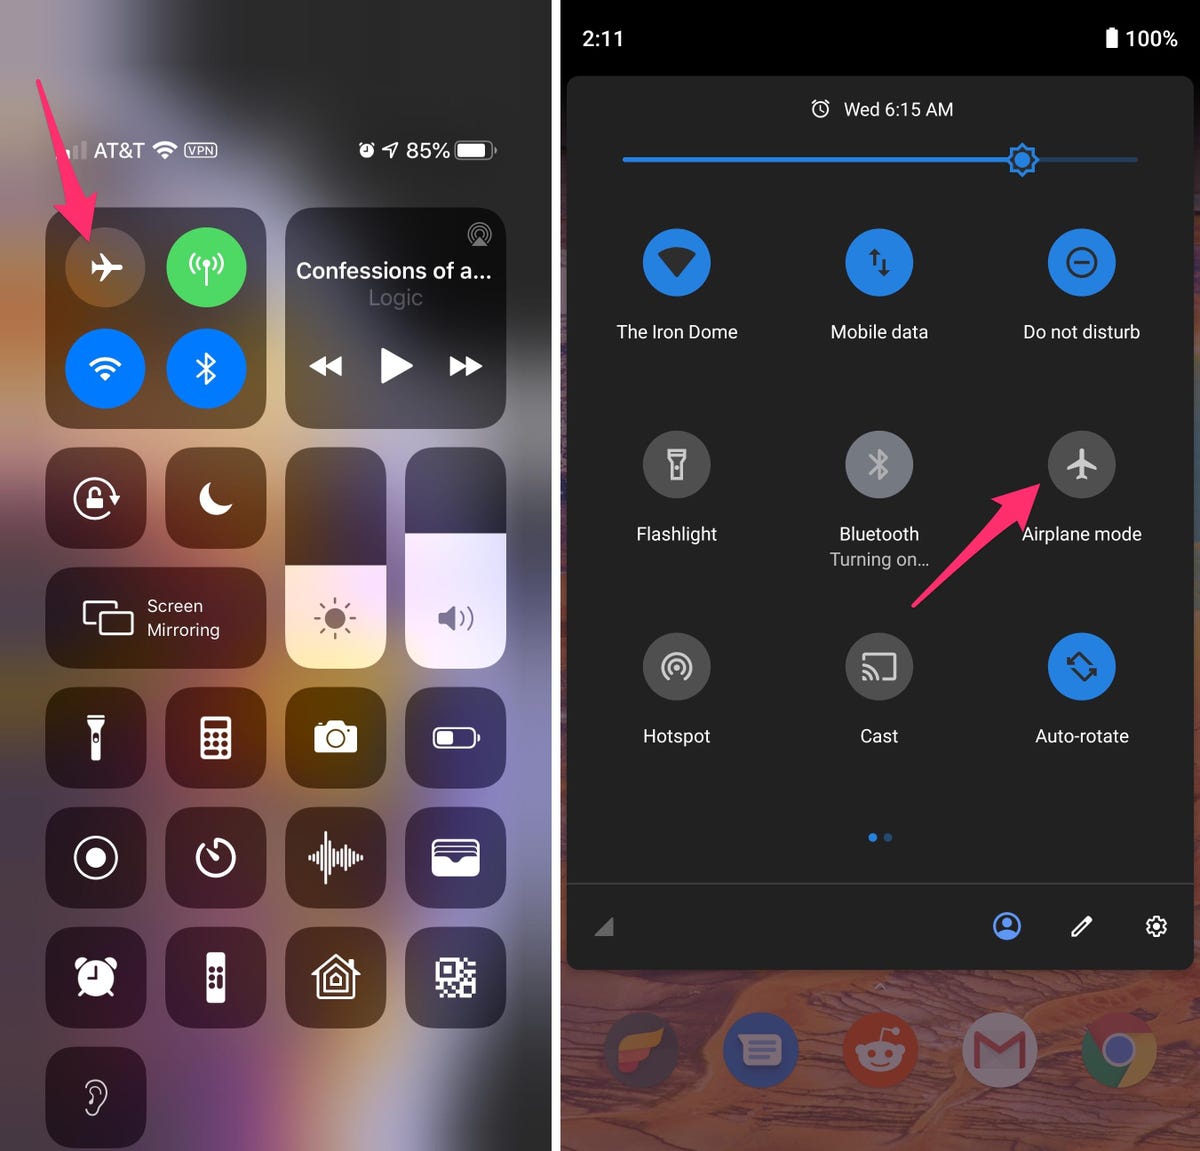
Always start by turning Airplane mode on and off
Turning your phone’s connection off and then back on is the quickest and easiest way to try and fix your signal woes. If you’re moving around from one location to another, toggling Airplane mode restarts the Wi-Fi, Bluetooth and cellular network modems, which forces them to find the best signal in the area.
Android: Swipe down from the top of your screen — to access the Quick Settings panel — and then tap the Airplane mode icon. Wait for your phone to completely disconnect from its Wi-Fi and cellular connections. It doesn’t happen instantly, so give it a good 15 seconds before you tap on the Airplane mode icon again.
iPhone: On the iPhone, you can access Airplane mode from the Control Center, but that varies depending on which iPhone model you have. On the iPhone X and later, swipe down from the top-right corner to access the Control Center. On older iPhone models, swipe up from the bottom of the screen. Then tap the Airplane mode icon, which will turn orange when it’s enabled. Again, wait up to 15 seconds before turning it off.
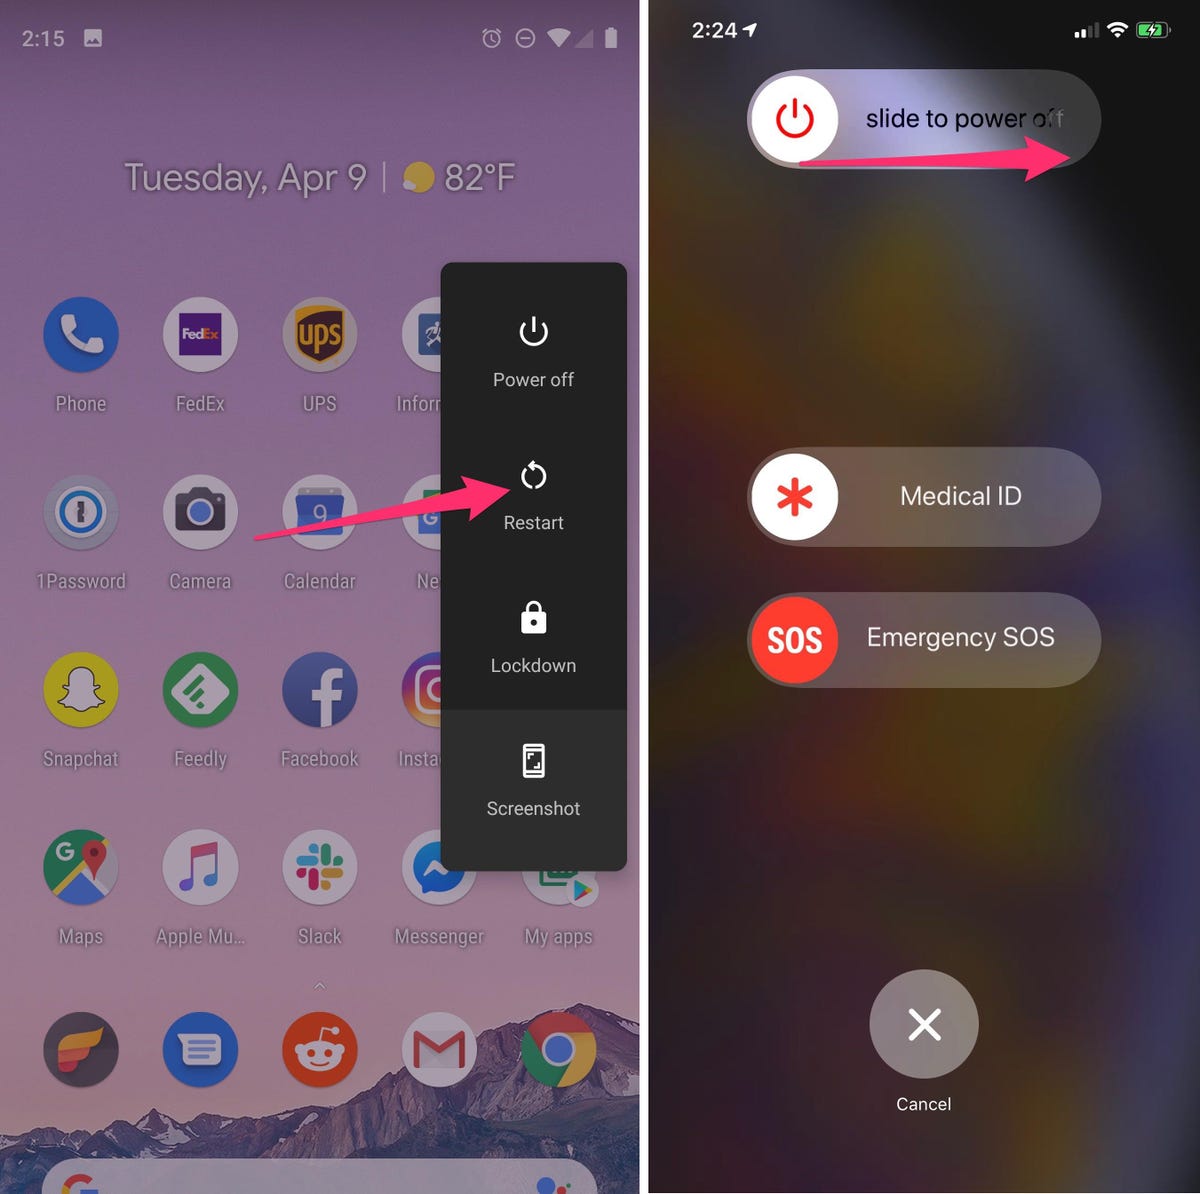
If airplane mode doesn’t work, restart your phone
Our phones are miniature computers, and just like computers, sometimes you can fix issues like network connection by simply restarting them.
Android: Hold down the power button, or the power button and the volume down key (depending on your Android phone), until the on-screen menu shows up, and then tap Restart. If your phone doesn’t offer a restart option, you can simply tap Power Off to shut down your device, and then boot it back up with the power button.
iPhone: On the iPhone X and older models, hold down the sleep/wake button and either one of the volume buttons and then swipe right on the power slider to turn off the device. Wait until it fully turns off, then press down on the sleep/wake button to turn it back on.
Alternatively, you can do a force reset on your iPhone: Press the volume up button, followed by the volume down button and then press and hold the side button. Keep holding it in, after your phone’s screen goes black and until you see the Apple logo appear again.
If your iPhone has a home button, hold down the sleep/wake button until the power slider is displayed and then drag the slider to the right. Once the device is turned off, press and hold the sleep/wake button until you see the Apple logo.
Take your SIM card out of your phone
Another troubleshooting step that might help is to remove your SIM card and then place it back in your phone with the phone turned on. If the SIM card is dirty, clean it. If it has any physical defects, you may need to replace it.
You’ll need a SIM card tool — usually included in your phone’s box — or an unfolded paper clip or sewing needle to get the SIM tray out of your phone.
All phones: Remove the SIM card, check to see if it’s damaged and positioned in the SIM tray correctly, then put it back in your phone.
eSIM: For phones with an eSIM — that is, an embedded electronic SIM in your phone — there’s nothing for you to remove. The best you can do is restart your phone.
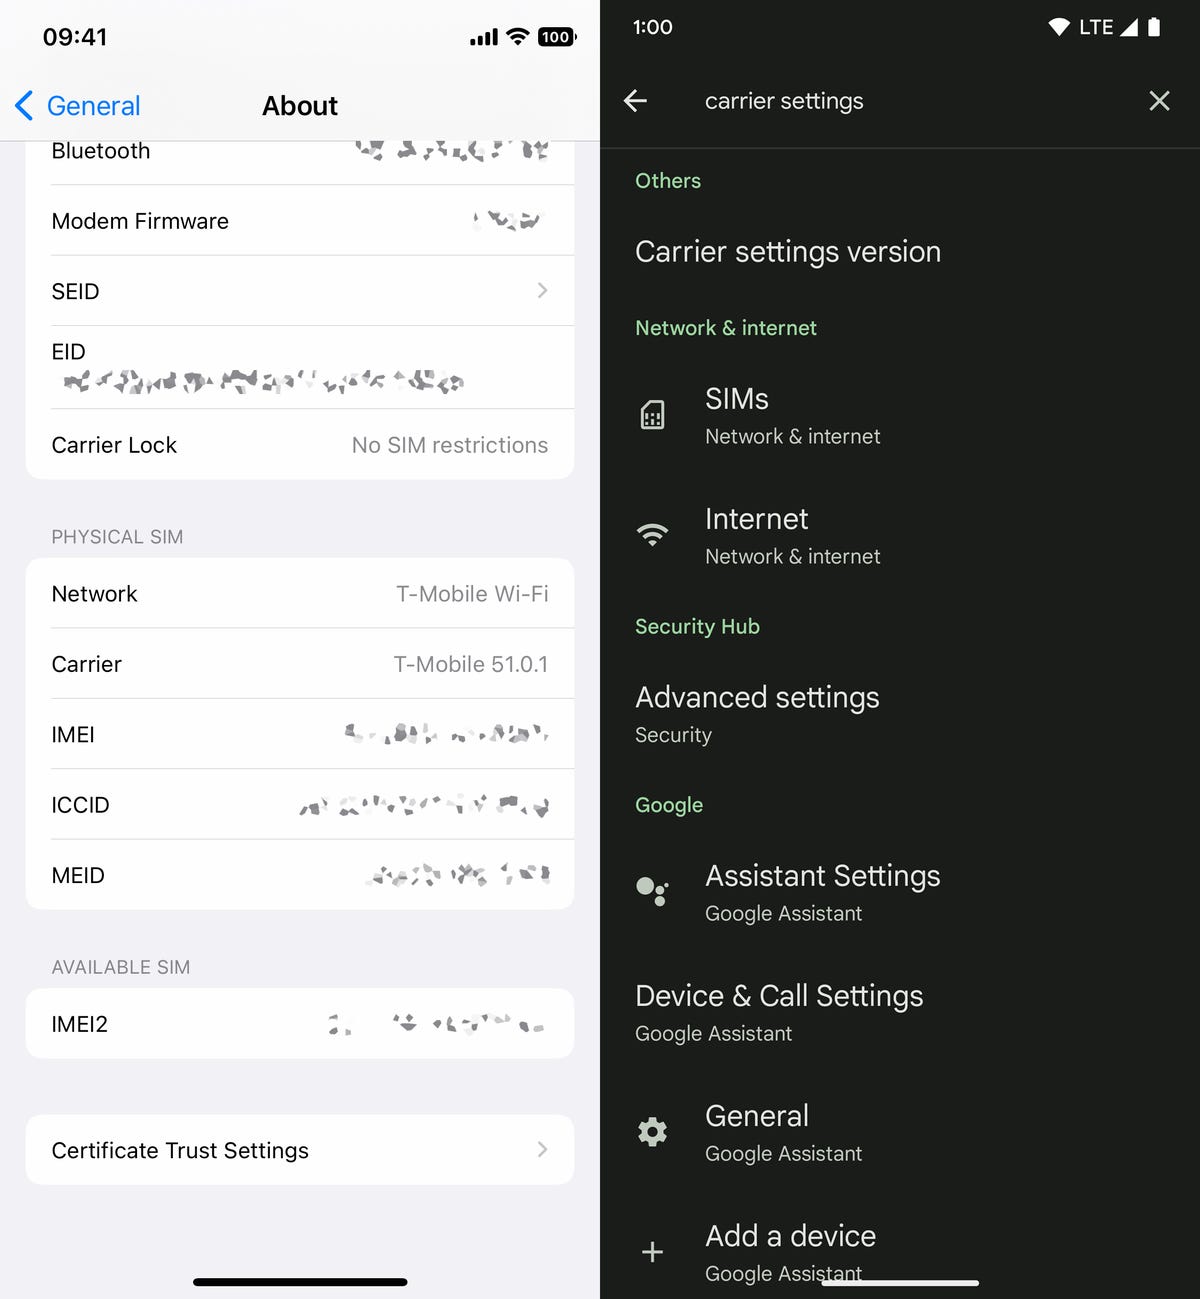
Check your carrier settings (and update your software)
Mobile carriers frequently send out carrier settings updates to help improve connectivity for calls, data and messages on their network. Although this feature is available on all iPhone models, it’s not universal on Android, so you might not find carrier settings if you don’t have a supported phone.
iPhone: Carrier updates should just appear, and you can update from the pop-up message that appears. To force your iPhone to check for a carrier settings update, go to Settings > General > About on your phone. If an update is available, you’ll be prompted to install it.
Android: As mentioned before, not all Android phones have carrier settings, so you’ll have to open the Settings app and type in “carrier settings” to find any possible updates. On supported Pixels, go to Settings > Network & internet > Internet, tap the gear next to your carrier name and then tap Carrier settings versions.
Reset your phone’s network settings
Sometimes all you need is a clean slate to fix an annoying connectivity issue. Refreshing your phone’s network settings is one way to do that. But be forewarned, resetting your network settings will also reset any saved Wi-Fi passwords, VPN connections and custom APN settings for those on carriers that require additional setup.
Android: In the Settings app, search for “reset” or more specifically “reset network settings” and tap on the setting. On the Pixel 6 Pro running Android 13, the setting is called Reset Wi-Fi, mobile & Bluetooth. After you reset your network settings, remember to reconnect your phone to your home and work Wi-Fi networks.
iPhone: Go to Settings > Transfer or Reset iPhone > Reset > Reset Network settings. The next page will warn you that resetting your network settings will reset your settings for Wi-Fi, mobile data and Bluetooth. Tap Reset Network Settings and your phone will restart.
Contact your phone carrier
Sometimes unexpected signal issues can be traced back to problems with your wireless carrier. A cell tower could be down, or the tower’s fiber optic cable could have been cut, causing an outage.
For consistent problems connecting to or staying connected to a cellular or data network, it’s possible your carrier’s coverage doesn’t extend well into your neighborhood. To help, some carriers will offer a network extender — a device that acts as a small wireless tower that relies on your internet connection, such as AT&T’s MicroCell or T-Mobile’s Personal CellSpot.
Other times, a newfound signal issue can be due to a defect with your phone or a SIM card that’s gone bad. Contacting your carrier to begin troubleshooting after you’ve tried these fixes is the next best step to resolving your spotty signal.
If all else fails, try a signal booster to improve cell reception
If after going through all of our troubleshooting steps, including talking to your carrier to go over your options, you’re still struggling to keep a good signal — try a booster. A signal booster receives the same cellular signal your carrier uses, then amplifies it just enough to provide coverage in a room or your entire house.
The big downside here is the cost. Wilson has three different boosters designed for home use, ranging in price from $349 for single room coverage to $999 to cover your entire home. To be clear, we haven’t specifically tested these models. Wilson offers a 30-day money back guarantee and a two-year warranty should you have any trouble with its products.
With your signal issues resolved, using your phone as a mobile hotspot for a backup connection is easy, but there are some things you need to know. If you’re looking for iPhone-specific tips and tricks, check out our guide to hidden features on iOS 16. And for Android fans, we have some hidden features for Android 12 as well.
There are no shortage of streaming services to choose from these days — and an increasing number of shows and films have been released exclusively on those platforms, making it harder for streaming holdouts to access major hits. For those that have yet to invest in a media streamer, now is a great time to take the plunge.
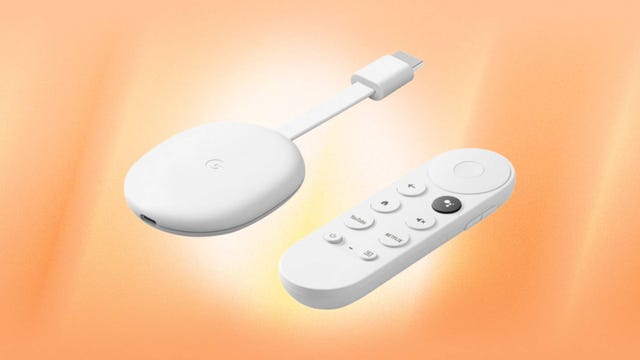
Right now Chromecast with Google TV HD — one of our picks for best streaming devices for 2023 — is back down to just $20, saving you 33% off its list price. We don’t know how long this offer will last, so we recommend getting your order in soon if you want to nab one for your place at this price.
If you don’t yet have a 4K TV or stream your content in HD anyway, this entry-level streamer is a good bargain. You don’t have to worry about line-of-sight and the remote has a built-in button for instant access to Google Assistant — so you can quickly search with your voice. Simply plug it into the HDMI port on your TV, and once you’re connected to your Wi-Fi, this baby can stream all your favorite shows, movies and more.
This Chromecast device shows everything from your streaming services in one place, so you won’t have to jump between apps to decide what to watch. Plus, you can manage your connected devices from your couch. And you can set parental controls if you have little ones at home. As long as you don’t need all the bells and whistles, this is a solid streaming option at a bargain price.
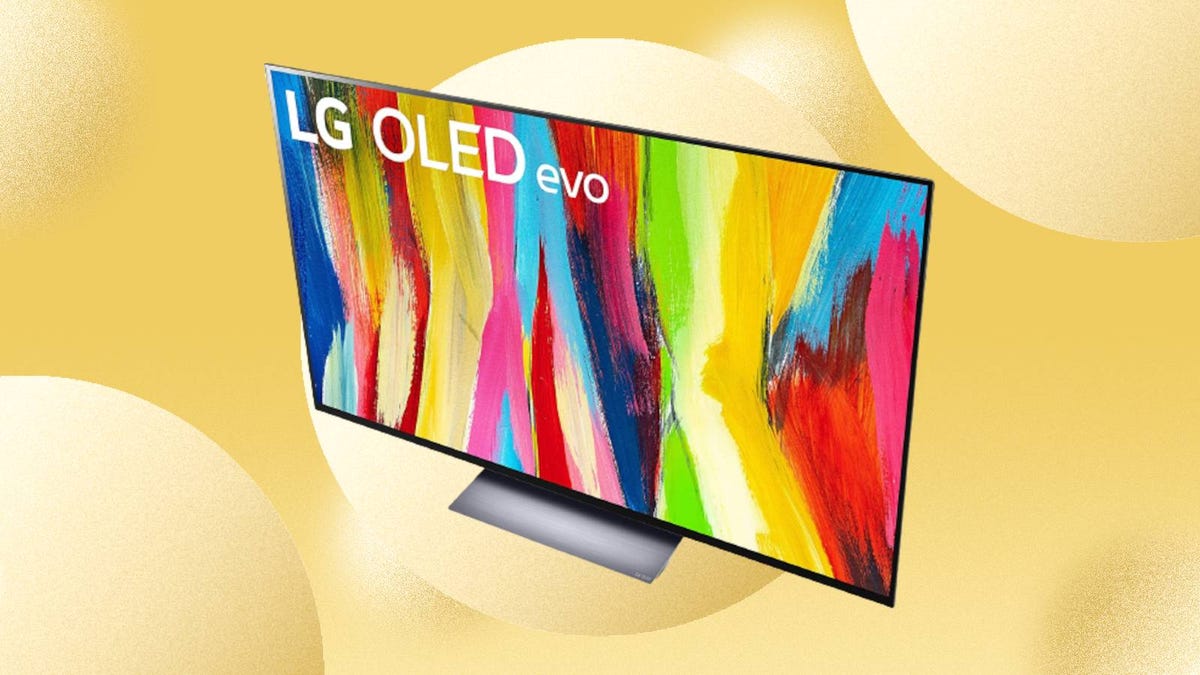
Even though the LG C3 has already been released, the LG C2 is still one of the best high-end TVsyou can get, according to CNET’s David Katzmaier. Featuring an OLED panel, the C2 offers brilliant color reproduction and visual fidelity compared to a traditional LED or QLED TVs. Even better, there’s a substantial deal at Woot that will discount the 65-inch model down to just $1,397, which is a significant 44% discount. An unlike a lot of Woot deals, this TV is offered brand new with a one-year manufacturer warranty.
The TV itself is optimized for a true cinematic experience at home, as its a9 Gen 5 AI processor, 8 million self-lit pixels, 4K resolution, Dolby Vision IQ, Dolby Atmos and a Filmmaker Mode combine to give it “better picture quality than any non-OLED TV,” according to Katzmaier. And if you’re a gamer, this TV has Nvidia G-Sync, FreeSync Premium and a variable refresh rate of 120Hz so you can have lag-free gaming sessions — along with four HDMI 2.1 ports for your consoles or other devices. Katzmaier says these are “best-in-class gaming features.”
There’s also built-in support for Amazon Alexa, Google Assistant, Apple AirPlay and more, which means you can use voice commands to control this set and connected devices. You can also get personalized recommendations for every member of your family by making separate accounts.
However, if you don’t need an OLED TV, there are plenty of other cheap TV deals worth checking out.
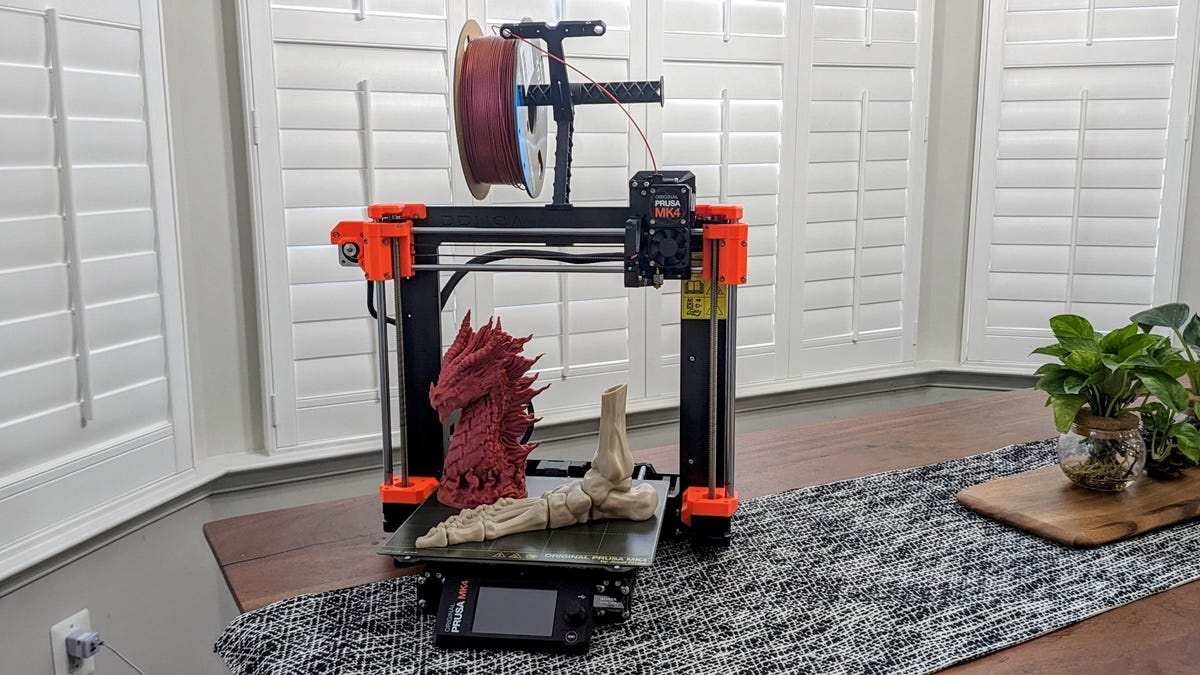
For the better part of a decade, the Prusa Mk3 has been the best 3D printer you could buy for less than $1,000, and the Mk4 — the natural evolution of the MK3 — would have retained that top slot if the landscape hadn’t changed so much in the last year. Now, the MK4 is still a good machine, but is it a great one compared to the competition?
If you have been into 3D printing at all in the past 10 years, you’re sure to recognize the shape and even the colors of the Prusa Mk4. Prusa Research has been making open-source printers for as long as I have been part of the 3D printing space, and the iconic black-and-orange bedslinger is synonymous with excellent print quality and a sense of community.
The Mk4 has much the same shape and design as the Mk3 with a lot of refinement. The frame of the MK4 is thicker aluminum than the Mk3, adding stability, something that is needed when you’re accelerating at the speeds these machines now run at. The Mk4 also features a whole new extruder system, called the Nextruder, that uses a dual-gear system to control the flow of materials. This is especially helpful with TPU — the very flexible filament used in phone cases — as it forces the bendy material to behave while running through the nozzle. The nozzle is also swappable using a very easy, hand-tight screw mechanism. This lets you change nozzle sizes between prints, so you can use smaller nozzles for details and a larger nozzle for structural parts.
Really, almost no part of the Mk3 still exists in a meaningful way on the MK4. It looks the same, but every part that can be upgraded has been. Although there’s an upgrade kit available to turn your Mk3S+ into a Mk4, you really shouldn’t bother; you’ll be spending as much and replacing almost all the parts anyway. Just buy the Mk4 and keep your Mk3 for other projects, or, even better, donate it to your local school.
Prusa MK4
Build Volume (mm)
210 x 250 x 220
Hot end
All metal
Extruder type
Direct Drive Nextruder
Nozzle diameter mm
0.4 (0.2, 0.6, 0.8 compatable)
Nozzle max temperature
290c
Build plate max temperature
120c
Official max speed
600mm/s
Supported material
PLA, PETG, ABS, ASA, Flex, HIPS, PVA
Auto bed leveling
Yes
Filament Run out sensor
Yes
Connectivity
USB memory card, WiFi and ethernet with Caveats
Time-lapse camera
No
Slicer
PrusaSlicer
With all of the upgrades, you should expect the Prusa Mk4 to be significantly better than the Mk3 in terms of quality, and that’s difficult. The Mk3 always operated at peak quality for me, and whenever I needed something to print as smoothly as I could, I used the Mk3. The Mk4 offers that same level of quality without improving on it very much. What it does is maintain that extremely high standard while printing at least twice as fast.
I’ve printed for nearly 100 hours so far, using PLA, ABS, TPU and PETG, and every print has completed extremely well, aside from some heavy stringing. Even my CNET test print had a lot of stringing across the peaks, something that doesn’t happen as much these days. Despite using PrusaSlicer — the slicer specifically designed for the Mk4 — I couldn’t get the stock profiles to print without stringing. Every profile needed the temperature turned down by 8 to 10 degrees Celcius.
The rest of the CNET test and every print I printed turned out very well. The details on this red dragon from Fotis Mint are exquisite, though even here, you can see some stringing. Both the overhang test and bridging test were almost perfect, even at the hardest levels, and the tolerance test — one of the hardest tests on the CNET model — showed all four parts to be easily removable. This is a rare thing, happening on only five of the dozens of 3D printers I have tested over the years.
I’m impressed with the quality of the prints on the MK4, and I’m happy to see that even when you print at high speeds, it maintains the quality that we expect from Prusa Research. It’s also worth a special shout-out to the work PrusSlicer does to make sure these models are excellent. The organic support structures that PrusaSlicer uses are nothing short of miraculous and have all but eliminated the scarring that used to occur when printing with supports.
While speed isn’t everything, it’s incredibly important in this modern age. When most of the best 3D printers are now fast 3D printers, Prusa has to keep up with the changing times. They almost didn’t, releasing the MK4 without any speed bump at all over the Mk3. Thankfully, Prusa managed to get an update out within a few weeks, helping to keep it in the top 10 printers to buy. Just two years ago, you could have argued that speed only made the quality worse, and that’s why manufacturers didn’t focus on it, but with the X1 Carbon from Bambu Lab proving you could have both speed and quality, every manufacturer needs to focus on both areas to be successful.
I would also love to see a more user-friendly setup for using a network on the MK4. While it has both Wi-Fi and an Ethernet port, both of them require another piece of software to run other than the slicer, making them complicated. Modern 3D printers should have easy access to remote printing, and possibly even an app. Prusa is well placed to be able to do that, as the company owns into only PrusaSlicer, one of the best slicers around, but printables.com, one of the best repositories for 3D models on the web. These resources should be brought together to make printing on the MK4 from anywhere a breeze. Unfortunately, it requires a mess of shenanigans to accomplish.
Prusa has kept its open-source roots with the Mk4, something that we can all appreciate. The greatest achievement of the Mk2/Mk3/Mk4 series has been the ability to expand, upgrade and tinker with them without fear, as long you follow the open-source rules. This has given birth to some amazing projects, college papers and life-saving techniques, and I think that open-source printers will always have a place in our community. Prusa is one of the last bastions of truly open-source hardware, and I think it can keep that root while still pushing 3D printing forward.
I like the Prusa Mk4, I do, but I think this needs to be the last of this kind of upgrade. Iterative design does great for a while — look at the iPhone as an example — and I don’t have a problem with incremental upgrades, but the MK5, or whatever they decide to call the next machine, needs to be something wholly different and monumentally improved if Prusa wants to stay at the top of the consumer 3D printing market. The Prusa XL, a multi-head tool-changing 3D printer for manufacturing, has a lot of excellent innovations that I would love to see passed down to its smaller sibling.
Lastly is the price. Eighteen months ago, $1,100 for the new Prusa printer would have felt like a perfectly reasonable sum of money to spend. Now, though, we have printers that are almost as good, if not on par with the Mk4, priced considerably lower. Thankfully, you can get the Mk4 in kit form for $800, which is much more reasonable, and I still think if you’re interested in how 3D printers work, then a kit to build is the best way to get into the hobby. If you’re interested only in the end result, though, there are better options out there.
The low-cost Google Pixel 7A, unveiled at Google’s I/O developer conference back in May, has already seen a number of price-cutting deals. And right now Amazon has slashed the price on an unlocked Pixel 7A to just $374 — that’s a $125 savings and a new all-time low for this device, making this an offer that’s hard to beat. We don’t know how long this deal will last, so we recommend making your purchase sooner rather than later.
Even though the Pixel 7A is designed to be an entry-level device, it’s still plenty powerful and has already taken the crown as the best phone under $500. It’s powered by Google’s Tensor G2 chip, the same chip found in the Pixel 7. It also features a 64-megapixel camera and a 6.1-inch, 90Hz display, plus nice extras such as face unlock and wireless charging — notable upgrades over previous Pixel A phones, which help close the gap between the affordable Pixel line and more premium flagships. Mixed usage battery life should be up to 24 hours, too.
Editors’ note, Nov. 1: The Pixel 7A raises the bar for lower-priced smartphones. With the same processor as the Pixel 7, an attractive design and a camera that inherits most of the same features as its pricier sibling, there’s a lot to love about the Pixel 7A. We originally reviewed the Pixel 7A at launch in May but are recognizing it with an Editors’ Choice Award now that we’ve tested other major smartphone releases in 2023. The original review, published on May 10, 2023, is as follows.
Good news, Pixel fans: the Pixel 7 just got $100 cheaper. Well, not really. But it might as well have. Even though Google still charges $599 for its flagship Pixel, it just launched the $499 ( 449, AU$749) Pixel 7A — which includes many of the same benefits at a lower price. (See our full Pixel 7A preorder guide for the current best deals, including a $50 gift card at Amazon, a $50 discount with service activation at Best Buy and a free case and headphones at the Google Store.)
Google announced the Pixel 7A at Google I/O, its annual developer conference where it typically introduces new products and updates to existing ones. Other than the Pixel 7A, which is available now, Google also debuted the Pixel Fold, a new Pixel Tablet and a slew of new AI-powered features for search and other services.
Clearly, Google took feedback on the Pixel 6A into account with its latest entry-level phone. The Pixel 7A gains a 90Hz screen for smoother graphics and scrolling, along with wireless charging and face unlock. Though those may not be must-haves for everyone, they’re common features that the Pixel 6A lacked.
Otherwise, the Pixel 7A has the same Tensor G2 processor as the Pixel 7, a new 64-megapixel main camera and a 6.1-inch screen just like its predecessor. Since the Pixel 7A runs on Google’s mobile processor, you can expect many of the same Pixel-specific features seen on other devices, like the phone app’s Hold for Me setting, Google’s Recorder app and the company’s Real Tone photo processing tech, which is meant to render skin tones more realistically.
Taken together, these changes help bridge the gap between the Pixel 7A and the Pixel 7. At the same time, it can also make the buying decision more complicated if you’re shopping for a new Pixel device.
Google Pixel 7A looks a lot like the Pixel 7
Like the Pixel 6A, the Pixel 7A borrows design cues from its pricier predecessor. That includes the camera bar, which has a matte metallic finish that almost matches the one on the Pixel 7. The Pixel 7A’s camera strip is slightly thinner than the Pixel 7’s, marking one of the few noticeable physical differences between the two devices. The Pixel 7A is also available in different color options compared with the Pixel 7. You can pick up Google’s cheaper phone in white, black, light blue or bright orange, while the Pixel 7 comes in white, light yellow or black.
The Pixel 7A is attractive for a phone in this price range, much like the Pixel 6A. Part of me wonders if Google’s approach to design with its A-series phones motivated Samsung to up its game, too. The Galaxy A54 5G, which costs $450 and is Samsung’s direct competitor to the Pixel 7A, has a glossy finish that makes it feel more premium than last year’s Galaxy A53 5G.
The Pixel 7A has a 6.1-inch screen; the same size as the Pixel 6A’s and slightly smaller than the 6.3-inch screen on the Pixel 7. If you prefer smaller phones, you may find the Pixel 7A easier to use with one hand compared with the Pixel 7. I personally find 6.1 inches to be the right screen size for a phone, since it provides enough space to comfortably read and watch videos without feeling overwhelming to operate.
The biggest change Google made to the Pixel 7A’s screen is its ability to switch the refresh rate between 60Hz and 90Hz depending on what’s on the screen. With this setting turned on, navigating the operating system and scrolling through apps felt smooth and slick. Truthfully, I didn’t always notice a huge difference compared with the Pixel 6A, which has a standard 60Hz screen.
But there were some cases when flipping through my Twitter feed felt noticeably speedy on the Pixel 7A. Regardless, it’s great to see Google incorporating more premium features into its less expensive devices, especially as higher refresh rates are starting to become the norm.
It also helps Google stay more competitive with Samsung, which often trickles high-end features down to its own budget Galaxy phones. The Galaxy A54 5G can increase its refresh rate up to 120Hz, for example, similar to Samsung’s high-end Galaxy S devices.
Google also says it bumped up the Pixel 7A’s brightness, which would address one of my biggest complaints about the Pixel 6A. Unfortunately, I didn’t notice much of a difference. Though I had no problem using the Pixel 7A at 50% brightness or lower indoors, I still had to crank it up to between 75% and 100% outdoors.
Both the Pixel 7A and Galaxy A54 5G are capable of reaching 1,000 nits of brightness at their maximum setting. However, even at lower settings, the Galaxy A54 5G’s screen looked noticeably brighter alongside the Pixel 7A’s.
The Pixel 7A has an impressive camera that produced results similar to the Pixel 7’s. The Pixel 7A has a 64-megapixel main camera and a 13-megapixel ultrawide camera, as shown below, both of which have a higher resolution than the Pixel 7’s main and ultrawide camera.
Pixel 7A camera vs. Pixel 7, Pixel 6A and Galaxy A54 5G
Google Pixel 7A
Google Pixel 7
Google Pixel 6A
Samsung Galaxy A54 5G
Rear camera
64MP main; 13MP ultrawide
50MP main; 12MP ultrawide
12.2MP main; 12MP ultrawide
50MP main; 12MP ultrawide; 5MP macro
Zoom
8x digital zoom
8x digital zoom
7x digital zoom
10x digital zoom
Front camera
13MP
10.8MP
8MP
32MP
Even though the Pixel 7A’s main camera has more megapixels than the step-up model, Google says the Pixel 7’s main camera is more light sensitive and, more importantly, has a larger sensor. But most of the time, I could barely tell the difference between photos taken on the Pixel 7A and the Pixel 7. There were some instances where the Pixel 7 captured more detail, but I had to zoom in on my monitor to tell. I even thought the Pixel 7A did a better job than the Pixel 7 at capturing a portrait of my husband near a window in a mix of indoor and outdoor lighting.
The Pixel 6A has a great camera that snaps crisp and colorful photos, especially for a phone under $400. However, I noticed the Pixel 7A sometimes exposed the subject better, as shown in the zoomed photo of a stop sign below and the photo of my husband. The Pixel 6A was also noticeably slower than the Pixel 7A when taking photos in Night Mode. (Since the Pixel 6A was slower, my cat moved midshot, as you can see below).
I generally prefer the Pixel 7A’s camera over the Galaxy A54’s, since Samsung’s phone made colors look over exposed when shooting outdoors. But the Galaxy A54 5G performed well in a few of my tests, especially when shooting low-light photos. It also has a closer digital zoom than the Pixel 7A, Pixel 7 and Pixel 6A, though its photo came out grainier.
The Pixel 7A’s 13-megapixel front camera can take a great selfie. During my testing against the Pixel 7, Pixel 6A and Galaxy A54, the 7A’s selfie was my favorite because it had the right mix of detail, color accuracy and softening to make my face look flattering.
The Pixel 7A can shoot 4K video at up to 60 frames per second, just like the Pixel 7, and footage shot on the two phones looked very similar.
You also get many of the same camera shooting modes, backend tech and editing tricks found on the Pixel 7, such as Magic Eraser, Photo Unblur and Real Tone, which you can read more about in my Pixel 7 review. However, the Pixel 7A doesn’t have the Pixel 7’s Action Pan, which focuses sharply on a moving subject and blurs the background. But it does have Long Exposure mode, unlike the Pixel 6A, which has neither of those features.
The bottom line: Even though the Pixel 7 technically has a more advanced camera according to Google, the Pixel 7A’s camera will be just fine for casual photographers. The Pixel 7A should be plenty adequate for the average phone user who primarily wants to take great photos of vacations, family gatherings and social occasions. Those who really want the best camera on a Pixel phone should opt for the Pixel 7 Pro, which has a dedicated telephoto lens and other extras.
Pixel 7A has solid battery life and gains wireless charging
The Pixel 7A can get through a full day on a single charge, though battery life will always vary depending on the phone’s settings and which apps you’re using. My experience varied a little depending on my circumstances.
On a lighter day of use spent mostly at home, I used the Pixel 7A for basic tasks like checking email, playing games for 10 minutes, exporting a few videos and taking photos for roughly 20 minutes. I had 41% of my battery left after about 16 hours.
But on a busier day, when I commuted into the office, streamed music for about an hour during my subway ride and made a video call, the battery was down to 20% after about 13 hours of use. I tried to keep the brightness at 50% on both days, but there were times on both occasions when I set it higher while outdoors. During my testing, I also left the high refresh rate setting turned on and the always-on display option switched off — both of those can impact battery performance.
I ran a 45-minute endurance test that consists of streaming video, making a video call, playing games, browsing social media, and general miscellaneous use to see how much those activities would drain the battery after a full charge. The Pixel 7A had 92% of its battery left after that test, which puts it on par with the Galaxy S23 (91%) but lower than the Pixel 7 (94%).
I also streamed a YouTube video to see how much doing so would drain the battery over the course of three hours. The Pixel 7A performed slightly better than the Pixel 7 on this test, though the results were close.
Pixel 7A vs. Pixel 7 battery test
Pixel 7A
Pixel 7
1 hour
96%
95%
2 hours
90%
88%
3 hours
85%
81%
One major aspect new to the Pixel 7A is wireless charging. Though the ability to power up your phone by resting it on a compatible charger has been standard on many phones for years, it’s typically missing from budget-minded devices. The Pixel 6A doesn’t have wireless charging, for example, and neither does the Galaxy A54 5G.
The Pixel 7A’s wireless charging speed is slower than the Pixel 7’s (7.5 watts versus 12W on the Pixel 7 with a compatible qi-certified charger), and it took 30 minutes to charge from 37% to 47%.
Pixel 7A performance and other features
The Pixel 7A runs on Google’s Tensor G2 processor, which feels smooth and fluid when performing daily tasks, whether that’s playing a mobile game, scrolling through apps or snapping photos.
Performance is rarely a concern on major smartphone releases from companies like Apple, Google, Samsung and OnePlus. But it’s worth mentioning for a phone at this price, because cheaper phones can sometimes come with performance hiccups, as was the case when I reviewed the Galaxy A53 5G last year.
Everyday performance felt speedy, but I did notice that the Pixel 7A exported video a bit more slowly than Google’s other Pixels and Samsung’s Galaxy A54 5G. On average, it took about 22.5 seconds for the Pixel 7A to export a 30-second 4K video to 1080p in Adobe Premiere Rush, which is slower than the Pixel 6A (20.2 seconds), Pixel 7 (18.3 seconds) and Galaxy A54 5G (15.6 seconds).
Still, that Tensor G2 chip is more about the Pixel-specific features you get, rather than speed alone. Those include Google’s Recorder app, Live Translate and Photo Unblur. Google’s Pixel phones also have some handy phone-calling features, like Hold for Me, which allows Google to wait on the line in your stead. Tricks like these help set Pixel phones apart from other Android devices, though Samsung is trying to catch up by bringing more Galaxy-specific tricks to its own devices.
The Pixel 7A launches with Android 13 and will get three years of Android version updates and five years of security updates. That matches the Pixel 7 and 7 Pro, but it’s still behind Samsung, which pledges four generations of Android OS updates and five years of security updates.
Pixel 7A, Pixel 7 or Pixel 6A: Which should you choose?
Given all the similarities between the Pixel 7 and 7A, deciding between the two can be tricky. Google is keeping last year’s Pixel 6A in the lineup for a newly discounted price of $349, making it a tempting choice for those on a budget.
My advice? After spending a few days with the Pixel 7A, I can’t come up with a compelling reason to choose the Pixel 7 instead. The Pixel 7A has the same processor, a great main camera and the same amount of memory and storage. By adding wireless charging and a smoother screen to the Pixel 7A, Google fixed the two major features the Pixel 6A was missing.
The Pixel 6A still has plenty to offer at its new price, including a capable camera and Google’s Pixel-specific software features. If you prefer to save money and don’t mind sacrificing wireless charging, face unlock, and extra photo tools like long exposure mode, the Photo Unblur editing tool and faster night mode capture, then the Pixel 6A is still a worthwhile choice.
However, it’s worth considering Google’s software update cycle. Since the Pixel 7A launched later than the Pixel 7 and Pixel 6A, it’ll get Android version updates for a longer period of time. That could be a good reason to choose the Pixel 7A over the 6A.
Pixel 7A overall thoughts
The Pixel 7A feels like the best value for Pixel fans right now. While you miss out on certain Pixel 7 extras, like battery share, the camera’s Action Pan mode, a larger screen and slightly faster charging, none of those omissions feels like a deal-breaker. In my experience, camera performance is comparable between the two — certainly enough to satisfy the average person.
With the Pixel 7A, it’s clear Google is leaning into competitive pricing as a major part of its effort to bring more Android users into the world of Pixel. My only concern is that Google may be blurring the line a bit too much between its A-series Pixel and regular Pixel. Don’t get me wrong, I’m glad Google brought most of the features I asked for to the Pixel 7A. It just means I’ll be expecting more from the Pixel 8.
How we test phones
Every phone tested by CNET’s reviews team was actually used in the real world. We test a phone’s features, play games and take photos. We examine the display to see if it’s bright, sharp and vibrant. We analyze the design and build to see how it is to hold and whether it has an IP-rating for water resistance. We push the processor’s performance to the extremes using both standardized benchmark tools like GeekBench and 3DMark, along with our own anecdotal observations navigating the interface, recording high-resolution videos and playing graphically intense games at high refresh rates.
All the cameras are tested in a variety of conditions from bright sunlight to dark indoor scenes. We try out special features like night mode and portrait mode and compare our findings against similarly priced competing phones. We also check out the battery life by using it daily as well as running a series of battery drain tests.
We take into account additional features like support for 5G, satellite connectivity, fingerprint and face sensors, stylus support, fast charging speeds, foldable displays among others that can be useful. And we of course balance all of this against the price to give you the verdict on whether that phone, whatever price it is, actually represents good value.
Google Pixel 7A vs. Pixel 7, Pixel 6A
Google Pixel 7A
Google Pixel 7
Google Pixel 6A
Display size, tech, resolution, refresh rate
6.1-inch FHD OLED; up to 90Hz refresh rate
6.3-inch OLED; FHD+; up to 90Hz refresh rate
6.1-inch OLED; FHD+; 60Hz refresh rate
Dimensions (inches)
2.9x6x0.35 inches
6.1×2.9×0.34 inches
6×2.8×0.35 inches
Dimensions (millimeters)
72.9×152.4x9mm
155.6×73.2×8.7mm
152.2×7.18×8.9mm
Weight (ounces, grams)
6.8 ounces; 193 grams
6.9 ounces; 197 grams
6.3 ounces; 178 grams
Mobile software (at launch)
Android 13
Android 13
Android 12
Camera
64MP main; 13MP ultrawide
50MP main; 12MP ultrawide
12.2MP wide; 12MP ultrawide
Front-facing camera
13MP
10.8MP
8MP
Video capture
4K at 60fps
4K at 60fps
4K at 60fps
Processor
Google Tensor G2
Google Tensor G2
Google Tensor
RAM/storage
128GB + 8GB
128GB + 8GB
128GB + 6GB
Expandable storage
None
None
None
Battery
4,385 mAh; wireless charging
4,355 mAh; wireless charging
4,410 mAh
Fingerprint sensor
Yes (under screen)
Yes (under screen)
Yes (under screen)
Face unlock
Yes
Yes
No
Connector
USB-C
USB-C
USB-C
Headphone jack
None
None
None
Special features
Magic Eraser, Real Tone, Photo Unblur, Face Unblur, Long Exposure Mode, Hold for Me, Wait Times, Direct My Call, Live Translate
Magic Eraser, Photo Unblur, Real Tone, Face Unblur, Long Exposure Mode, Action Pan, Hold for Me, Wait Times, Direct My Call, Live Translate
Magic Eraser,Real Tone, Face Unblur,Hold for Me, Wait Times, Direct My Call, Live Translate
Editors’ note, Nov. 1, 2023: It’s 2023. Apple hasn’t released any new iPads all year. Apple is likely to make refreshes across the lineup next year, which is why I recommend waiting on buying any iPad at all. While Apple’s 10th-gen basic iPad has USB-C, a better processor, a larger screen, better-positioned front camera, newer keyboard case options, and it works with the newer low-cost Pencil introduced recently, it’s also more expensive. Until we know what 2024’s models might be, I lean towards recommending the least-expensive iPad (which is the 9th-gen) for kids and anyone who wants a basic tablet. If you want to spend more, consider the 10th-gen model, or an M1-equipped iPad Air if it’s on sale.
My original review from 2021 is below.
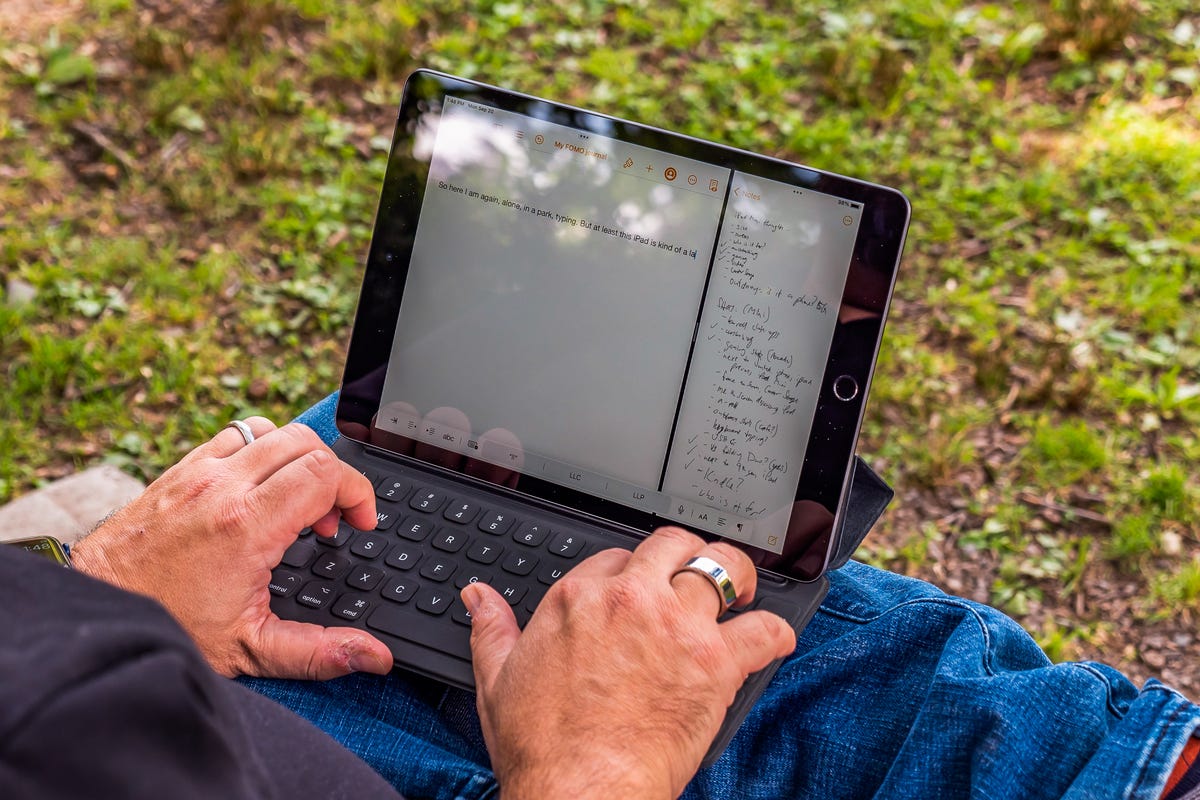
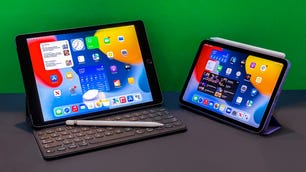
The 9th-gen iPad isn’t new. It isn’t fancy. It has a big old circular home button. It still has big bezels around the screen. There’s no USB-C. No Magic Keyboard or newer Pencil support. But I’m OK with that, for its price, and you or your kids might be, too.
I wrote this review on the new ninth-gen iPad. I’m able to do this because the iPad allows connections to keyboard cases, like the Apple smart keyboard cover I’m using to write this. It’s not as good as the Magic Keyboard for iPad Pro and Air, but it’s good enough (and costs less). And good enough is exactly what the ninth-gen iPad is: In fact, compared with all other iPads right now, it still covers all the bases just fine. Let me explain.
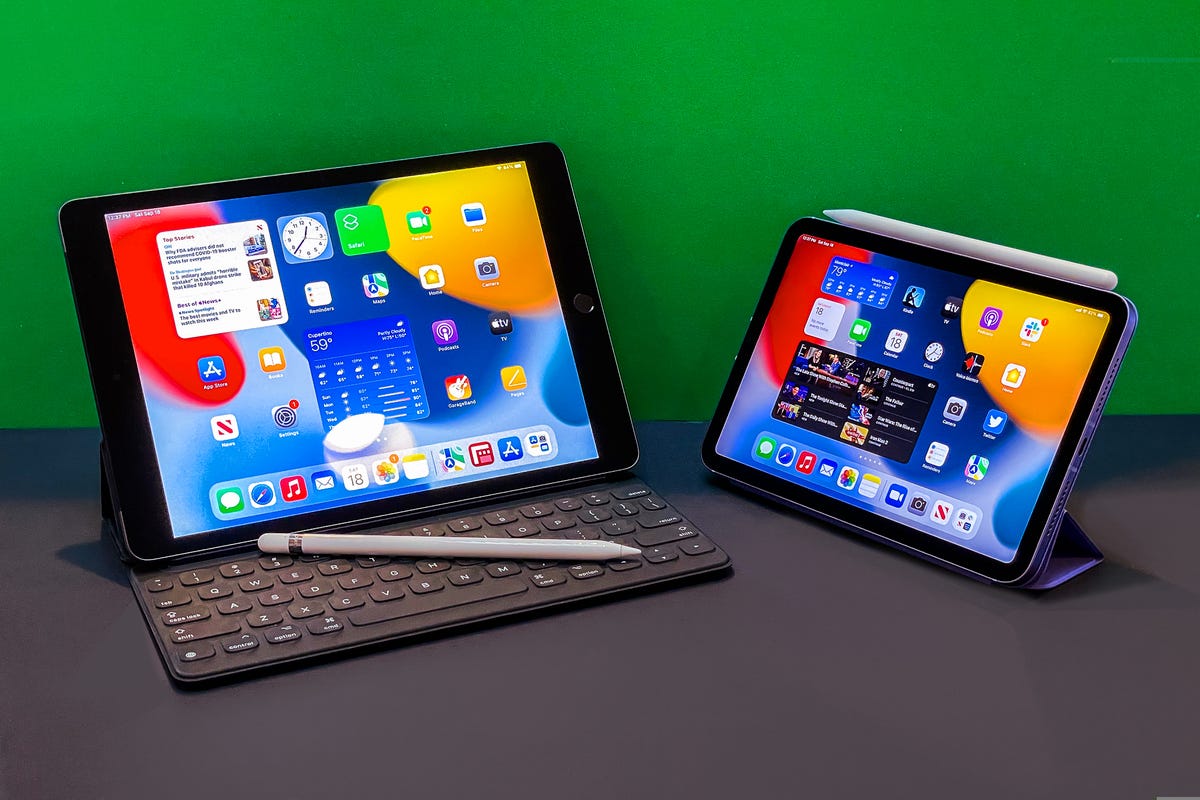
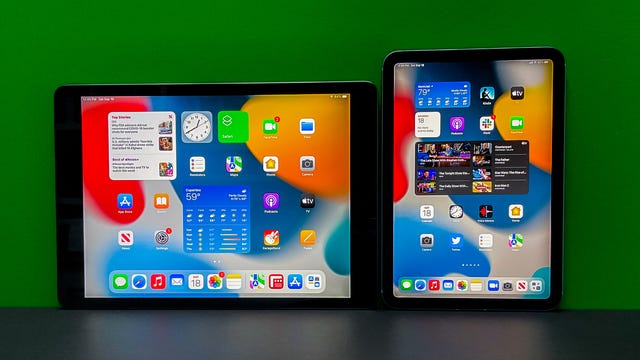
iPads are secondary devices for most people. Maybe even tertiary devices. After phones and laptops, of course. But they’re also pretty essential and useful for a lot of people. Families, kids. That’s why budget factors heavily into iPad purchases. In that regard, the basic iPad (still called “iPad” on the box) should be your default pick. Right now, Apple has two basic iPads: the 10th-gen model, and this one. The 10th-gen is more future-proof, but the 9th-gen costs less. It’s inexpensive but still versatile: This iPad works with the Apple Pencil for sketching (although it’s the first-gen Pencil) and with keyboard cases (although not the Magic Keyboard), and has a big enough screen to feel laptoplike (unlike the Mini, which is lovely but expensive and for me, too small). And there’s more storage, which helps.
The lowest-priced iPad has always been a trickle-down device, gradually getting upgrades other iPads got years ago. The same is true here: a new A13 processor, a zooming-in Center Stage camera that the iPad Pro got this spring and True Tone on the display for ambient color temperature adjustments. This iPad may eventually disappear from Apple’s lineup, to be replaced by the 10th gen iPad released in 2022, but for now it’s the safest low-cost iPad purchase if you don’t want to spend a lot on something else. You could spend more on the 10th-gen model, too, but that model ends up going up above $500 for the accessories and storage you’d likely need.
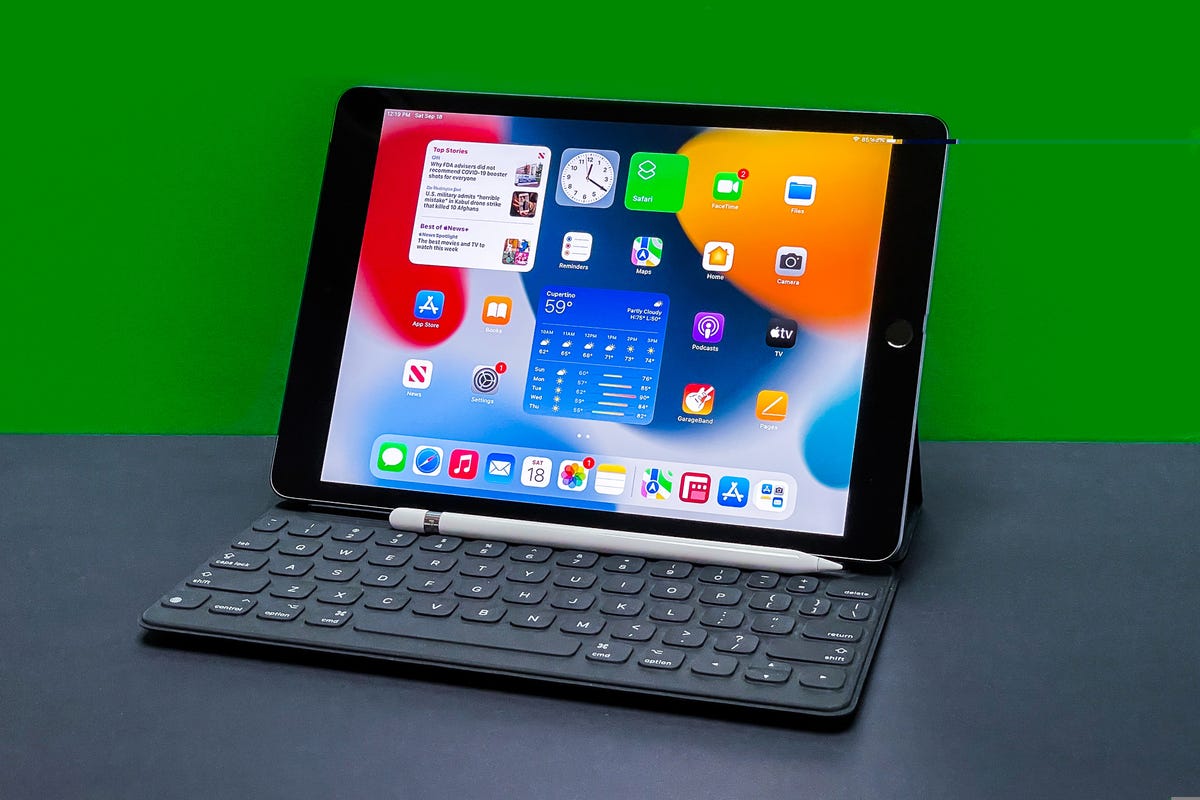
Design: The same
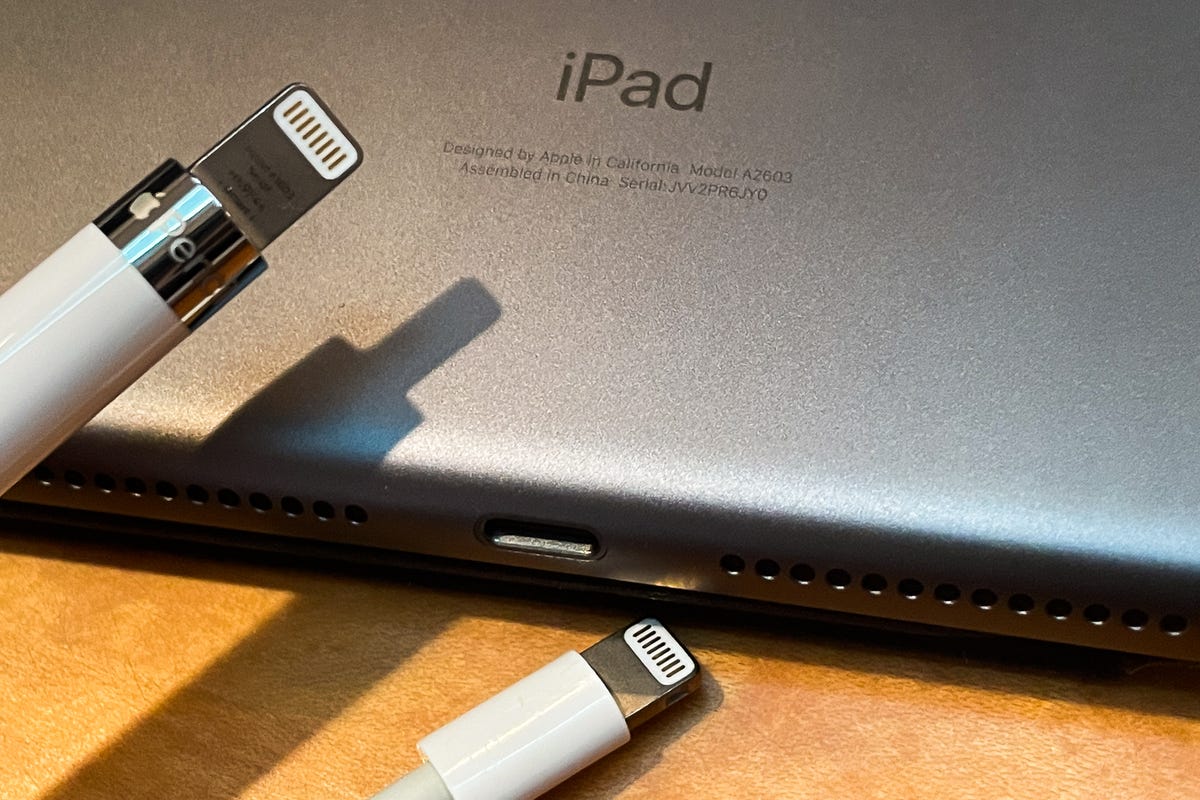
It looks exactly the same as last year. It has that old circle Touch ID button. It still uses Lightning, not USB-C. And, you know what? It’s fine. It works with last year’s iPad cases. And it’s the last iPad on Earth that has a real headphone jack. And its starting price is the same. But Apple’s bumped the storage up, finally, with 64GB on the $329 ( 319, AU$499) version — you could survive with that, just about — and 256GB on the $479 version, which I’d recommend without a doubt if you’re planning to download any movies for travel, or any content-making apps.
If you didn’t have any big emotions about last year’s iPad, this year’s basic model won’t wow. It would be nice to have less bezel, switch away from Lightning and also, to have stereo speakers. (Sound only comes out of one side of the iPad in landscape mode, like always, but the fancier iPads fix that. Answer: Deal with it or use headphones.)
Pencil support is fine, but that older Pencil has nowhere to go unless you buy a case that has a loop to hold it (those do exist, like Logitech’s keyboard folios). And the front-facing camera is still stuck on the side in landscape mode, which is how you’ll have it set up for laptop-style use.
Center Stage: Zooming-in FaceTime and Zoom calls
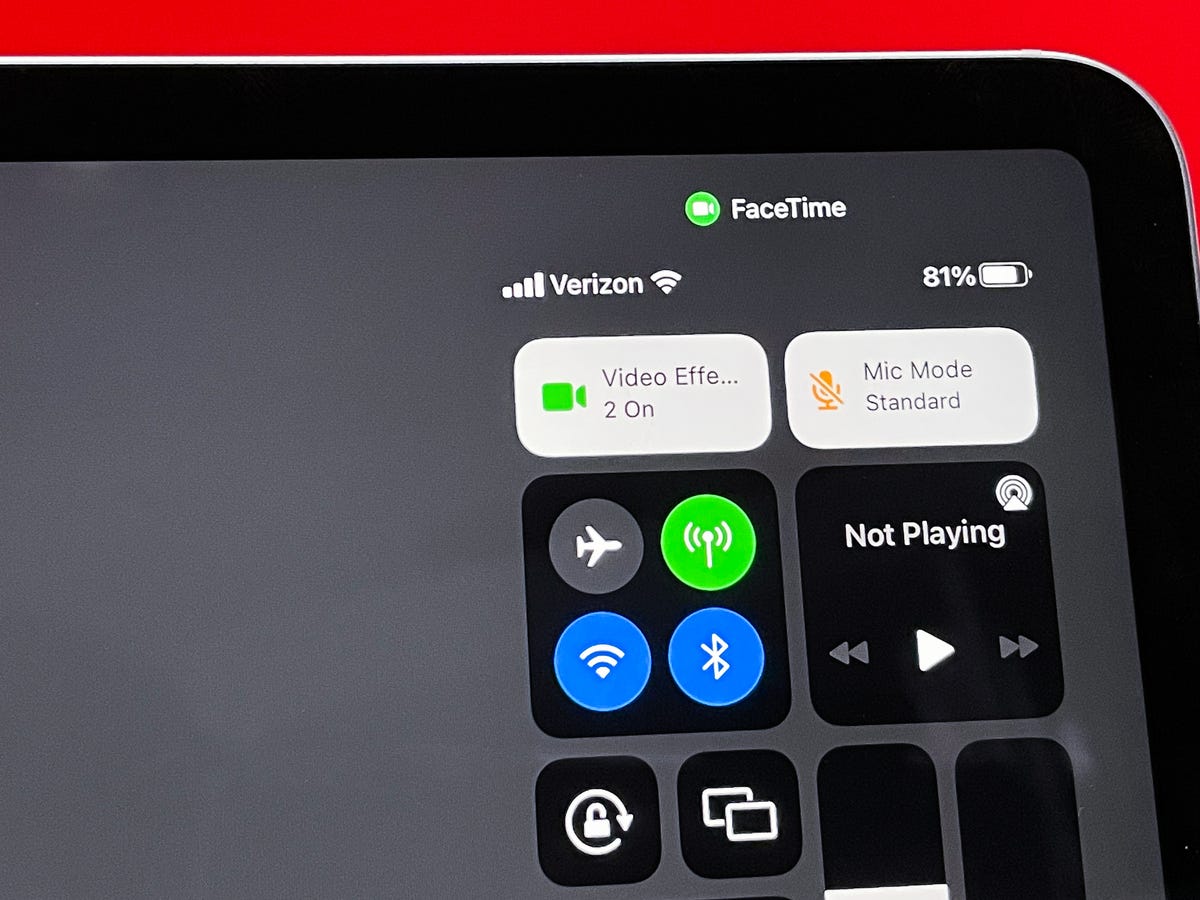
You’ll notice that when you launch video chat on the new iPad, it’ll start zooming in on your face. That’s Center Stage, a feature that leans on the wider-angle iPad front-facing camera to zoom in during calls.
In general, Center Stage is a useful tweak to the video chat experience, especially from a distance with families. Like a Facebook Portal and a few other devices, it’ll follow you around. The autotracking works smoothly, almost like a panning camera. But on a few FaceTime calls, using a prerelease iPad, I found stutters. (Maybe a software update will fix that). It works with Zoom, and whatever video chat apps want to support it (it’s openly available for any video chat app to incorporate).
Center Stage can be turned off by swiping down from the Control Center and toggling it with the Video Effects button, and some video recording apps like Filmic Pro use it. But Apple’s built-in Camera app doesn’t take advantage of it, oddly.
One note: On my review iPad I found a few times that Center Stage made FaceTime calls seem to stutter. It might be something Apple needs to address in an iPadOS update.
Performance: More than good enough
The added A13 processor upgrade makes it fast enough for most needs and then some. On benchmark tests, it’s about as fast an iPhone 11 (no surprise, since it has the same processor). It’s fine for multitasking, gaming and video and doesn’t seem to lag.
And its front camera is notably better: crisper for video calls, with a digital-zoom face-following Center Stage mode that works with Zoom, FaceTime and other apps, making it a better family video-chat screen from a distance. They’re not amazing cameras, but they’re suitable, and better than on most laptops. The front camera went from a 1.2 megapixels to a 122-degree wide-angle 12 megapixels, which makes a real difference, and also lets that camera zoom in using Center Stage without losing effective resolution.
Battery life feels largely the same in daily use so far: Apple keeps leaning on the “10 hours of battery” promise as always, and I find that iPads generally last a whole day of normal use.
Boring, but recommended
Seriously: The 10th-gen iPad has a lot of my favorite features, but it’s more expensive and doesn’t have the same case and Pencil situation as fancier iPads do. The iPad Mini costs more, lacks the same keyboard support and is probably too small. The iPad Air has a faster M1 processor, and I personally love its design, but it’s a more expensive proposition. And the iPad Pro models (expected to get major upgrades in 2024) are in a totally different price tier.
For now, I still think the basic unexciting iPad wins out. Especially if the price hits $300 for holiday season sales. But other sales could change that metric fast. There’s still no perfect iPad right now, and in the meantime I’d opt for the cheapest option until things maybe settle down a bit more in the future.