“I’m going to destroy Android, because it’s a stolen product,” Steve Jobs says in author Walter Isaacson’s 2011 biography of the late Apple co-founder.
Jobs’ fury around Google and its smartphone software is well documented, and the many lawsuits involving Apple and various Android partners showed that Jobs was serious about his allegations of theft. But the reality is that both Apple and Google have taken inspiration from each other for years and that neither company would be where it is today without the work of the other.
So, because this year saw Android mark its 15th anniversary (since the launch of the first Android-based phone, the T-Mobile G1), let’s take a look back at the journey the companies have taken to becoming the most dominant forces in the tech world — and how their competition pushed them to innovate.
Smartphones have arguably changed the world more than any other invention in human history, from radically altering how we interact with one another to creating a whole new category of companies that deal in various mobile technologies. And though Jobs may have been outspokenly vitriolic about Android in the early days, it’s clear that ideas and inspiration have echoed back and forth between Apple and Google in the years since.
During the last 15 years of competition between the two companies, it’s often felt like we’ve been watching siblings bickering at playtime, falling out over who had which toy first or crying to their parents when the other one took something that wasn’t theirs. Most siblings will argue to some extent throughout their lives, but history is also rife with pairings that, through spirited competition, pushed each sibling to succeed.
“When we play against each other, we always raise each other’s game,” global tennis star Venus Williams once said, referring to her competition with sister Serena, who, like Venus, was a dominant Grand Slam player during her time in the sport.
The Williams sisters grew up with competition in their blood, challenging each other on the court and learning to read each other’s movements so precisely that they could respond with the exact play needed to counter — and win. Competing against the best helped Venus and Serena reach the top of their game, learning how to beat not just each other but also other rivals in the sport, in much the same way Apple and Google have done.
The two companies’ volleying back and forth pushed them ahead in the game, and allowed them to fight off other challengers, like the once-dominant BlackBerry, as well as Nokia and its short-lived Symbian platform. Even tech giant Microsoft and its Windows Phone failed to thrive in the face of the heated competition from Apple and Google.
But though the relationship today between the iPhone maker and the Android purveyor hardly matches the Williams’ friendly, familial rivalry, that wasn’t always the case. Let’s take a look back.
Beginnings
Android began as its own company (Android Inc.) back in 2003, and it wasn’t acquired by Google until 2005. Meanwhile, Apple already had success with mobile products in the form of the iPod, the iPhone began development in secret in 2004 and Jobs was reportedly approached to become Google CEO.
Jobs didn’t take the role, but Google found a CEO in Eric Schmidt, who in 2006 became part of Apple’s board of directors. “There was so much overlap that it was almost as if Apple and Google were a single company,” journalist Steven Levy wrote in his 2011 book In the Plex: How Google Thinks, Works, and Shapes Our Lives. Things didn’t stay as cozy, however.
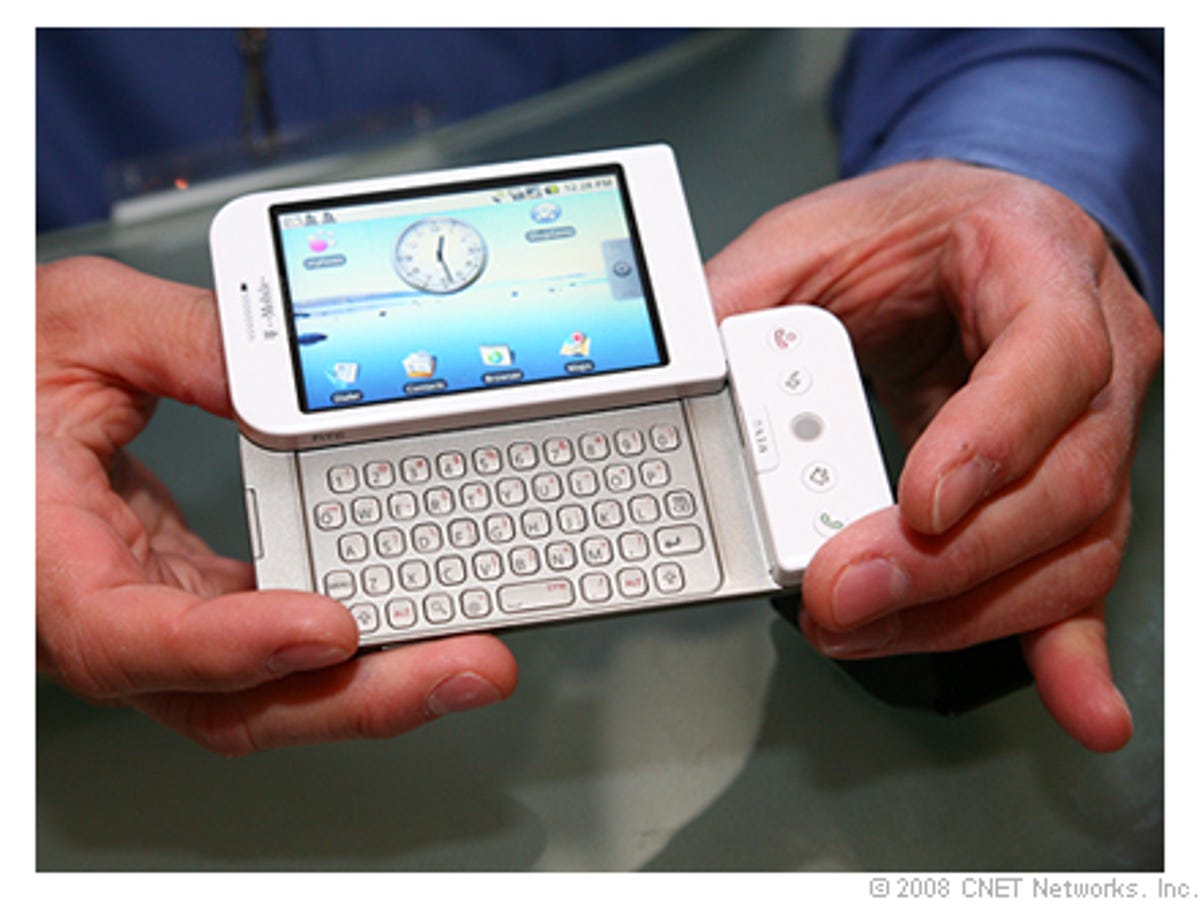
In January 2007 Apple unveiled the first iPhone, and in November 2007 Google showed off two prototypes. One, a Blackberry-esque phone that made use of hardware buttons and scroll wheels, had been in the prototype phase for some time. The more recent prototype was dominated by a large touchscreen and appeared to be much more like the iPhone.
That didn’t go down well with Jobs, who threatened the destruction of Android using “every penny of Apple’s $40 billion in the bank.” The first Android phone, the T-Mobile G1, combined elements of both those prototypes, with a touchscreen that slid out to reveal a physical keyboard. Schmidt left Apple’s board of directors in 2009 due to potential conflicts of interest, and so began a series of lawsuits involving Apple and various Google partners over alleged infringement of phone-related patents.
The most notable of the Google partners was Samsung, which Apple accused of infringing a number of patents, including patents related to basic functions like tap to zoom and slide to unlock. These legal battles raged for years, with Apple claiming that “it is a fact that Samsung blatantly copied our design” and Samsung pushing back. The long dispute finally came to an end in 2018, when both sides agreed to settle out of court.
Despite the competing claims made during those long courtroom struggles, if we look at the development not just of the software but of the phones that run it, it seems clear both sides continued to liberally borrow ideas from each other.
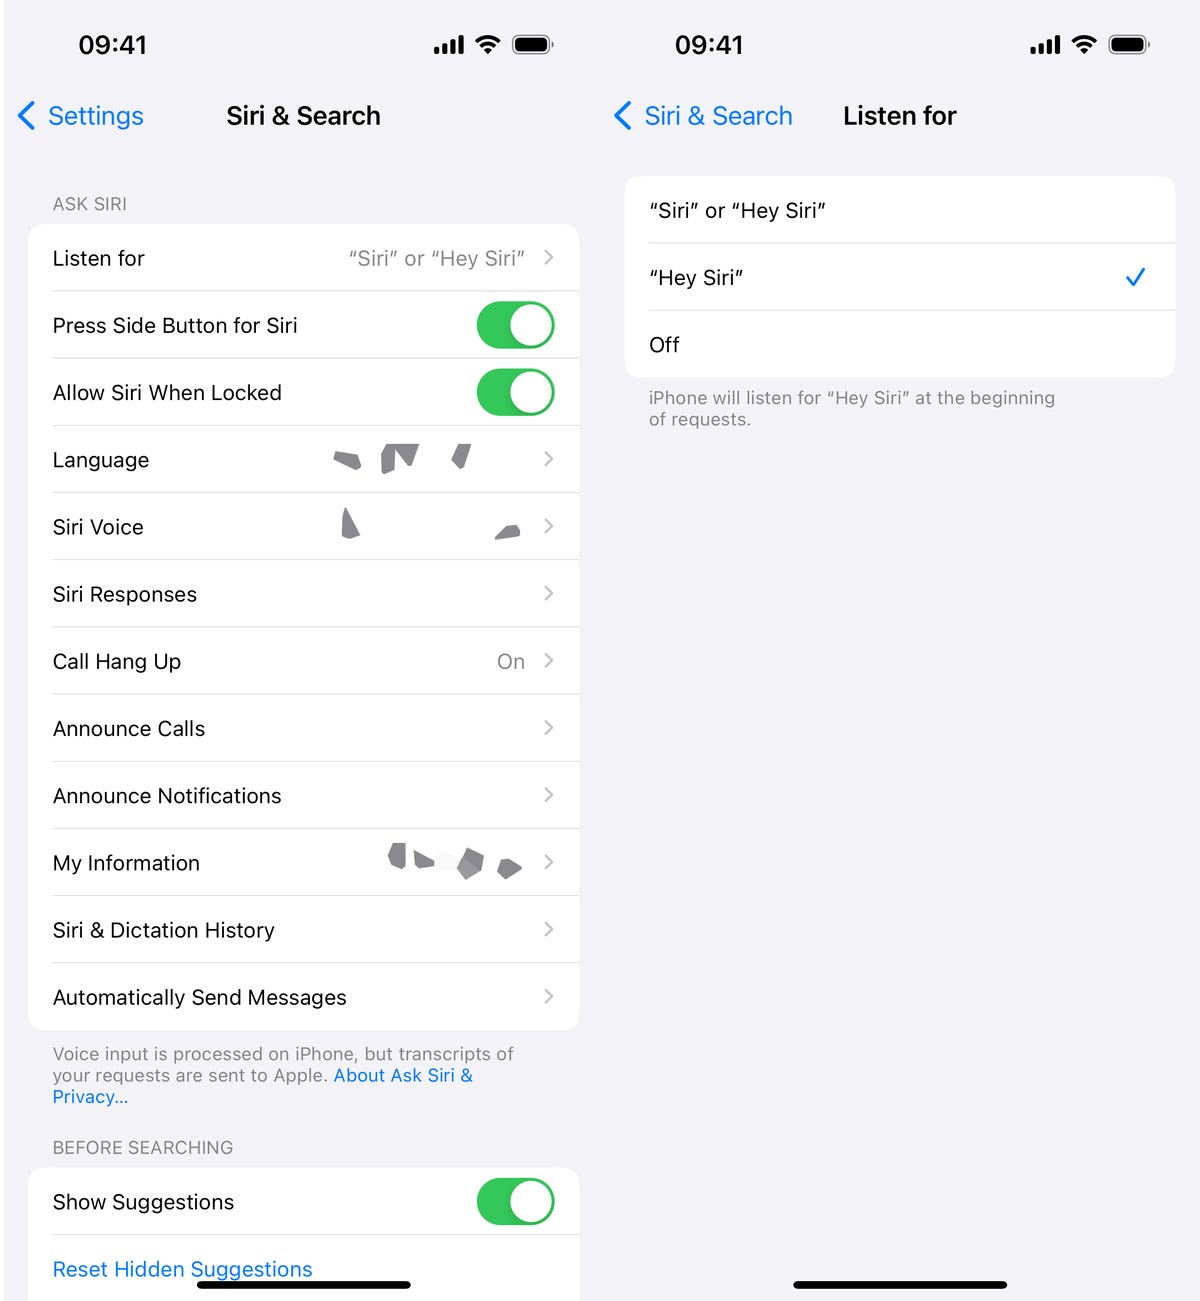
Features like picture-in-picture, live voicemail, lock screen customization and live translation were all found on the Android operating system before eventually making their way to iOS. And though the use of widgets to customize your home screen was long held as a differentiator for Android, that feature too eventually found its way to iOS.
On the other hand, Android’s Nearby Share feature is remarkably similar to Apple’s AirDrop, and Android phones didn’t get features like “do not disturb” or the ability to take screenshots until some time after the iPhone had them.
Apple removed the 3.5mm headphone jack from the iPhone in September 2016, and I distinctly remember that at Google’s launch event for the Pixel the following month, chuckles went round the room when the exec on stage proclaimed, “Yes, it has a headphone jack.” Still, Google itself went on to ditch the headphone jack, with the Pixel 2.
Sometimes it’s difficult, if not impossible, to say whether these companies are copying each other’s ideas or simply coming up with the same conclusions after paying attention to consumer trends, rumors in the press and the general evolution of supporting technologies.
Rumors that Apple would remove the physical home button on the iPhone X were circling long before the phone was officially unveiled in September 2017. Are they the same rumors Samsung responded to when it “beat Apple to the punch” and removed the home button from its Galaxy S8 earlier that same year? Or did both sides simply arrive at such a big design decision independently?
It’s impossible to pick a side in this argument — and somewhat reductive to even try. And regardless, you wind up with the same thing: Phones and software from different manufacturers that seem to evolve in unison.
Today
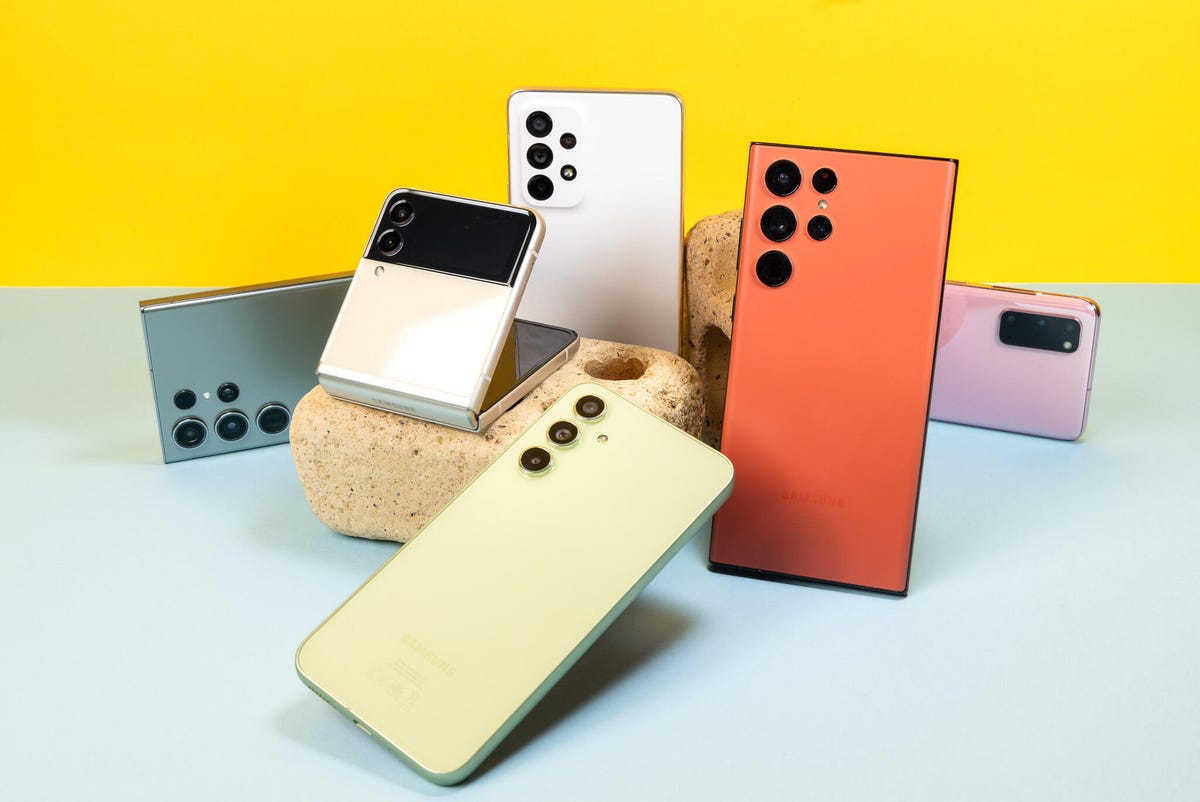
In 2023, Android is by far the dominant smartphone platform, with 70.8% market share globally against Apple’s 28.4% (according to information from Statista). But Google’s focus has always been on getting the Android operating system onto as many devices as possible, from phones costing less than $50 to those costing over $1,500. Apple, meanwhile, offers iOS only on its own devices, and those devices come at a hefty premium, so it’s fair to expect that iOS won’t be as widespread.
Google’s business model is primarily one of a service provider, though, and not a hardware manufacturer. It makes its money chiefly from selling advertisements across all its platforms, and so it typically benefits from a mass market approach. Android itself is free for companies to use — hence the large number of installs. But to use Google services (Gmail, YouTube, Chrome and so on, along with access to the Google Play Store) companies must pay license fees to Google. Still, the free use of Android is why you’ll find the operating system on phones from Samsung, Motorola, OnePlus, Oppo, Nothing and a huge variety of other brands — and yes, on Google’s own Pixel phones.
Apple, however, is a closed shop. Only iPhones can run iOS, and Apple has every intention of keeping it that way. It has full control over how that software works on its phones (and charges developers accordingly for apps sold in its own App Store) and how it can be best optimized for the hardware. That’s why Apple phones typically perform better than many high-end Android phones, despite the hardware often being less high-spec on paper. Android by its nature has to take more of a “one size fits all” approach, where each new version has to run well on a huge variety of devices, with different screen sizes and under-the-hood components.
Android struggled with the arrival of tablets, as software designed for 4-inch phones suddenly had to stretch to fit screens much larger in size. Android 3.0 Honeycomb was primarily designed for tablets, but various issues meant it didn’t hang around for long, and some of its features were simply absorbed into future versions. Apple takes a different approach: Though at first it used iOS for both devices, now it keeps iOS solely for its phones, optimizing for the smaller screen sizes, with the newer iPadOS as the software for its tablets.
Yet it’s still clear to see the ways the two operating systems have converged over the years. Though Android was always the more customizable of the two, Apple eventually introduced home-screen widgets, customizable lock screens and even the ability to create icon themes to transform the look of your device.
Meanwhile, Google worked hard to limit the problems caused by fragmentation and has arguably taken more of an “Apple” approach in its own line of devices. Like Apple’s iPhones, the phones in the more recent Pixel range — including the recent Pixel 8 Pro — were designed to show off “the best of Google,” with processors produced in house (as Apple does with the chips for its iPhones) and software optimized for the Pixel phone it’ll run on.
Though Android may be ahead in terms of numbers of users, Google has clearly seen that Apple is leading the way in terms of a more premium, refined hardware experience, and the Pixel series is Google’s answer. Having reviewed the Pixel 8 Pro, Pixel 7 Pro and Pixel 6 Pro myself, I can say with certainty that they’re the most Apple-like experience you can get from an Android phone.
The future
“We are at an interesting crossroads for Android,” says Ben Woods, industry analyst at CCS Insight. “Although its success in volume terms is undisputed, it is increasingly losing share to Apple in the premium smartphone space.” Google’s Pixel phones are some of the best Android phones around, but sales of the devices are a fraction of what Apple sees with the iPhone.
It’s a different story when you look at Android partners, chiefly Samsung, which is jostling with Apple for the position of No. 1 phone manufacturer in the world — a title that seems to frequently slip from one of the companies to the other. But Samsung has a much wider catalog of products, with unit sales being bolstered by a larger number of phones at lower price points. In the premium segment, Apple still rules, and that’s showing no sign of slowing down.
But Android is increasingly betting on longer-term success from its innovation with foldable phones. Samsung is now multiple generations into its Galaxy Z Flip and Z Fold devices, with Google’s own Pixel Fold joining the party earlier this year, along with foldables from the likes of Oppo, Motorola and OnePlus. Apple has yet to launch a foldable device, and it remains to be seen whether that’s simply because its take on the genre isn’t ready, or because it believes foldables are a fad that’ll pass (like 3D displays or curving designs).
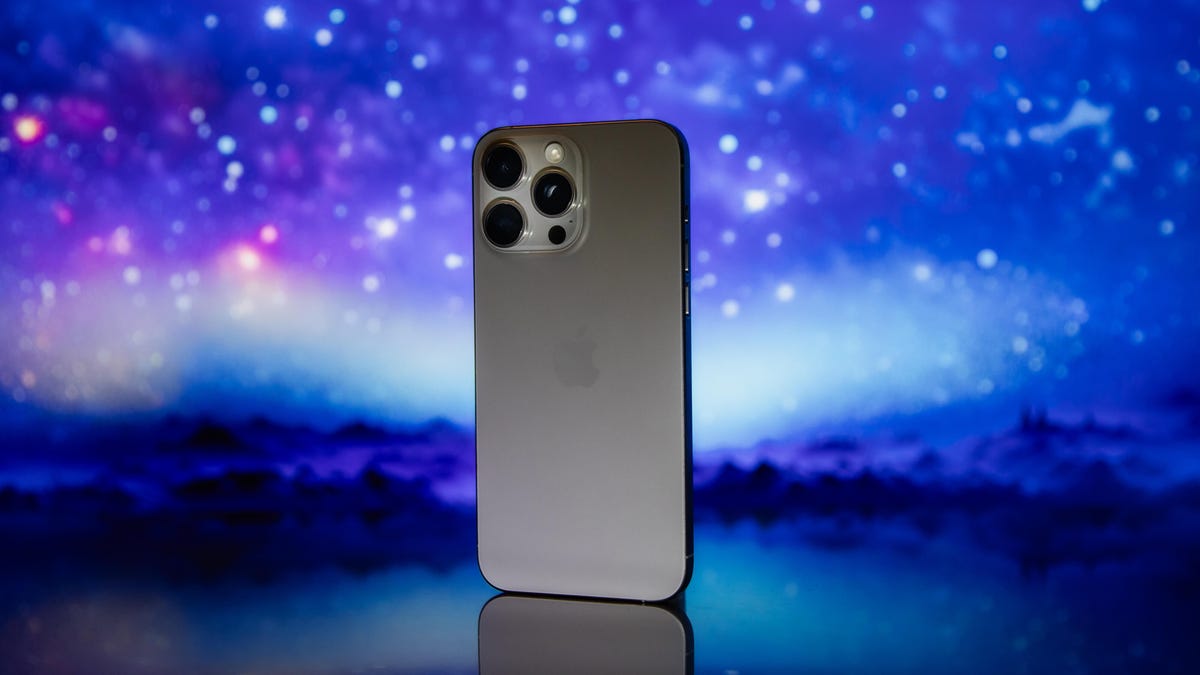
Rather than looking toward more-experimental innovations like foldable displays, Apple has instead continued to refine its existing hardware, equipping its latest iPhone 15 Pro series with titanium designs and improved cameras. And Apple’s approach also includes pulling people into the wider Apple ecosystem, with iPhones syncing seamlessly with other Apple products, including Apple Watches, iPads, Macs, HomePods and Apple TV.
With each new iPhone customer comes an opportunity for Apple to sell additional products from its own catalog, along with services like iCloud storage, Apple Music, Apple Fitness or subscriptions to its Apple TV streaming service. Though Google offers products like this to some extent, it has yet to offer the sort of cohesive package Apple does, which could make Google’s offerings less enticing for new customers and tempt Android users to jump ship to Apple.
Still, Android’s proliferation across devices at lower price points will continue to make it a popular choice for people on tighter budgets. And its presence on a huge number of devices from third-party manufacturers means it’s where we’ll see more innovation that seeks to answer the question of what role the smartphone plays in our lives.
With smartphone shipments expected to hit their lowest point in a decade, more companies will be looking for ways to use new, exciting technologies to capture an audience’s attention and present a product that serves up new ways of doing things. We’ll see this from Android and its partners and from Apple with the iPhone, its software and its peripheral devices, including new tech like Apple’s Vision Pro headset.
We’ll also see a bigger focus from all sides on sustainability: Apple, for instance, went to great lengths during its iPhone 15 launch event in September to flex its green credentials. While Samsung is making larger efforts in sustainability and smaller companies like Fairphone are using planet-friendly features as primary selling points, other manufacturers have yet to make sustainability a key part of their business model. It’s likely, then, that as consumers increasingly look toward sustainable options, the next major competition in the smartphone industry could be who can make the greenest product.
There’s no question that the development of both the software and hardware side of iOS and Android smartphones has at times happened almost in tandem, with one side launching a feature and the other responding in “me too!” fashion. And like the Williams sisters using their sporting rivalry to reach stratospheric new heights in tennis, Apple and Android will need to continue to embrace that spirit of competition to find new ways to succeed in an increasingly difficult market.