The original Apple AirPods Pro and the new AirPods Pro 2 are among the most popular earbuds on the market, with both earning CNET Editors Choice Awards. If you’re here, you probably already own the AirPods Pro or the AirPods Pro 2nd Generation and are looking for a case to protect your investment or perhaps another accessory, of which there are many. While the AirPods Pro are in fact accessories, like other popular Apple products, they’ve created a cottage industry of companion accessories, including ones that allow you to customize your AirPods Pro earbuds for workouts, adventure, air travel and more.
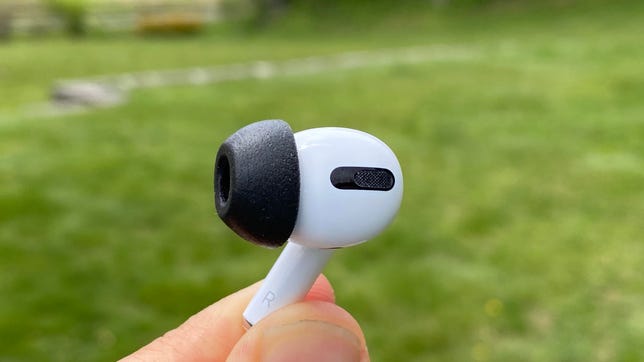
The AirPods Pro 2 are the same size as the original AirPods Pro. However, there are some small differences, the most notable of which are the microphone configuration on the buds and a built-in speaker in the AirPods Pro 2’s charging case that emits a sonar-like sound when tracking the buds in the Find My app. Also, there’s now a spot on the AirPods Pro 2’s case to attach a lanyard.
While cases designed for the original AirPods Pro case will fit the AirPods Pro 2 just fine, a case specifically designed for the AirPods Pro 2 will have cutouts for the speaker port and lanyard loop. If you want a waterproof case for your AirPods 2 (or AirPods Pro), those tend to cover all the ports. You can buy a simple, cheap case made of silicone rubber that provides decent protection should you drop your case. Or you can buy fancier cases, some even made of leather, that give your AirPods case a more premium look while also providing protection.
Here’s a look at CNET’s current top picks of accessories for AirPods Pro and AirPods Pro 2 based on my own hands-on experience. I’ll update this as I test more of the best AirPods Pro cases and accessories.
David Carnoy/CNET
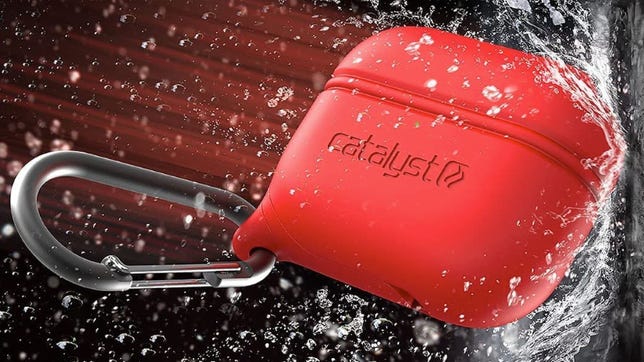
You can find cheaper knockoff versions of Catalyst’s AirPods Pro case ($30), but the Catalyst is a better Apple AirPod case than many of the imitators, not to mention one of the top AirPods case options you can purchase. This AirPods case cover protects your AirPods’ own case, as well as makes it fully waterproof. Another key feature: The bundled detachable carabiner lets you strap the AirPods case onto a belt loop or backpack or use it as a keychain case to help keep your wireless earbuds from getting lost. This Catalyst waterproof case is available in multiple color options.
Compatible with: AirPods Pro and AirPods Pro 2 (but covers speaker port and lanyard loop).
David Carnoy/CNET
For several years, Comply has been the gold standard for memory foam eartips and now you can get Comply tips for your AirPods Pro. I tried them and they work quite well, and even the large tips fit just fine in the AirPods Pro charging case. With the Apple-issued tips, I found that the AirPod Pro in my left ear got a little loose when I ran with the buds. With the Comply tip, it didn’t get loose and fit very securely. They also seem to help a bit with noise-canceling because you get an even tighter seal.
Comply tips are fairly pricey at $25. You can get foam tips that cost less (more like $12 to $15), but as I said, Comply is the gold standard and it may be worth paying a little more. If you know your specific size, you do get three sets of tips in a pack (of the same size. Comply also sells a pack with small, medium and large tips though it’s currently only available on the Comply website, not Amazon). That might be a good option for your new AirPods Pro eartips if you have a couple of people in your family who own the AirPods Pro and have different-sized ears.
Compatible with: AirPods Pro and AirPods Pro 2.
Screenshot by David Carnoy/CNET
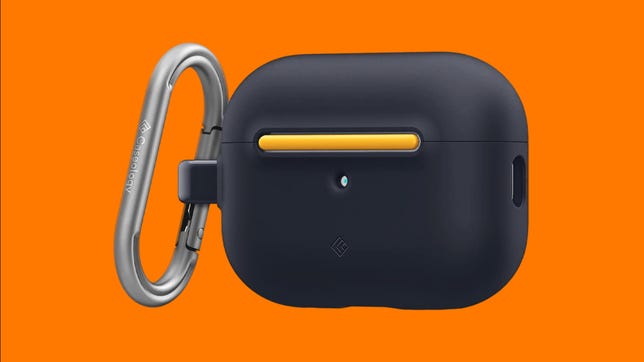
The Caseology Nano Pop case comes in a couple of color options and is one of the early cases specifically designed for the AirPods Pro 2. While it doesn’t include a lanyard, it does come with a carabiner and has a cutout for the charging LED and dimple over the pairing button.
Compatible with: AirPods Pro 2 only.

Screenshot by David Carnoy/CNET
I’m not sure how you can even pronounce the name of the company that produces this inexpensive AirPods Pro 2 case, but it’s only $6 in certain colors (it’s offered in several color options, some of which cost around $10) and it does the job. This case is specifically designed for the AirPods Pro 2 and several similarly styled budget cases are available on Amazon (they’re all your basic slim silicone rubber case). It comes with a lanyard and a gasket covers the Lightning port.
Compatible with: AirPods Pro 2 only.

Screenshot by David Carnoy/CNET
I’ve been using a pair of extra large Eartune foam tips with my AirPods Pro 2 and have been happy with the quality and fit. The extra large tips only come in gray and black, while the small, medium and large tips are available in a variety of colors. If you’re just looking for one size, you can get a pack with three large tips, for example. Or you can buy a pack with small, medium and large tips if you have friends or family who use different sized tips.
Before I put an earbud in, I scrunch the tip up and then let it expand in my ear canal. While I can use Apple’s large tips, I get a more secure fit with these tips. (When I run with the AirPods Pro 2 I use foam tips to make sure they stay in my ears.)
If you treat them well, these tips should last a few months, minimum. They’re a reasonably good value at three to a pack.
Compatible with: AirPods Pro and AirPods Pro 2.
Screenshot by David Carnoy/CNET
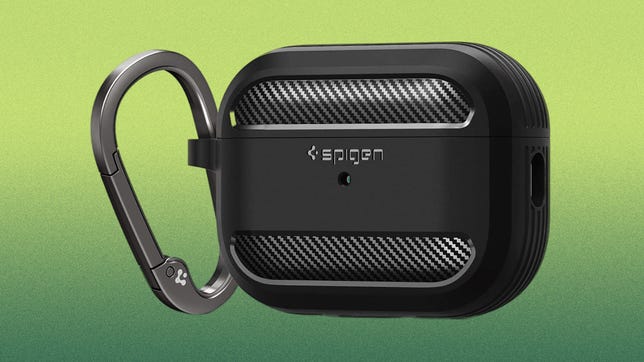
Spigen’s Rugged Armor case returns for the AirPods Pro 2. It’s available in only one color at launch but it is protective and includes a carabiner though no lanyard.
Compatible with: AirPods Pro 2 only.
David Carnoy/CNET
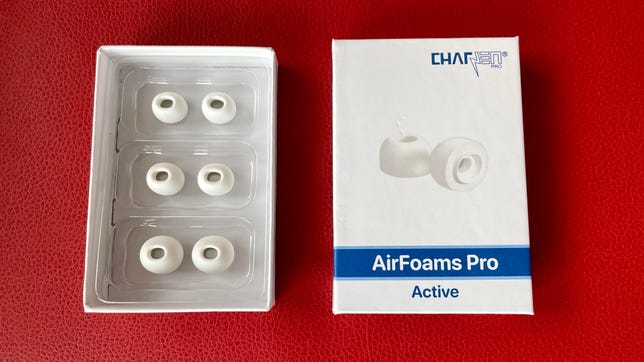
The husband-and-wife team of Charlie and Jen at CharJenPro pulled off a successful Kickstarter for AirPods foam earbuds in early 2020 and created a line of AirPods Pro foam eartips. Their top model is the AirFoams Pro Active 2,0 ($26), which have a silicone layer over the foam that’s designed to protect the tips from sweat and ear wax and help them last longer (the company claims five times longer).
I did notice that the large Comply tip is slightly larger than the large CharJenPro AirFoams Pro Form Fit tip, and it’s also probably worth pointing out that if you typically use a medium tip for your AirPods Pro, you may want to go with a large foam tip here).
The AirFoams Pro Active include three different-sized tips (small, medium and large), so you can choose the tip size that fits you best and possibly pass the other tips on to friends). Since I know I require a large tip, I’d prefer it if there was an option that included a couple of sets large tips instead — that would be the better value — but CharJen Pro doesn’t offer that option.
Compatible with: AirPods Pro and AirPods Pro 2
Sarah Tew/CNET
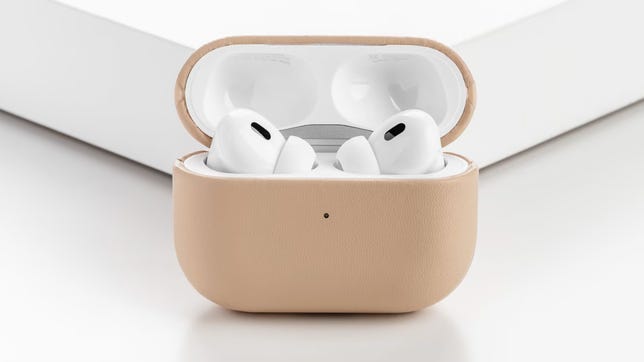
Nomad makes nice leather cases for the iPhone and other Apple products, including the AirPods, AirPods Pro and AirPods Pro 2. Its Modern Leather AirPods Pro case is one of the best I’ve tested and it now comes in a version for the AirPods Pro 2 (it remains available for the original AirPods Pro as well).
This AirPods Pro case fits like a glove and wears nicely over time, developing a patina. It’s available in four colors and comes in a version with Horween leather for $10 more (the Horween version is only available in black and rustic brown).
Compatible with: Either AirPods Pro or AirPods Pro 2 (Nomad sells separate versions, so make sure you get the right one for 1st- or 2nd-Gen AirPods Pro).
Screenshot by David Carnoy/CNET
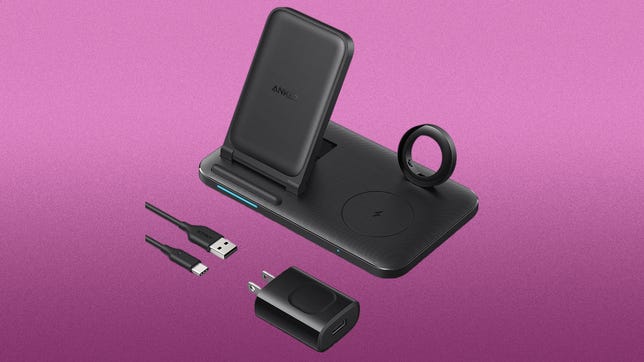
If you’re looking for an affordable wireless charging dock for several of your Apple devices, the Anker Foldable 3-in-1 Wireless Charging Station 335 is about as good a deal as you can get on one. This isn’t MagSafe-enabled and it won’t charge your iPhone at top speed (it only charges at 7.5W), but it’s a nice compact dock that will also charge your AirPods and Apple Watch (however, you have to supply the wireless charging puck for the Apple Watch).
Compatible with: AirPods Pro and AirPods Pro 2
Screenshot by David Carnoy/CNET
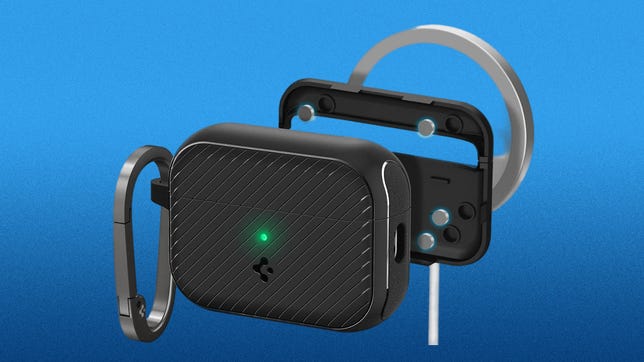
The AirPods Pro 2 are MagSafe enabled but once you put a case on the case, it’s no longer magnetic. That’s where a magnetic case like the Spigen Mag Armor comes in, restoring MagSafe compatibility so your case will stick to a MagSafe wireless charger (or any magnetic wireless charger). A carabiner is included but no lanyard.
Compatible with: AirPods Pro 2 only.
David Carnoy/CNET
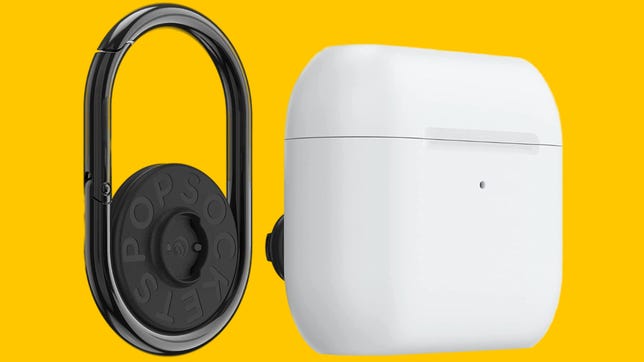
If you’re a PopSockets fan, the PopSockets PopGrip AirPods Pro Holder + PopChain 2 is a surprisingly good deal on Amazon for $16. It has a stick-on attachment for the back of your phone, that lets you clip the case (and the AirPods Pro) to your phone and use your AirPods Pro case as a kickstand for video watching. Or you can attach your AirPods Pro to the included PopChain 2, which clips onto your belt loop or the loop on your backpack. The case itself fits like a glove and seems nicely protective.
Note that the version I got included the PopChain Premium. The model linked here includes the PopChain 2, which has a carabiner clip instead of a keychain. The case is compatible with PopSockets’ PopGrip base so you can use it with another PopGrip if you own one already.
Compatible with: AirPods Pro and AirPods Pro 2 (but covers speaker port and lanyard loop).
David Carnoy/CNET
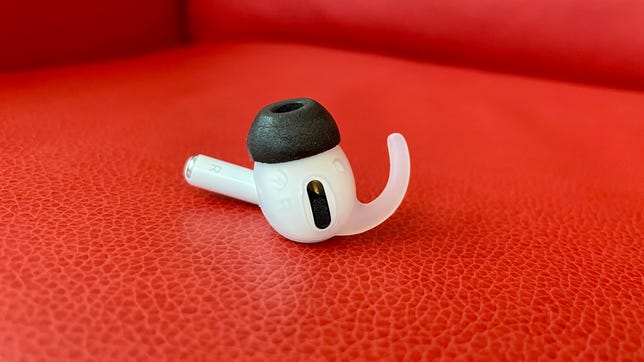
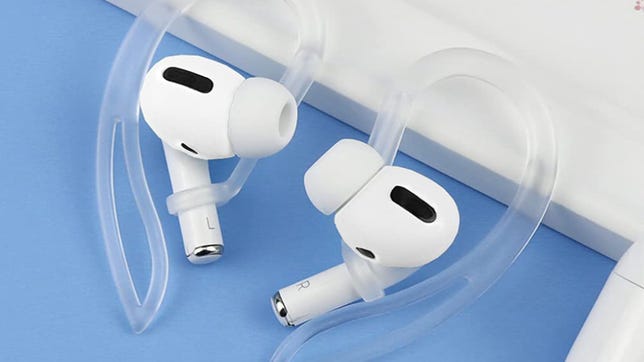
You have a couple of choices if you want to add some additional grip to the AirPods Pro to promote them staying in your ears more securely. You can get very thin silicone skins that cover the bud portion of the AirPods Pro or a set of wings like these that not only cover the bud but add a sport fin (they do help lock the AirPods Pro in your ears). The only issue with the fin approach is that the AirPods Pro won’t fit in their case with an appendage on them so you have to remove them whenever you want to charge the AirPods.
It’s actually pretty easy to get them on and off but you just have to avoid losing them. Two sets of ear hooks are included — one that’s translucent (shown here) and one that’s white.
If you go the silicone skin route (with no fin), you should be able to get your AirPods in the case without having to take the skins off. However, some people complain that because the rubber is so thin it has a tendency to stretch easily and end up not fitting as well as it should. That isn’t a problem with CharJenPro AirFoams Pro Ear Hooks (and other ear-hook accessories) because the rubber is thicker and more durable.
Compatible with: AirPods Pro and AirPods Pro 2.
Amazon
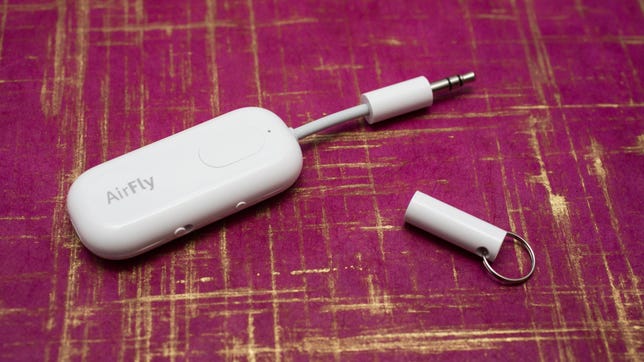
What do you do if you want to use your AirPods with an in-flight entertainment system or the TV built into a machine at the gym that requires a wired connection? Well, one workaround is buying a Bluetooth transmitter that you can plug into any 3.5mm audio jack. There are several transmitters available from TaoTronics and other little-known brands.
To pair your AirPods with a transmitter, you have to turn off the Bluetooth on your phone (or just put it into airplane mode), put your AirPods in their case, hold down the Bluetooth button on the transmitter until it goes into pairing mode, and then hit the pairing button on the AirPods case. (This video explains how to pair to your AirPods.) Battery life is rated at 16 hours and the AirFly Pro uses Bluetooth 5.0.
Compatible with: AirPods Pro and AirPods Pro 2.
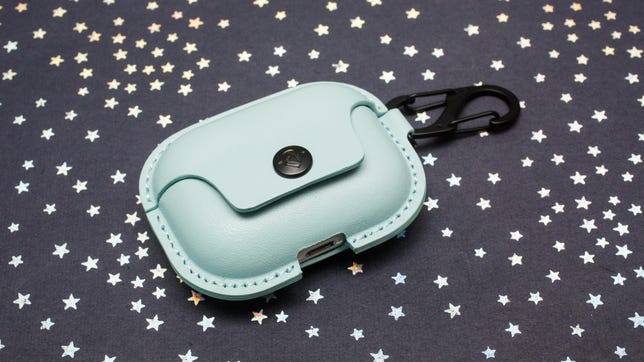
Screenshot by David Carnoy/CNET
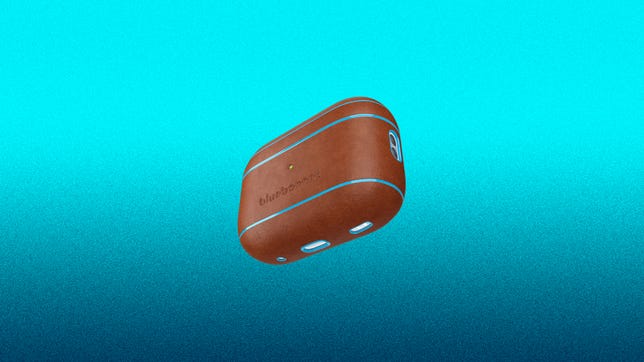
Based in Austin, Texas, Bluebonnet is named after the state flower and crafts leather-clad accessories for various Apple products, including iPhones, MacBooks, Watches and AirPods. Its AirPods Pro and new AirPods Pro 2 cases are a bit slimmer than Nomad’s leather cases, but offer ample protection and have a distinct style with turquoise trim lines. Your AirPods charging case is designed to slide up a little as you open the Bluebonnet case so the bottom portion doesn’t fit as snugly as some AirPods Pro cases. Nonetheless, I found it worked well.

Satechi
If you’re looking for a mini USB-C wireless charging dock for your AirPods Pro (or standard AirPods), this Satechi accessory fits the bill nicely. It’s very compact — basically slightly bigger than the AirPods Pro’s case — and easily fits in a pocket. It works with any USB-C port that outputs power. The only issue is that you may have trouble plugging it in if you have some sort of case on your computer (it has to plug all the way into the port to work).
Compatible with: AirPods Pro and AirPods Pro 2.

Anker
The AirPods Pro can charge wirelessly, so you’ll need a wireless charging pad to take advantage of that feature. A good affordable option for both your AirPods Pro and your phone is the Anker Wireless Charging Pad 315. It offers 7.5-watt charging for your iPhone and 10-watt charging for Android models that support it. It costs $15 but is sometimes on sale for only $10. A cable but no power adapter is included.
Compatible with: AirPods Pro and AirPods Pro 2.
Screenshot by David Carnoy/CNET
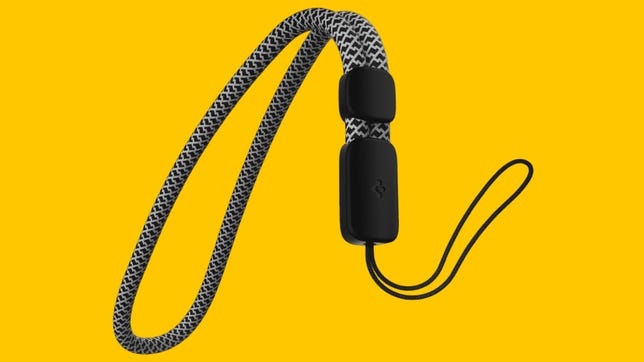
There are a number of inexpensive lanyards you can pick up for the AirPods Pro 2. This Spigen one is a little thicker than some on Amazon. Alternatives like the HiFan Lanyard ($6.50) should also work just fine for you but are designed a bit differently.
Amazon
If you’re looking for a more affordable way to make sure your AirPods don’t drop out of your ears, these clear-colored ear hooks can currently be had for $6. Of course, you do need to take them off to charge your AirPods Pro, but if you’re a biker who’s worried about losing a bud, this is certainly a cheap option to try.
Compatible with: AirPods Pro and AirPods Pro 2.
Screenshot by David Carnoy/CNET
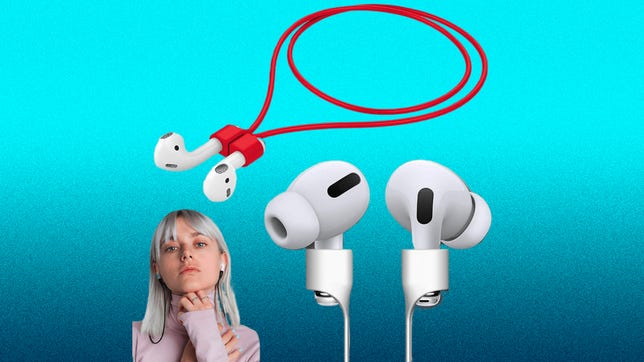
I personally don’t like the idea of adding a wire to true-wireless earbuds, but plenty of people have asked me about “anti-lost” cords for AirPods over the years. There are several cheap versions available on Amazon but the Cobcobb is one of the better ones even though it costs a few bucks more at a little over $10. Some competing models come in packs with multiple cords in different colors. However, this is a single cord with built-in magnets that allows you to clasp your AirPods Pro together around your neck when not in use — just like the Beats Flex earbuds.
Compatible with: AirPods Pro and AirPods Pro 2.
David Carnoy/CNET
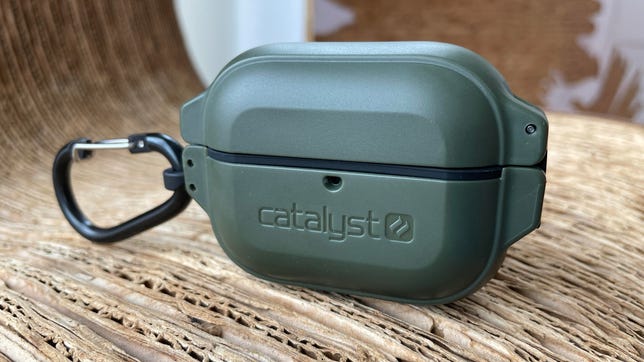
I like Catalyst’s original Waterproof Case (see above — $30) but if you want something that delivers maximum protection, its newer Total Protection case certainly measures up to its title. If you happen to drop your AirPods in the ocean or a deep lake, the case is rated as waterproof down to 330 feet (100 meters). It’s also shock-proof.
Catalyst’s original Waterproof case has a rubberized finish, while this has a hard plastic finish. Both include a carabiner and this model literally clamps shut. Still, you can access your AirPods fairly quickly. The case is available in army green or black.
Compatible with: AirPods Pro and AirPods Pro 2 (but covers speaker port and lanyard loop).
David Carnoy/CNET
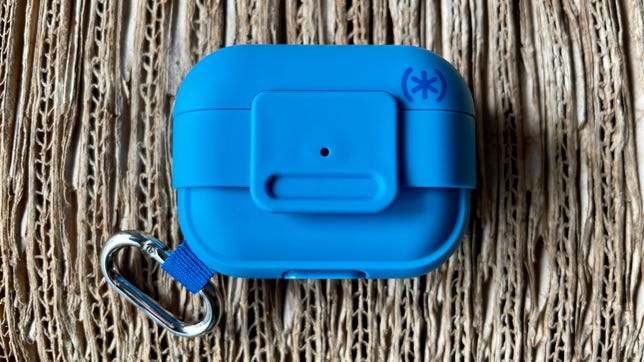
Speck’s initial AirPods Pro cases, the Presidio Pro and Presidio Perfect-Clear, are decent but not anything special. However, the newer Presidio ClickFlip is more intriguing. It offers IPX5 water resistance, as well as dust resistance and is generally well-designed though a bit thicker than more minimalist AirPods Pro cases.
The Lightning port is covered by a gasket, but the port is still easy to access, and wireless charging works fine even though the case is thicker. Also, the carabiner seems securely attached to the case (with some silicone cases, the carabiner can end up getting torn off if you snag the case on something). The case has a kind of band that slides up and clicks into the lid, locking it down.
The ClickFlip is usually available in three color options, but the only one that’s currently in stock is the blue version.
Compatible with: AirPods Pro and AirPods Pro 2 (but covers speaker port and lanyard loop).
Sarah Tew/CNET
Made of rugged leather and equipped with a snap closing system, as well a “loss-prevention” S-Clip, Twelve South’s AirSnap leather case is a slightly different take on an Apple AirPods Pro case. It’s available in several colors in leather, and depending on the color, prices range from $20 to $40. You can wirelessly charge your AirPods Pro with the leather case on.
Compatible with: AirPods Pro and AirPods Pro 2 (but covers speaker port and lanyard loop).