Attention all gamers! If you’re serious about gaming, chances are you have a cool set-up at home that includes a monitor and desktop. But for gamers who want to enjoy gaming on the go, check out this Asus ROG Gaming laptop tablet, now on sale at Amazon for $500 off the list price.
You get a powerful Intel i7 Core processor, 16GB RAM and 512GB SSD in this dual laptop tablet. It’s got a detachable keyboard and kickstand that’s easy to set up on any surface. The best part? Its original price of $1,800 is slashed all the way down to $1,300.
Get ultimate versatility with the Z13 tablet. You can use the touchscreen with active stylus for support drawing and taking notes, or attach the included keyboard for serious work and play. For great performance in a compact space, this tablet is equipped with intelligent cooling that features liquid metal on the CPU and a custom vapor chamber module.
Enjoy full connectivity with Wi-Fi 6E, Bluetooth 5.2, a Thunderbolt 4 port, a USB 3.2 Type-C port and a microSD reader. The Z13 has a ROG Aura Sync System and a 13.4″ touchscreen with a 1920×1200-pixel resolution.
Love shopping online but don’t have time to compare prices or search for promo codes? Our CNET Shopping extension does that for you, so you always get the best price.
The new year is coming up in just a few days, and there are Amazon deals going strong with more to come for the new year. If you’re a Prime member, there are a slew of perks included with your subscription that you’ll want to use all year round.
No, we’re not just talking about free two-day shipping. Amazon Prime members have access to tons of other perks and bonuses you might not know about.
We’ll teach you why protecting your identity and data is important. Plus, get recommendations for VPNs, Password Managers and Antivirus Software.
For example, Amazon Prime members can get deliveries much faster than two days, sometimes in a few hours. They can also schedule delivery dates for convenience or to avoid times when they’ll be away from home. And they even get exclusive deals simply by using Alexa on an Amazon Echo.
If you’re thinking about signing up for an Amazon Prime account (here’s how) or don’t know much about all of the included features, here are some ways you can get the most out of your membership while shopping for Black Friday deals.
You can get free same-day delivery on qualifying items
If there’s a product you want immediately, you can see if it’s available for delivery the same day you order. To check a product’s eligibility, look for delivery that’s marked as “Prime FREE Same-Day” while shopping. Note that your order will need to contain over $35 of qualifying items. If not, you’ll have to pay a small fee.
Amazon will deliver from morning until evening, so you won’t have to worry about receiving your order at 3 a.m. However, same-day delivery isn’t available in all locations, so enter your ZIP code on the Amazon Same-Day Delivery page to see if you’re eligible.
Schedule a convenient shipping date during checkout with Amazon Day.
James Martin/CNET
Alexa can share extra discounts when you shop on Echo
You can use your Amazon Echo to ask “Alexa, what are my deals?” anytime. Alexa will then share Prime-exclusive deals and you’ll have the option to add the item to your cart, buy it now or move on to the next deal.
Schedule a convenient shipping date for your package
Everyone knows about Amazon’s free two-day shipping, but another option is to choose a delivery date during checkout. It’s called Amazon Day and it’s helpful if there’s a specific day you know someone will be at home to answer for packages — especially if it’s something pricey that you don’t want to risk leaving unattended.
If you order multiple items on different days, you can have them delivered on the same day as long as they’re eligible for this offer.
Just say “Alexa, where’s my package?” and your Echo will let you know where it is, who it’s for and when it’ll arrive. Once your order has been delivered, the Echo’s ring light will pulse yellow and if you have the Echo Show, the delivery notification will appear on the screen.
Use any Amazon Echo to track your packages.
Chris Monroe/CNET
Shop Early Access deals before non-Prime members
If something you’ve been eyeing says “Prime Early Access,” as a Prime member you can shop that sale 30 minutes before non-Prime members. However, you’ll still have to compete with other Prime members who are interested in the product before it sells out.
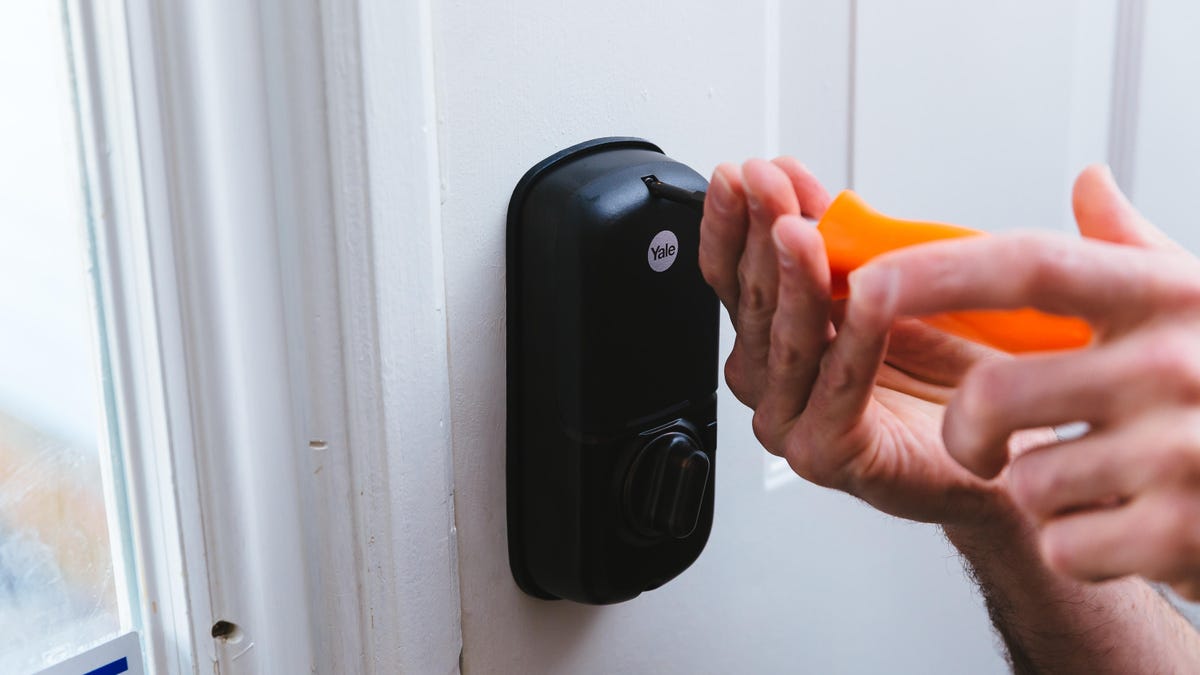
Amazon can leave your package inside your house
When you know you’re not going to be home for a while and you’ve got a shipment on the way, it’s much safer to have an Amazon employee leave your items inside your house to avoid theft.
For in-home delivery, you’ll need a Key-compatible smart lock and an (optional) Amazon Cloud Cam. The Amazon driver will send you a notification when they’ve arrived at your house and will request to unlock your door. Amazon will verify the package is at the right address and the driver is near the door, then will turn on Amazon Cloud Cam and unlock your door.
You can also have packages delivered inside your garage
“Porch pirates” — thieves who steal packages left in front of homes — are no joke. Security site SafeWise told CNET that about 260 million packages have been stolen from home exteriors in 2022. The Amazon Key in-garage delivery service can stop porch theft completely and is free for all Amazon Prime members.
When you use Amazon In-Garage Delivery, select Key Delivery at checkout. The garage kit is $29 right now and turns your garage into a smart garage. It works the same as in-home delivery so Amazon will do all the verifying for you.
Amazon employees can leave a package inside your house with Amazon Key.
Tyler Lizenby/CNET
Send a gift to someone without knowing their address
An Amazon Prime feature lets you send someone a gift, even if you don’t have their address. For instance, if you’d like to send a coworker something for the holidays or their birthday but don’t know what their address is, you can still send a gift. But there’s a catch — that person must also have a Prime account and you need either their phone number or email address associated with the account.
Just note that not every item on Amazon is eligible.
Share Prime perks with family
If you’ve got another adult living in your household, like a significant other or friend, you can share your Prime membership with them. You’ll still be able to keep your personal accounts separate, but you’ll both have access to all the same Prime benefits.
You can also share your account with up to four teens and up to four children in your household. While they’ll have their own logins, you can still manage their profiles.
Love shopping online but don’t have time to compare prices or search for promo codes? Our CNET Shopping extension does that for you, so you always get the best price.
This story is part of 12 Days of Tips, helping you make the most of your tech, home and health during the holiday season.
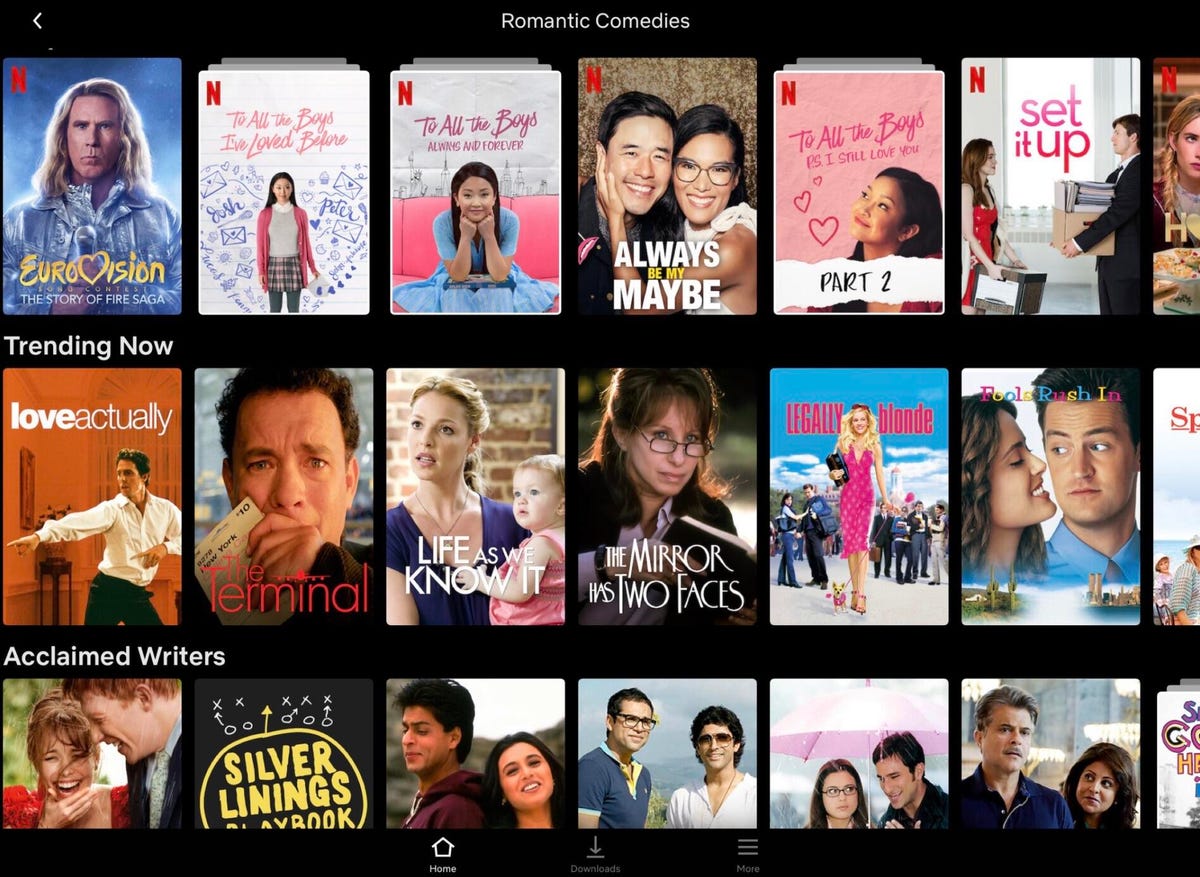
Ready to relax on the couch and wind down from the holidays? A Netflix marathon is a great place to start. If you’re tired of seeing the same list of Netflix TV show and movie recommendations, scrolling really isn’t the best way to find something new to watch. It’s also not a great way to find other niche genres you might be interested in.
But there’s a secret trick for filtering Netflix’s library by genre to find exactly what you’re browsing for: Netflix codes. Instead of passively accepting the algorithm’s picks, learn how to use Netflix codes to find your own next binge-watch.
Netflix codes are based on a number system that corresponds to a different genre or subgenre, which the algorithm uses to categorize and serve up recommendations. For example, instead of scrolling through Horror, you can search Small Town Scares (81496215) for more specific results.
So far, Netflix has about 36,000 codes. Note that codes can only be used on Netflix’s website and not in its apps.
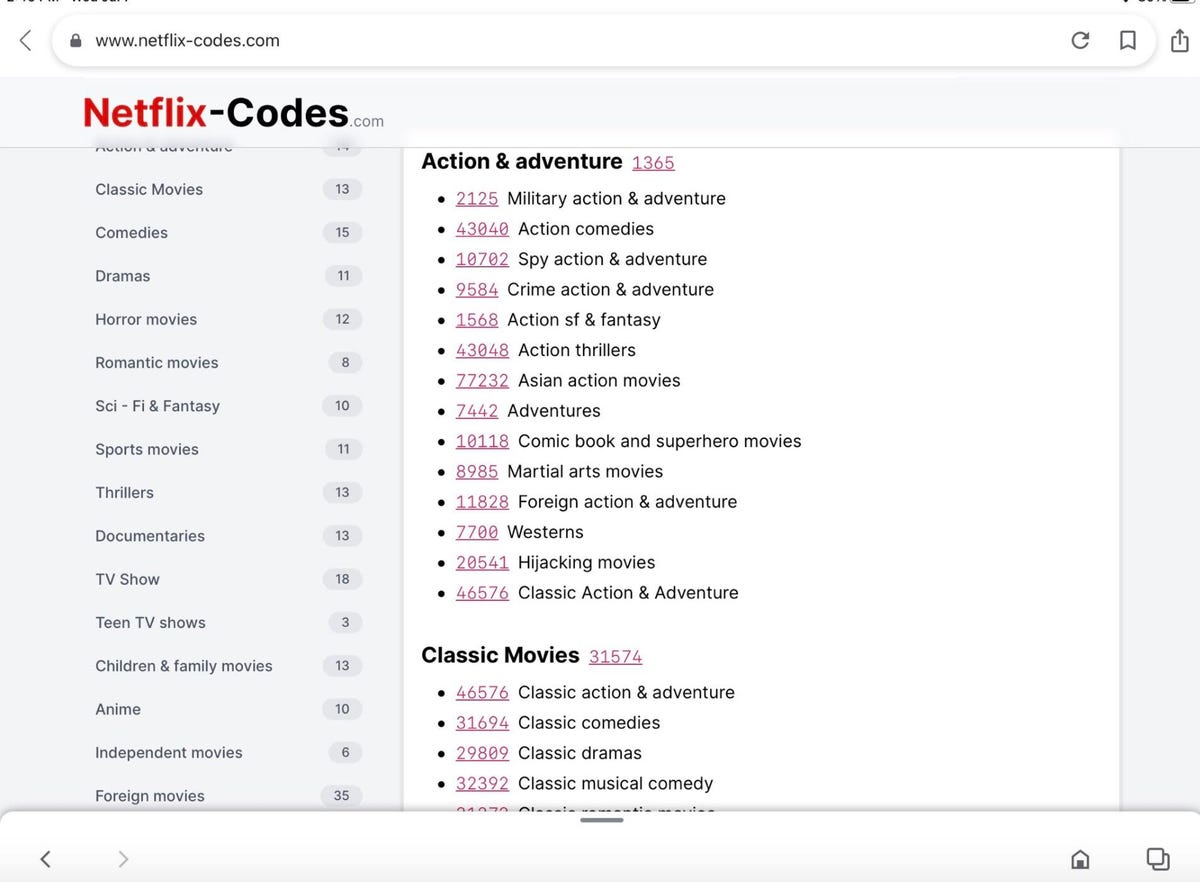
This is what you’ll see when you visit the Netflix codes website.
Screenshot by Shelby Brown/CNET
Where do I find Netflix’s secret menu?
Check out netflix-codes.com for a full list. There are about 20 categories like anime, foreign movies and classic movies. Those categories are broken down into more specific subgenres. For example, horror movies — coded 8711 — houses 12 more codes like deep-sea horror movies, zombie horror movies, teen screams and more.
The easiest way is by installing the Better Browse for Netflix extension for Chrome. Here’s how:
1. Go to the Chrome Web Store and search “Better Browse for Netflix.” 2. Click Add to Chrome. 3. Click Add Extension. 4. Log into your Netflix account in a new tab.
At the top of the Netflix home screen, you should see a new option — Browse All — next to My List. Click that to search manually or scroll through the subgenres available.
Use the code 5475 and you’ll unlock a trove of romantic comedies on Netflix.
Screenshot by Shelby Brown/CNET
Another way is through the Netflix codes website. Here’s how:
1. Visit netflix-codes.com in your PC or mobile browser. 2. Find the genre or subgenre you want to explore. 3. Tap the code next to the genre or subgenre you want. 4. If you’re on a device that has the Netflix app installed, the app should open and take you directly to the genre or subgenre you chose. If you don’t have the app installed, it’ll open Netflix through the browser and you can view the specific movies and shows available. 5. Tap thetitle you want to watch.
You can also use the Netflix codes manually in your browser. Here’s how:
1. Visit netflix-codes.com in your PC or mobile browser. 2. Find the genre or subgenre you want to explore. 3. In another tab, type in <http://www.netflix.com/browse/genre/INSERTNUMBER>, but replace INSERTNUMBER with the specific genre or subgenre code. 4. You’ll be taken to Netflix to peruse the titles available in that section.
From there, you can either make a mental note of the movie you want to watch and go back to the app on your preferred device, or log in to watch in your browser.
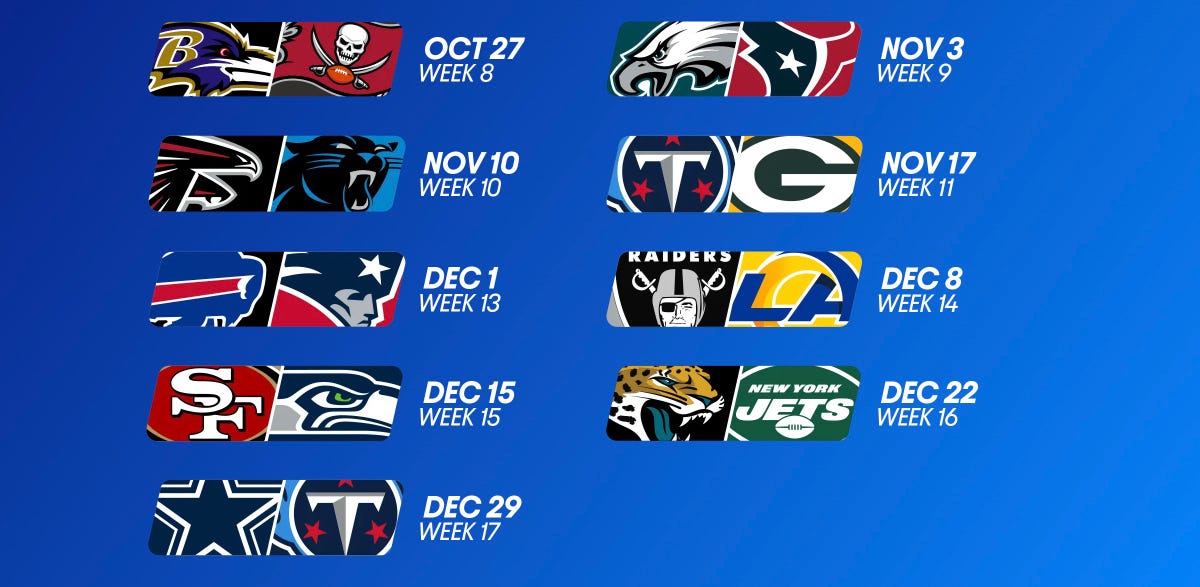
The Tennessee Titans (7-8) have lost five in a row, yet enter Week 17 tied for the AFC South title. The Dallas Cowboys (11-4), meanwhile, have locked up a playoff berth and after a win against the Philadelphia Eagles last week, still have a small chance to still capture the NFC East title. Kickoff is set for 8:15 p.m. ET (5:15 p.m. PT) tonight with the game streaming nationally on Prime Video, and for free on Twitch.
Dak Prescott and the Dallas Cowboys take on the Tennessee Titans on Thursday Night Football.
Richard Rodriguez/Getty Images
Here’s how to watch the Cowboys-Titans game this evening, as well as the rest of the NFL season, without cable.
Thursday Night Football Streaming: Amazon Prime Video, Twitch and NFL Plus
In past years, Thursday Night Football games were shown on Prime Video but were also available on Fox or NFL Network. This year, the games on Thursday nights will be available nationally on Amazon’s platforms, giving NFL fans more incentive than free two-day shipping to sign up for an Amazon Prime account for $15 a month or $139 a year. You can also subscribe only to Prime Video for $9 a month.
Fans in the local market of each team playing on Thursday night will be able to watch on an over-the-air station, while those who don’t pay for either of Amazon’s services can watch for free on Prime Video’s Twitch channel (Twitch is also owned by Amazon).
If you subscribe to NFL Plus, the league’s $5-per-month streaming service, you can also stream the game without subscribing to Prime or Prime Video. Note that NFL Plus viewing is limited to watching on just a phone or tablet, not on a computer or TV.
Can I watch Thursday Night Football on local TV?
You can. Front Office Sports’ A.J. Perez has put together a handy list of which local channels in which market will broadcast Thursday Night Football games when their respective teams are playing. For this week, that’s WNYW Fox 5 in New York and WJAX CBS 47 in Jacksonville.
What are my streaming options for NFL games in 2022?
Paying for cable is the easiest solution, but not the cheapest. For cord-cutters looking to save some money, NFL football streaming options can get a bit complicated, with games played across three different days and nights each week on different channels and streaming services.
Most NFL games are played on Sunday, with a game each week on Thursday night and another each week on Monday night. On Sundays, games start at 1 p.m. ET (10 a.m. PT) and 4 p.m. ET (1 p.m. ET), with most AFC teams on CBS and most NFC teams on Fox.
Although the first Thursday night game was on NBC, as mentioned above the rest of the games for Thursday Night Football will be shown on Amazon’s Prime Video and Twitch platforms. Unlike last season, Prime Video is now the exclusive home to Thursday Night Football and the games are no longer available on Fox or NFL Network (though the games will be available on TV in teams’ local markets).
As in previous seasons, Monday Night Football games will be on ESPN. In addition, NFL Network will show three international games played in London and Munich this season.
All five of the live TV streaming services carry ESPN and Fox, and all but Sling TV carry CBS. All but DirecTV Stream carry NFL Network. For the games on CBS and Fox, keep in mind that not every service carries every local network, so check each one using the links below to make sure it carries CBS and Fox in your area.
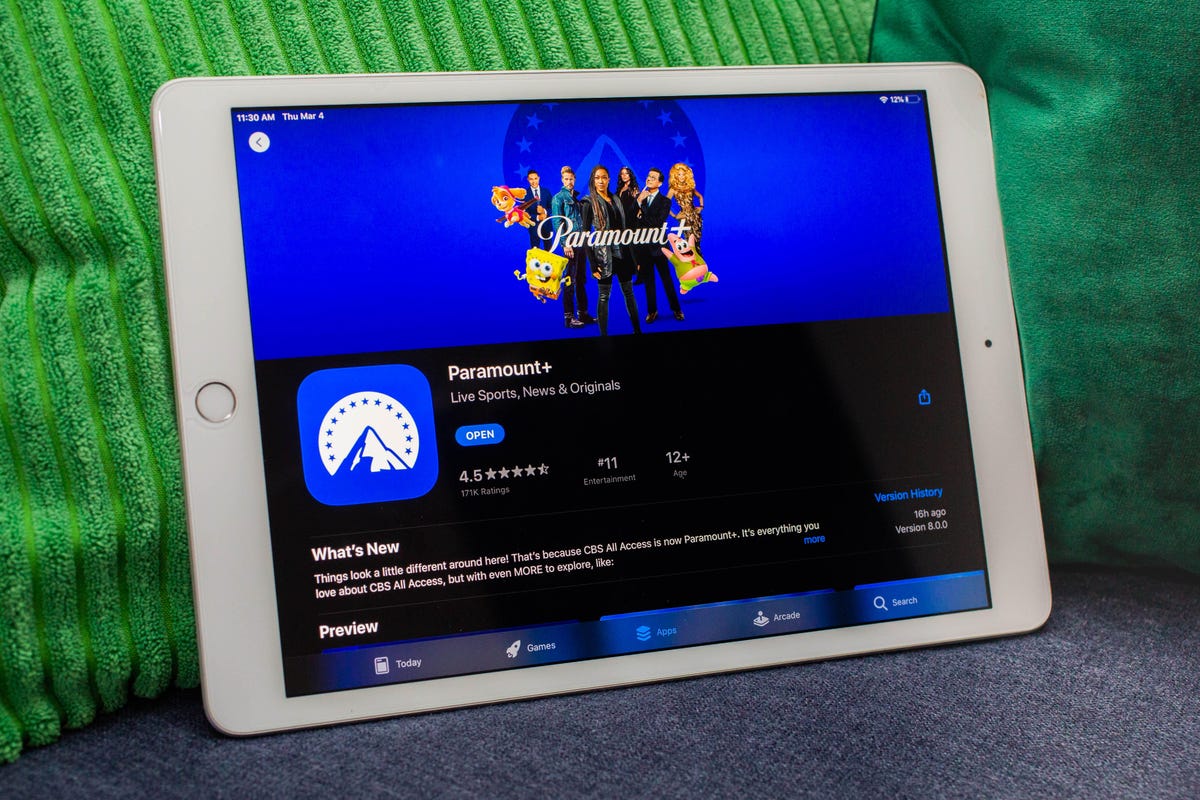
In addition to Prime Video, there are three other streaming services that cord-cutting NFL fans should consider. The paid Premium plan of Paramount Plus will show CBS games on Sundays, and the paid Premium plan of Peacock will show NBC’s broadcasts of Sunday Night Football.
Wait, there’s one more streaming service to consider this year. The NFL is launching a new streaming service for watching games on your phone or tablet — no casting to your TV. In past years, you could do this for free with the Yahoo Sports app, but now you’ll need to pay $5 a month or $40 for the season for the NFL Plus app. With it, you’ll be able to watch every local game on Sunday and the national games on Sunday, Monday and Thursday nights as well as the playoffs and Super Bowl — again, only on your phone or tablet.
Lastly, there’s NFL RedZone, a channel that springs to life each fall and shows live NFL action during the Sunday afternoon games. It pops in and out of the live games and attempts to show each touchdown scored in each game. RedZone is available as an add-on on four of the five major live TV streaming services — all but DirecTV Stream.
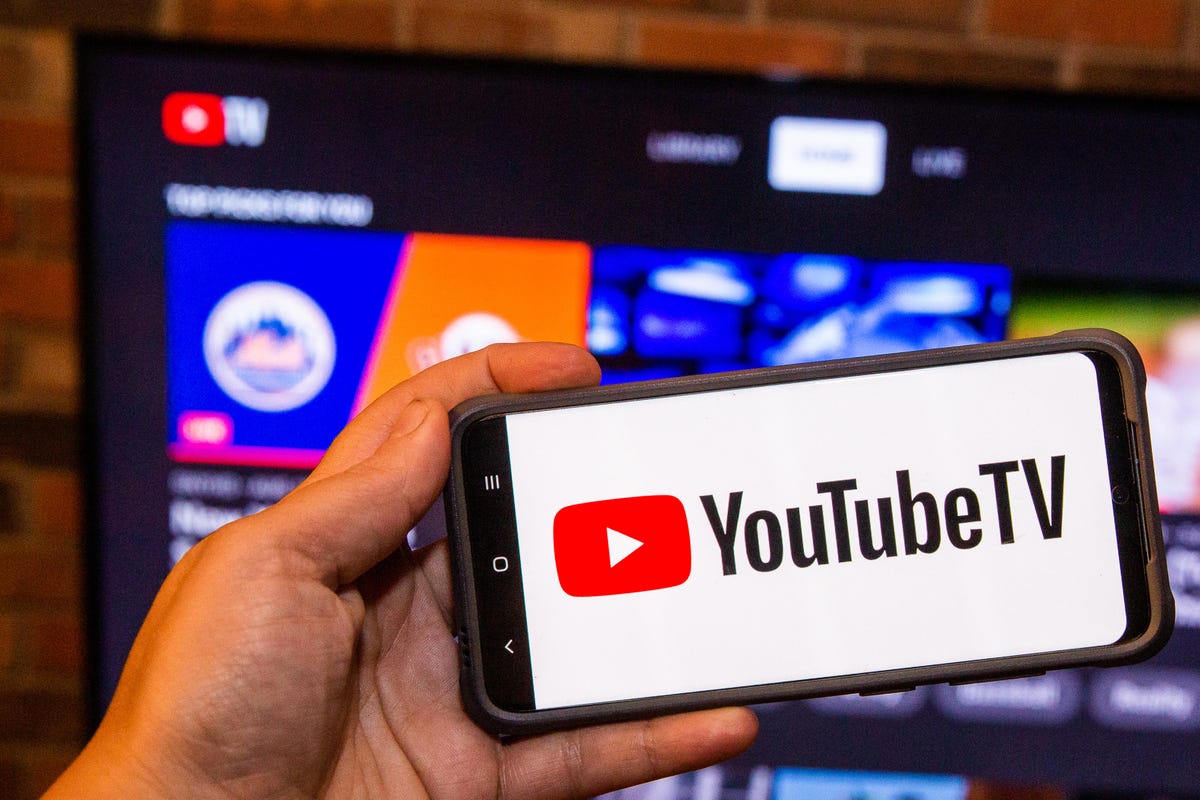
Best for everything: YouTube TV ($65)
Sarah Tew/CNET
Our pick from the last two years remains our go-to choice in 2022.
At $65 per month each, YouTube TV checks all the NFL boxes. Local channels CBS, NBC and Fox are included in many markets, and ESPN and the NFL Network are also included so you can watch Sundays and Monday nights. The next best options are FuboTV and Hulu Plus Live TV; both offer the same channels as YouTube TV for NFL fans, but for $70 a month.
Want to follow your fantasy team with RedZone? That’s available on all three services as part of an add-on. If you’re a YouTube TV subscriber, you can add the $11 per month Sports Plus add-on by clicking on your profile and going to Settings, then the Membership tab. FuboTV subscribers can go into My Profile and choose Manage Add-ons to get its $11-per-month Sports Plus with NFL RedZone offering. And Hulu users can now add RedZone for $10 per month with its Sports add-on.
Both YouTube TV and FuboTV allow three people to watch at once (Hulu allows two live streams) and all three have apps on nearly every mobile device and major streaming platform, including Amazon Fire TV, Google TV, Roku and Apple TV.
While all three are largely similar, we like YouTube TV for its superior DVR — it features unlimited storage, compared with 30 hours on FuboTV and 50 hours on Hulu. We also like YouTube TV because it gives you an option to stream in 4K for an extra $20 a month. FuboTV does, too, with its $80-a-month Elite plan. Keep in mind that only Fox and NBC offer 4K NFL broadcasts; CBS and ESPN do not.
DirecTV Stream offers the main broadcast channels for NFL games, but it starts at $70 per month and lacks NFL Network and RedZone.
Sling TV’s Orange and Blue plan for $55 a month gets you ESPN and the NFL Network, and, in select major markets, Fox and/or NBC, but you’ll still lack CBS. You can also add RedZone for $11 per month with the Sports Extra add-on.
The cheapest way to stream NFL RedZone
NFL RedZone shows every touchdown scored during the Sunday afternoon games each week.
Rob Carr/Getty Images
A frequent fan-favorite method of following all the NFL action on Sundays, RedZone is a way to catch every big play around the league. The cheapest road to RedZone is to get Sling TV Blue for $40 per month and add the $11 per month Sports Extra add-on.
This option can also be streamed on a host of devices including iOS, Android, Apple TV, Roku, Chromecast, Amazon Fire TV and web browsers.
Note: If you only subscribe to Sling’s Orange package you won’t be able to get RedZone in Sports Extra. Your base package needs to be either Sling Blue or its larger Sling Blue Plus Orange bundle for you to be able to get RedZone as an add-on. If you choose the latter, the Sports Extra add-on is $15 per month as you will also get additional channels like the SEC Network, ACC Network and PAC 12 Network.
If you mainly plan to watch on a phone, you can also check out RedZone Mobile, which is in the NFL app. This is a separate subscription from NFL Plus and runs $35 for the season (which breaks down to around $7.78 per month for the roughly four-and-a-half months of regular season football). While this is one of the cheapest ways to get RedZone, be aware that — similar to NFL Plus — you will not be able to AirPlay or Chromecast it onto a larger screen and will need to watch on your phone.
Budget alternative for NFC fans in big cities: Sling Blue ($40) or an antenna ($20 one-time)
Sarah Tew/CNET
Those looking to save some cash might want to check out Sling Blue for $40 a month. While it lacks ESPN, meaning you’ll miss out on Monday Night Football, in select markets you’ll be able to get Fox and NBC. The catch is that those markets are mainly in big cities, so if you live outside one of those areas, Sling Blue might not be for you.
You can also add RedZone through the company’s $11-a-month Sports Extra add-on.
Fox broadcasts most NFC games on Sundays, while NBC has Sunday Night Football. CBS, which broadcasts the bulk of AFC games, isn’t included on Sling at all. But an antenna can fill those local channel gaps without a monthly charge.
Budget alternatives for AFC fans: Paramount Plus (or an antenna)
Sarah Tew/CNET
There are some apps that offer CBS’ slate of Sunday AFC games live, including Paramount Plus’ Premium tier for $10 a month. Depending on where you live, however, your local CBS station (and those NFL games) might not be available. CBS offers livestreaming services in many markets; you can check for yourself if your area has live CBS streaming here.
An antenna is another option for getting CBS. And as we mentioned above, an over-the-air antenna connected to your TV provides another option, no streaming or monthly fee required, as long as you have good reception.
What about Sunday Ticket?
For one more season, NFL Sunday Ticket is still largely limited to DirecTV satellite subscribers. While that is expected to change in 2023, those who live in buildings that can’t add a satellite dish can already get a streaming version to watch football starting at $294 for its To Go package for the season, or $396 for a Max package that includes the RedZone channel (a student version is also available at a discount). You can check your address on the Sunday Ticket site. Both packages have a one-week free trial.
The problem here, however, is that even if you’re eligible, it doesn’t include local games. You can only watch Sunday games that aren’t being broadcast on CBS, Fox or NBC in your area. They also won’t be helpful come playoff time — as you’ll need your local stations and ESPN to catch all those games.
Thursday Night games, starting with Week 2, will be available only on Amazon Prime Video (plus the local TV stations in the market of each team playing). For millions of Amazon Prime subscribers, the Prime Video channel is already included at no extra cost. But if you’re not a subscriber, it might be worth it to shell out the$9 a month for the stand-aloneTV service fee.
For $65 a month, you’ll get all the major football channels with YouTube TV. Plus, RedZone is available for an extra $11 per month. Plug in your ZIP code on YouTube TV’s welcome page to see which local networks are available in your area.
Sling TV’s $40-a-month Blue plan includes NBC, Fox and the NFL Network. Enter your address to see which local channels are available where you live. NFL RedZone is also available for an extra $11 a month.
Note: This version of Sling TV doesn’t include ESPN. For that, you’ll need to switch to the similarly priced Orange plan or go for the combined $55-a-month Orange and Blue bundle. With the combined plan, RedZone is an extra $15 a month.
Those looking for CBS games will be able to stream them on Paramount Plus with its $10 monthly Premium tier. You can check for yourself if your area has live CBS streaming.
This story is part of 12 Days of Tips, helping you make the most of your tech, home and health during the holiday season.
If you were tempted to treat yourself to the latest iPhone this Christmas or you plan to gift one to someone else in your family, you might be wondering what the most cost-effective way to do it is. Saving as much money as possible is paramount if you’re wanting to regularly upgrade to the best iPhone which is why subsidizing your next phone by selling your current one is such a great idea. But how do you get the most money back for your existing device?
Well, there are numerous ways to trade in an old iPhone and earn hundreds toward your new one, but each option has its own list of pros and cons. Fret not, though, as we’re here to help guide you through the process. We’ve put together a list of the best places to sell, so you can work out the best iPhone deal for you. Below, you’ll find three different ways you can make some cash, as well as when to make the sale and what you can expect from the process.
1. Sell it to a buy-back service
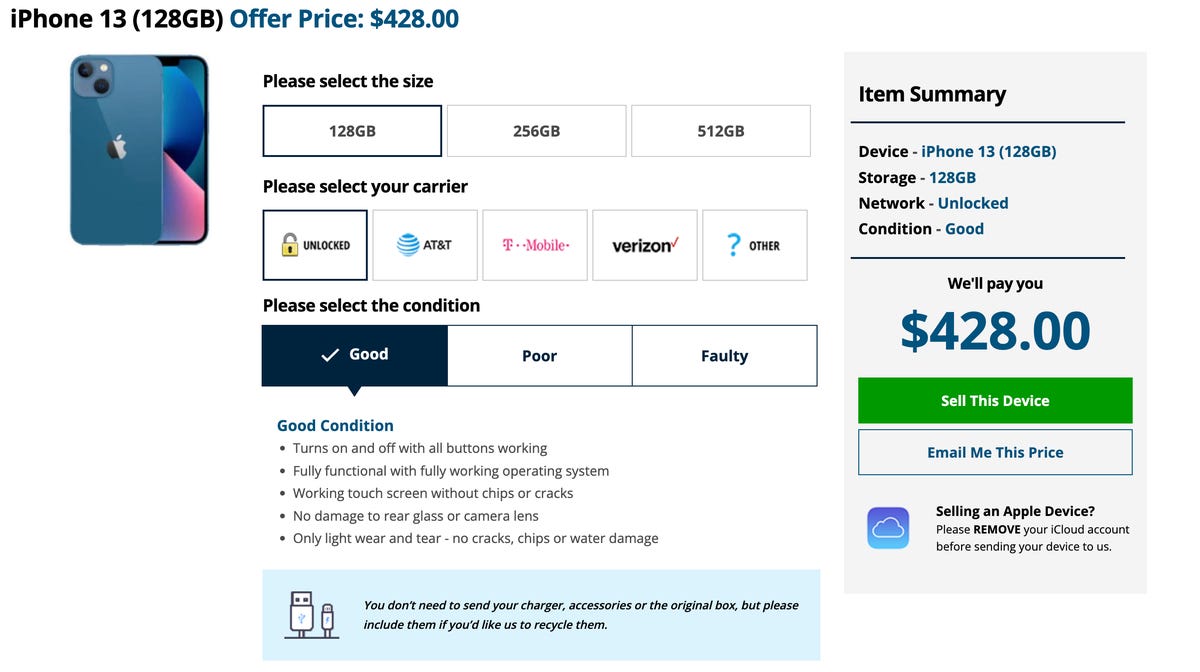
Decluttr is one option for trading in your old iPhone. In this example from December 2022, it is offering $428 for an iPhone 13.
Screenshot by Adam Oram/CNET
Looking for a quick and easy option? Consider selling your old device to a buy-back service. Although it’s not entirely without risk — if the old iPhone isn’t in the condition you said it was, for example if it is a broken iPhone, you may not get the full value quoted by the buyer — it does minimize the time and hassle, especially compared with trying to sell it yourself on, say, eBay or Craigslist.
There are traditional trade-in options like those offered by Apple and Best Buy (see the next section), and then there are buy-and-sell marketplaces like those listed below. Before you spend a lot of time hopping from one to another to get quotes, head to Flipsy, which compares US trade-in values at multiple buy-back stores. It shows you the payment methods, price-lock duration (that’s how long you have before you need to send the phone in) and price based on the condition of the old device. (Because each buyback program and store is little different when it comes to “condition” definitions, Flipsy doesn’t drill down beyond phone model, carrier and storage.) SellCell is another price-comparison service for anyone looking to score top dollar for an old iPhone.
If you’d rather check out some individual marketplaces yourself, below are a few options that are worth a look. The sample quotes are based on iPhone 13 trade-ins for “good” condition devices in December 2022 and were correct at the time of writing.
Decluttr may have the fastest quote generator of any buy-back site. You type the brand and model of your phone, choose it from the list that appears and presto: Instant quote. (You may have to click a few times to change the carrier and the phone’s condition.) It’s worth noting that Decluttr’s “good” option is the best condition you can select; it might equate to “excellent” elsewhere.
Although GadgetGone may not have the name recognition of, say, Gazelle or Swappa, it has a high TrustPilot and it offered a solid quote for my iPhone model.
Gazelle is probably the trade-in service that most people are aware of and the name recognition might give you some added comfort when it comes to handing over your old iPhone. It’s got a lower Truspilot score than other services, though has seen plenty more reviews submitted. Being a known brand does mean that could lowball you on trade-in prices, however.
An honorable mention goes to Swappa, which has a sky-high TrustPilot score (4.8) but isn’t really a buyback service. Rather, it’s a marketplace designed to connect buyers and sellers. Think eBay, but with a focus on devices like your iPad, iPhone or other Apple product. To list your older iPhone (which doesn’t guarantee a sale), you must first create a Swappa account and then connect a PayPal account. You also set your asking price, which necessarily includes a sale fee, but not any additional PayPal fees that may apply.
Worth the extra effort? Perhaps: Swappa recommended a sale price of $646 for my iPhone 13, while noting that the same phone had recently sold for $596 — still higher than most buy-back services and more than enough extra to put towards a couple of new iPhone cases for your next phone. But a marketplace is almost always going to net you a higher profit (see below).
2. Trade in for credit toward a new one
Want to cut out the middleman, so to speak? You can start by going back to the source. That can be either the manufacturer or a big-box retailer, the largest of which generally offer solid trade-in options for a new device. Consider two of the biggest fish in the pond: Apple and Best Buy.
Apple’s iPhone trade-in program offers an easy way to better afford a new iPhone, as phone trades net you Apple Store credit or money off your next iPhone directly.
For example, here are the current estimated trade-in values for select models, all of them in “good” condition:
iPhone SE (2020): Up to $100
iPhone 11 series: Up to $330
iPhone 12 series: Up to $480
iPhone 13 series: Up to $650
Those rates are reasonably competitive for an Apple trade-in, but you should definitely shop around. Apple’s trade-in program doesn’t factor in how much storage your phone has, however, so an iPhone 13 Pro with 128GB will net you the same trade-in value as one with 1TB — which is very different elsewhere.
Best Buy offers a trade-in program as well; at press time, a 128GB iPhone 13 in good condition would fetch you $340 with Pro variants offering higher values. (Taking an unfortunate cue from Apple, trading a higher capacity model in does not raise the value.) Curiously, the Best Buy trade-in program doesn’t let you select “unlocked” and rather makes you choose from one of the Big Four carriers. I selected AT&T for my quotes.
Best Buy will either fix you up with a gift card for the phone’s value to redeem against future purchases or, if you complete the trade-in process while ordering your new phone, you can hand over your old device in store (following a visual inspection to ensure it is as described) and Best Buy will refund the value to your payment method. There will occasionally be additional promotional offers from Best Buy which can add value to the trade-in, too.
The key takeaway here: Shop around. There are plenty of services with program options that will buy your old iPhone or take it in trade, but you might do better selling it yourself.
3. Sell it yourself
Selling an iPhone yourself will usually net you the most profit, but it’s not without risks and hassles.
Craigslist is probably the riskiest option, but buyers will pay cold, hard cash for iOS and Android devices. The biggest challenge here isn’t finding customers — it’s getting them to show up. Be prepared for flakes.
If you do decide to use Craigslist or another in-person option to sell an iOS device, make sure you meet your buyer in a well-lit, public place (many police departments offer their parking lots as transaction sites). For the smoothest transaction, make the agreement clear prior to meeting — your customer should know the price, the condition of the phone and its wireless carrier (especially if the phone isn’t unlocked) in advance.
I consider this a big step up from Craigslist, because not only are your listings free, but Facebook removes much of the anonymity from the transaction of your Apple gadget. You can check the profile of any interested buyer. You can also control where your listing is seen and by whom. I’ve sold lots of items this way, and while I’ve had my share of last-minute no-shows, most of the transactions worked out well.
If you don’t mind putting in a little work — listing, shipping and paying a small sales fee — eBay is arguably a better place to sell a used phone than either Craigslist or Facebook Marketplace. That’s because it offers purchase protection, which makes people more comfortable buying from strangers.
The downside? Fees. eBay charges a sales fee for products that are sold through its site: 10% of the final selling price.
To figure out a ballpark selling price for your device, search for your model and check the “sold” listings.
If there’s a downside to selling your iPhone on eBay, it’s the potential risk of buyer’s remorse. eBay offers protection to both the seller and buyer, but customer service tends to side with the buyer in the event of a dispute. Scammers know how to take advantage of this. You can minimize your risk by documenting everything (including taking photos or screenshots of the phone’s IMEI number) and making sure to get signed proof of delivery.
Your old phone is losing market value by the day, so the best time to sell it is always as soon as possible. It’s estimated that within 24 hours of a new iPhone’s unveiling, your old phone loses up to 30% of its trade-in value so you can try to time it right and sell it in the weeks leading up to an iPhone event if you’re smart.
One concern is that if you sell your old smartphone immediately, you’ll be phoneless until the new one arrives. Thankfully, many of the aforementioned buy-back and trade-in services give you a grace period (also known as a “price lock”) of up 30 days after selling your phone before you have to send it in — time enough, hopefully, to purchase and receive your new phone and get everything migrated over (including the SIM card — don’t forget that!). Since the iPhone 14 is just a few months old, this is less of an issue currently.
window.CnetFunctions.logWithLabel(‘%c One Trust ‘, “IFrame loaded: subtextIframe with class optanon-category-C0004”);
What to know before you sell your old iPhone
Whether you sell by yourself or trade to a third-party company, make sure you prep your iPhone properly before selling it
. Here are some tips:
Back it up: Back up all of your important data — including contact, photos, videos and apps — using Apple’s iCloud service or a third-party cloud storage service.
Turn off Find My: Apple’s Find My app (formerly known as Find My iPhone) is a security feature that must be turned off before you sell your phone — or nobody else will be able to use or reset it. To turn off Find My, open the Settings app on your iPhone and go to Settings > [Your username] > Find My and turn it off.
Wipe it: Sign out of all apps, services and connected accounts (like your iCloud account). Then, open the Settings app and go to General > Reset > Erase All Content and Settings to erase everything from your iPhone. Once this is complete, you can also go to General > Reset > Reset All Settings to restore the iPhone to factory settings, just in case.
Remove the SIM card: Don’t forget to pop out your SIM card, which you’ll likely need for the new phone to keep your existing number and service.
You’ll receive the most money for your phone if it’s in tip-top shape, but you can still do well if it’s in “good” condition: No cracked screen, no big dents or scratches in the casing, no water damage, and everything working well (meaning the phone turns on, holds a charge and so forth).
If your phone is damaged, you can probably still get something for it, even if the device doesn’t turn on. It’s not worth it to repair a cracked phone screen before you sell, but if your screen is only slightly damaged — a small hairline crack in the corner, for example — you may want to sell it on your own instead of trading it in. An individual may be willing to overlook superficial screen damage for a good price.
On Dec. 15, Twitter reached a boiling point when the site suspended several journalists who report on or have been critical of Elon Musk. Twitter reinstated some accounts, but other reporters who did not delete certain tweets are still locked out of the site two weeks later, and more have joined them.
Screenshot by Peter Butler/CNET
Today, San Francisco Chronicle reporter Gil Duran reported that he’s been banned from Twitter for more than 10 days for tweeting a question about the other suspended reporters: “Is tweeting about a banned account now prohibited? How about tweeting about an account that was banned for tweeting about a banned account?”
For several of those journalists formerly on Twitter, you can now only read their full stories on Mastodon.
Learn more about Mastodon and how to find the accounts of the reporters who’ve been locked out of Twitter. You can also find a step-by-step process for creating a Mastodon account and participating on the growing social network. For more about social media, here’s how to delete your Twitter account and how to download your Twitter archive before you do.
Which reporters and accounts were suspended by Twitter?
On Dec. 14, Twitter suspended @elonjet, a bot account that tracked the private flights of Elon Musk. It’s run by University of Central Florida student Jack Sweeney, whose personal account and other bot accounts were also suspended. Musk had criticized Sweeney’s account but also pledged not to ban it in a now infamous tweet from Nov. 6.
To justify its suspension of Sweeney’s accounts, Twitter updated its private information and media policy on Wednesday to prohibit “live location information, including information shared on Twitter directly or links to 3rd-party URL(s) of travel routes.”
The following day, the official Twitter account for Mastodon was suspended, apparently for sharing a link to the Elonjet account on mastodon.social.
Later in the day on Dec. 15, around 4:30 p.m. PT, several technology reporters found their Twitter accounts had been suspended. Some, but not all, of the accounts had posted links to the Elonjet account on Mastodon.
In response to news of the suspensions, Musk tweeted, “Same doxxing rules apply to ‘journalists’ as to everyone else.” Suspensions of other reporters who tweeted about Musk continued through the evening. Musk posted two Twitter polls asking when the journalists should be allowed back on Twitter, and the “Now” response won both polls. Several, but not all, journalists had their Twitter accounts reinstated after deleting certain tweets. Others have refused to delete tweets, and others yet have been suspended for uncertain reasons.
Most of the major Twitter accounts that were suspended on Twitter have created accounts on the decentralized social media network Mastodon, with differing levels of participation. Here are the links to their official accounts on Mastodon:
How can I follow someone on Mastodon without joining?
Almost all Mastodon servers allow public posts on the network to be viewed by anyone, regardless of whether you have a Mastodon account. You can simply point your web browser to any user’s profile and scroll through their posts.
If you want a centralized way to track multiple Mastodon users, the easiest way is to join a Mastodon server and follow people as you would on Twitter or any other social network (see more below). However, if you really don’t want to join Mastodon, you can also follow accounts using an RSS reader.
Every account on Mastodon automatically publishes an RSS feed that can be followed, For example, you can see an RSS feed of my original Mastodon posts at mas.to/@peterbutler.rss.
How do I join Mastodon?
Unlike Twitter, Mastodon is not a single website: It’s a decentralized network made up of thousands of websites talking to each other. To start posting on Mastodon (which until quite recently was called “tooting“) and following other people, you’ll need to create an account on a specific Mastodon server or “instance.”
To start following people and posting messages on the Mastodon social service, you begin by joining one specific instance. Each server (if open for registration) has its own sign-up process, but the majority only require a username, email address and password.
Once you’ve joined a Mastodon instance, however, you’re not limited to just following people and posts on that server. You can follow, favorite, reblog or reply to any Mastodon account that’s connected to the larger Fediverse.
How do I choose a Mastodon server?
The Mastodon organization provides a partial list of servers — about 100 — on its joinmastodon.org site. You can filter the servers by geographic region, language, topic registration process and whether or not they’re hosted by individuals or organizations. All servers on the official Mastodon site have agreed to follow the best practices of the Mastodon Server Covenant.
If you’re just testing Mastodon out, you might consider one of the official server instances run by the Mastodon organization. The first and biggest — mastodon.social — has been inundated with new users and has spawned a second mastodon.online server to pick up the slack.
The site provides useful data about each Mastodon instance, including number of users, number of “statuses” (posts), server uptime percentage and which versions of the Mastodon software it is running. It also lets you filter servers by language; minimum/maximum number of users; and prohibited/allowed content such as nudity, pornography, advertisements or entertainment spoilers. You can also click any instance name — fosstodon.org, for example, a server devoted to open-source software — to read a brief description of the community.
Once you’re actually on a Mastodon site, you can learn about the instance from its “about” page, browse community users on its “explore” page or view recent posts on its “public” page.
You should read the server rules for each Mastodon instance to make sure it’s a good fit, but don’t worry too much about which server you join. You can follow users on other servers and join and leave as many Mastodon servers as you’d like. If you do move around, Mastodon allows you to migrate all of your followers and lists with you.
How do I join a Mastodon server?
Joining a Mastodon server only requires a few personal details.
Screenshot by Peter Butler/CNET
Each Mastodon instance will have its own sign-up process, but the vast majority are the same. You provide a username, email address and password, check the box agreeing to the terms of service and server rules, and click “Sign Up.”
You’ll then see a notification asking you to check your email for a verification message. Click the “Verify email address” in that email message, and you’re done. You can now start posting on your Mastodon server and follow anyone in the Fediverse.
Because of the increased traffic to Mastodon servers since Elon Musk’s purchase of Twitter, some of those registration emails are taking a long time to show up or never arriving at all.
When I registered for the mas.to server, I got a confirmation email in about 15 minutes. Be patient, and try a new server if you can’t complete the registration for another.
After you verify your email address, your Mastodon account should be up and running. You can start posting or following people, though it will take a while to build up your feed. Web tools like Debirdify and FediFinder can jump-start the process by helping you find your Twitter contacts on Mastodon.
While most Mastodon servers offer the quick registration process described above, other, more private instances will ask that you apply for an invitation to the instance, which requires a manual review and longer registration time.
If you do decide to register on a Mastodon server and make it through the process, come visit me @peterbutler@mas.to to say hi.
This story is part of 12 Days of Tips, helping you make the most of your tech, home and health during the holiday season.
Your Android phone is like your car — it requires regular maintenance so you can identify any major issues, prevent future problems and keep it running at its best.
To start, you can give the exterior of your phone a good clean, since you’re likely putting it close to your face every day. Dust, dirt and gunk can quickly collect in the charging ports and speakers, and it’s not only bad for your hygiene — it can also shorten your phone’s lifespan.
But the most important upkeep work is under the hood, and it includes changing phone settings you may never have touched before.
An investment of just a few minutes can turn your Android phone into something that looks and feels new — at least until you’re able to upgrade. Read on to find five simple tips for decluttering, reorganizing and customizing your Android phone to keep it in tip-top shape.
As we mentioned above, part of making your Android phone feel new again is to also clean up the hardware. This $10 Amazon cleaning kit comes with the tools you need to clean your screen and all the stubborn dirt stuck in all the ports. And the best part is the kit can be used for any phone, as well as your headphones, laptop, tablet and more.
You’re receiving price alerts for Cleaner Kit for Airpod,Supfine Airpods Pro Cleaning Pen,Multi-Function Cleaner Kit Soft Brush for Phone Charging Port,Earbuds,Earpods,Earphone,Headphone, iPod,Case,iPhone,ipad,Laptop(White)
Delete all of your forgotten apps
Take a few minutes to go through your home screen or app drawer and delete any and all apps you no longer use. Not only do those apps take up precious storage, but they potentially have access the personal information or permissions you approved when the app was first launched.
How you go about deleting an app can vary based on who makes your device, but I covered all the bases in this post. Give it a read if you don’t see an uninstall option after long-pressing on the app’s icon.
You can also uninstall apps using the Play Store.
Jason Cipriani/CNET
Eliminate old files to free up storage
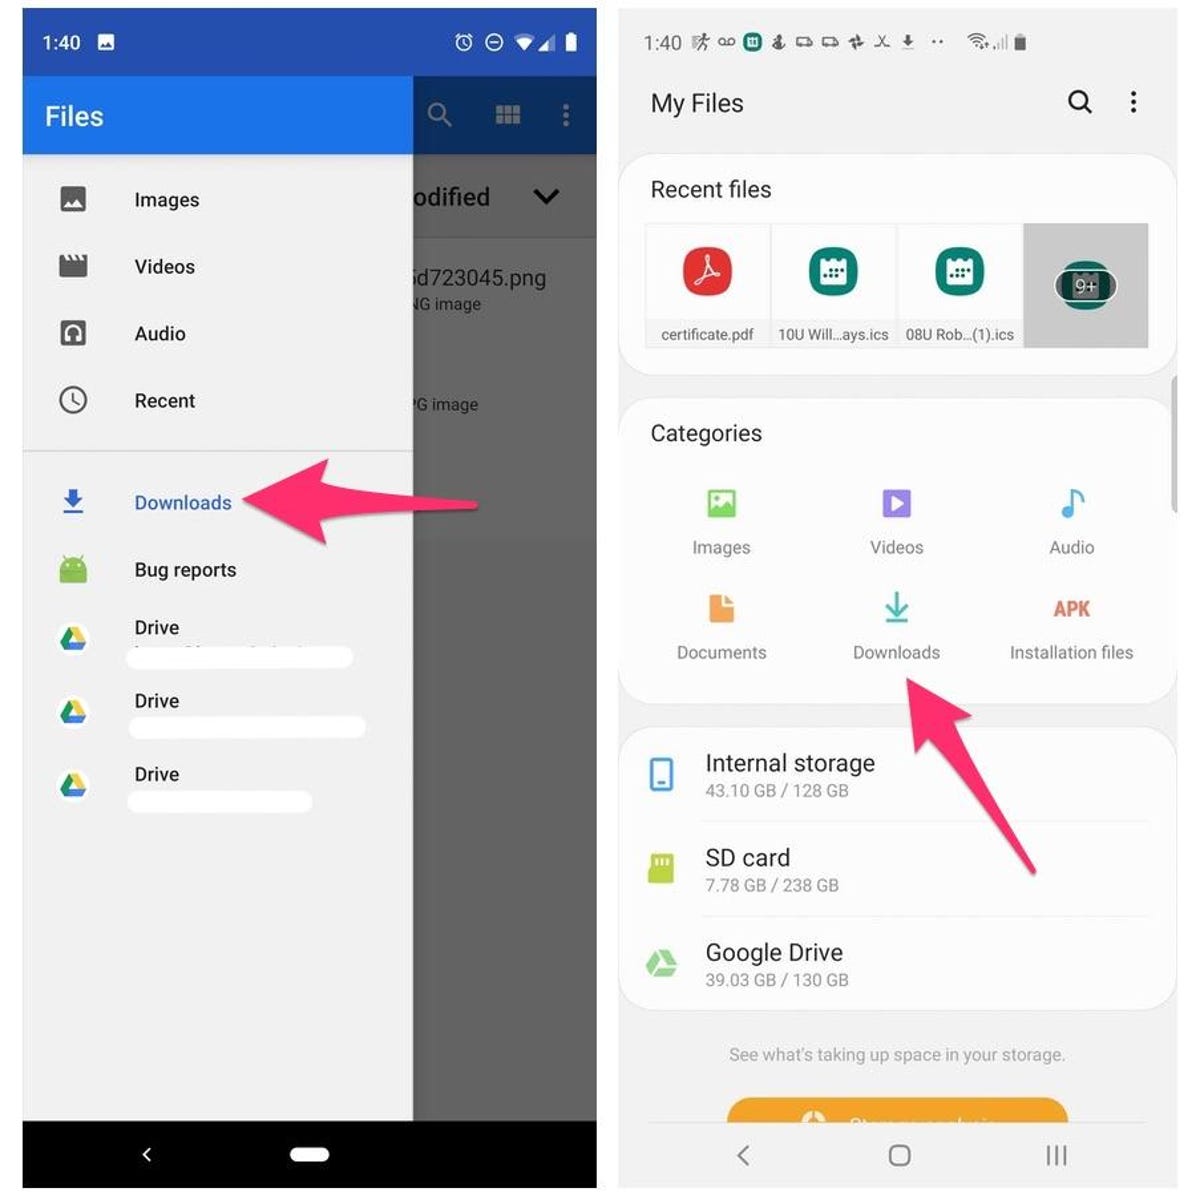
After removing any old apps, free up more storage by going through the files saved on your Android phone. It’s far too easy to forget about all of the files you’ve randomly downloaded — like the takeout menu of the new place down the road or a GIF a friend sent. And those files add up. The quickest and easiest way to manage your phone’s storage is to use the Files app that comes preinstalled.
Actually, some phones use a variation of that same app. On Samsung, for example, it’s called My Files. On the Pixel lineup, it’s just Files. On the OnePlus 10 Pro, it’s File Manager — you get the point.
I recommend opening the app drawer on your phone and reaching for “files.” Odds are that will reveal whatever your phone-maker calls the app.
Start with checking the Downloads folder, where you can either delete the files you no longer want or move them somewhere like Google Drive.
Most file apps will also reveal any large files that are saved on your device. For instance, the OnePlus 10 Pro’s File Manager app has a dedicated section in the app for files that are taking up a lot of space.
Left: Files app on a Pixel 3. Right: My Files on a Galaxy S10 Plus.
One of the best parts of Android is how much you can customize the entire look of your phone. From installing app icon packs to completely replacing the launcher your phone uses, there are plenty of options to personalize your phone.
While you can definitely jump into tweaking launchers and installing app icons, start by digging into the home screen settings your phone already provides. I do this once in a while and it’s surprising how subtle tweaks to aspects like app layout can make it feel like an entirely new phone.
Long-press on a blank area of your home screen, then select Home settings (or some variation of that). That will open the options for your home screen, where you can customize various settings.
Settings like the size of the app grid. It may seem like a small change to go from a grid of 4×5 apps to 5×5, but that extra column can make a big difference (the same can be said about shrinking the grid).
This is also where you’ll find settings for things like swiping down on the home screen to view notifications instead of having to swipe from the top of the screen.
Go through the respective settings your phone has and experiment with your home screen setup.
Your options for designing your home screen are endless.
Lexy Savvides/CNET
Optimize your device settings
Speaking of settings, now is a good time to go through and change any settings that have been annoying you. I have a roundup of settings you’ll want to change and customize on any Android phone to get the most out of it.
For example, turning on dark mode not only makes the app look better, but it saves battery life. And yes, I even show you how to stop app icons from automatically appearing on your home screen.
Device settings are easily ignored, but they’re important to get your device just right.
Andrew Hoyle/CNET
Customize your privacy options
Before you take a break, do yourself and your Android phone one last favor — double-check your privacy settings.
Open the Settings app then tap Privacy > Permissions Manager. Go through each category to see which apps currently have access to which treasure trove of your personal data. Find an app you don’t want to have access to your location? Turn it off. The same goes for contacts, calendar or camera.
It doesn’t take long to go through each section, and even if it did, it’s well worth the effort.
Use the Permissions Manager to control which apps have access to your data.
The iPhone 14 is only a few months old, but I’m already curious to see what’s in store for the iPhone 15. Apple gave us many of the upgrades we’ve been waiting for with the iPhone 14 — especially on the Pro models. Such features include an always-on display for showing the time at a glance and better multitasking through the Dynamic Island.
Still, there are a few ways Apple could take things further with the iPhone 15. For example, the company could do a better job of bringing certain Pro-exclusive features down to its less-expensive iPhone models. Samsung frequently does this with its cheaper phones, and I’d like to see Apple embrace this approach more fully, too. The Dynamic Island also shows a lot of promise already, but Apple could make it an even more integral part of the iPhone experience.
Apple typically announces its new iPhones in September and releases them shortly thereafter. Here’s what I’m hoping to see from the iPhone 15 next year.
Now playing:Watch this:How to Pick the Best iPhone for You
13:45
USB-C charging
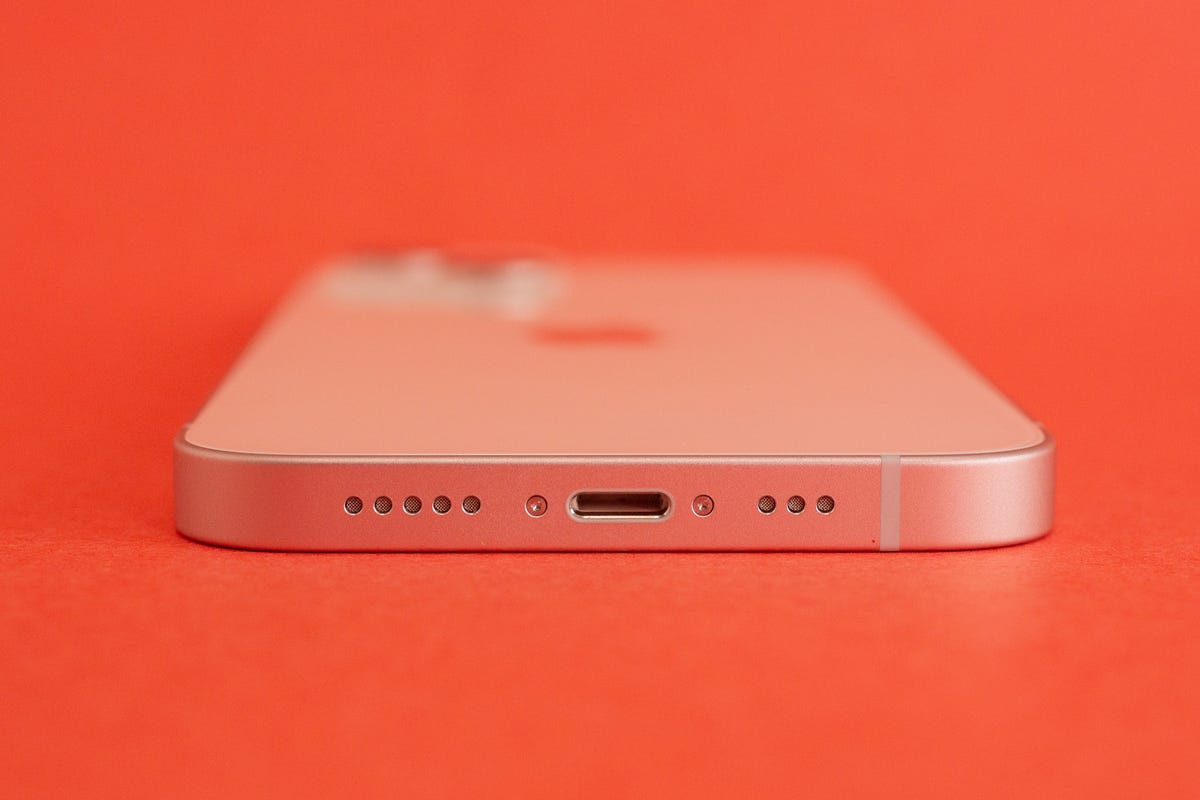
The iPhone still needs a Lightning cable to charge, but that may not be the case for long.
Sarah Tew/CNET
The Lightning connector has been around for 10 years, and it’s time for a change. With so many Apple products making the switch to USB-C, there’s never been a bigger need for one charger that powers all devices. Apple currently has four different types of chargers on the market: Lightning (for iPhones, the 2021 iPad, AirPods and a few other accessories), USB-C (for most new iPads and MacBooks), MagSafe (the wireless magnetic charger for iPhones) and MagSafe 3 (the magnetic charger for the 2022 MacBook Air, 14-inch MacBook Pro and 2021 16-inch MacBook Pro).
Making new iPhones compatible with USB-C instead of Lightning means you could use the same cable to charge your new phone, the Mac and new iPads. There’s a good chance most of your other electronics use USB-C too.
The good news is that a USB-C iPhone may not be very far away. Greg Joswiak, Apple’s senior vice president of worldwide marketing, confirmed that the company would comply with the European Union’s mandate that all phones sold in the region would need to have a USB-C charging port. He made the comments during an interview at the Wall Street Journal Tech Live conference. Apple has also previously tested USB-C iPhones, according to Bloomberg.
However, Apple has not revealed any specifics about its plans. We don’t know if Apple will begin making the switch to USB-C with the iPhone 15 or if it will wait until the following year, since the new rules require USB-C by the end of 2024. Apple also has not said whether USB-C will be coming to all iPhones or just European models, although analysts expect Apple to make a complete shift to USB-C.
Higher refresh rates on the regular iPhone 15
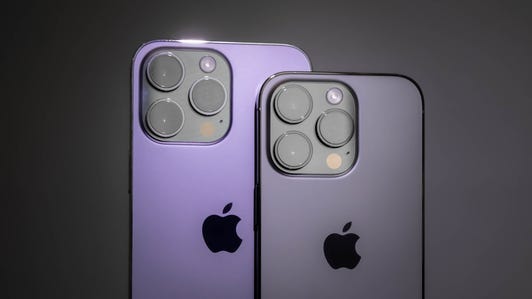
The iPhone 14 Pro (pictured) has ProMotion, but the regular iPhone 14 doesn’t.
James Martin/CNET
Starting with last year’s iPhone 13 Pro, Apple added higher refresh rates to the displays on its premium smartphones. The iPhone 13 Pro, iPhone 13 Pro Max, iPhone 14 Pro and iPhone 14 Pro Max have a feature Apple calls ProMotion, which can boost the screen’s refresh rate as high as 120Hz depending on what’s being shown. This results in more fluid scrolling and smoother animations.
It’s a small touch, but one that makes the experience feel more pleasant — as my colleague Patrick Holland wrote in his review of the iPhone 13 Pro. While having a high refresh rate isn’t a deal breaker, it’s become standard on most smartphones. Google’s $599 Pixel 7 has a 90Hz refresh rate and Samsung’s $800 Galaxy S22 includes a 120Hz refresh rate, for instance. Even the $450 Galaxy A53 5G has a 120Hz display, making its absence on the $799 iPhone 14 feel even more noticeable.
More features that use the Dynamic Island
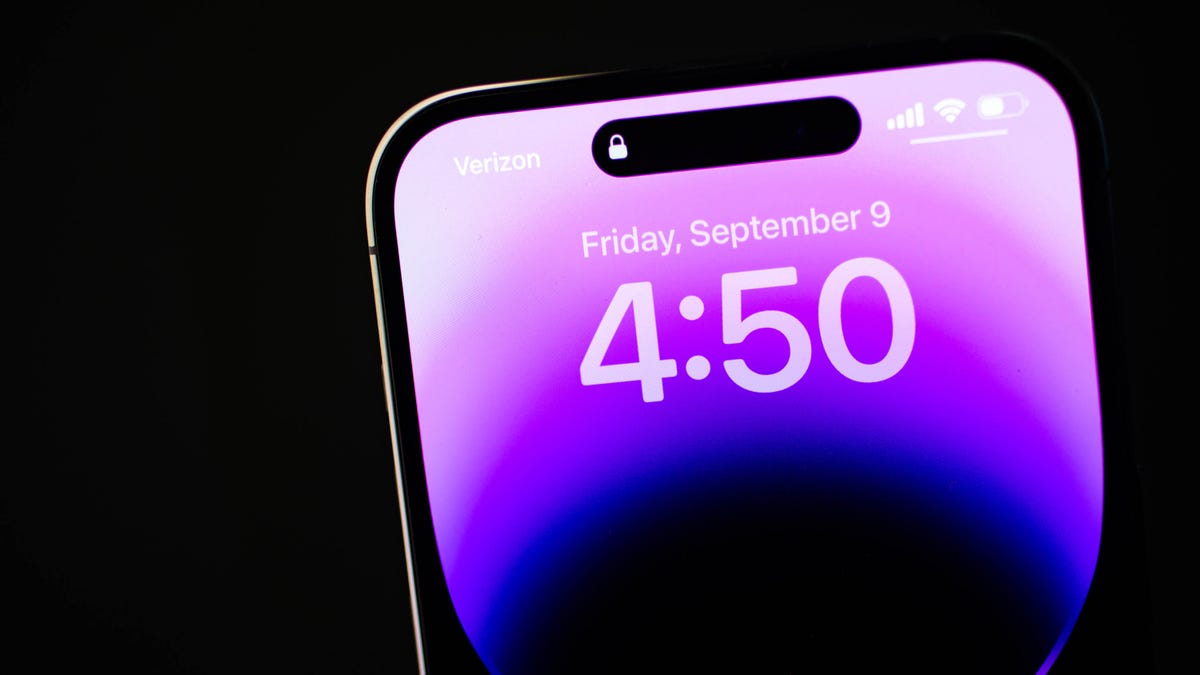
The iPhone 14 Pro Dynamic Island.
James Martin/CNET
The Dynamic Island, which is available only on the iPhone 14 Pro and Pro Max, is essentially a second miniature screen. Instead of getting rid of the notch, Apple gave that space a new purpose by using it to display information from other apps.
For example, you can see music that’s currently playing, timers, and directions in Maps at the top of the screen — eliminating the need to switch between apps. The Dynamic Island makes it easier to multitask on the iPhone 14 Pro, an area in which Apple has traditionally lagged behind Samsung and other Android phones that support split-screen apps.
Now that the Dynamic Island has proven its value, I’d like to see Apple do even more with it next year. It would be interesting to see Apple use this space to make proactive suggestions, like apps that may be useful based on your activity, the time of day or your schedule. Part of the Dynamic Island’s usefulness also depends on what app developers decide to do with it, too. There are already a handful of apps that incorporate the Dynamic Island, such as Pixel Pals, which essentially looks like a Tamagotchi for your iPhone. But I’m hoping to see more practical use cases for the Dynamic Island that make it feel like a more critical part of your phone, similar to the iPhone’s home screen widgets.
If Apple does expand the Dynamic Island’s functionality in the future, there’s a chance you may not need the iPhone 15 to take advantage of it. Instead, Apple could build new Dynamic Island features into its next major software update, which is likely to be called iOS 17.
A smaller notch on the regular iPhone 15
The iPhone 14 and 14 Plus (pictured) still have a notch.
James Martin/CNET
If Apple isn’t going to bring the Dynamic Island to the base iPhone 15, I hope it at least makes the notch less intrusive. The notch hasn’t changed all that much since its debut on the iPhone X in 2017, aside from the Dynamic Island on the iPhone 14 Pro and Pro Max. Meanwhile, other smartphone makers like Samsung, Google and OnePlus have found ways to provide edge-to-edge screens on their devices without carving out a large notch for the front-facing camera. Reducing the notch’s size would likely result in more screen space and a more modern look for the iPhone 15.
If Apple does move in this direction, we might have to wait until the iPhone 16 to see it. Ming-Chi Kuo, an analyst with TF International Securities known for his Apple predictions, estimates under-display Face ID and front-facing camera sensors will be coming in 2024.
That said, there are good reasons why the iPhone still has a larger notch than many of its competitors. It mostly comes down to Face ID, which is more sophisticated than the facial recognition systems found on other phones like the Pixel 7, which Google cautions shouldn’t be used for authenticating sensitive data like payment information.
Reverse wireless charging
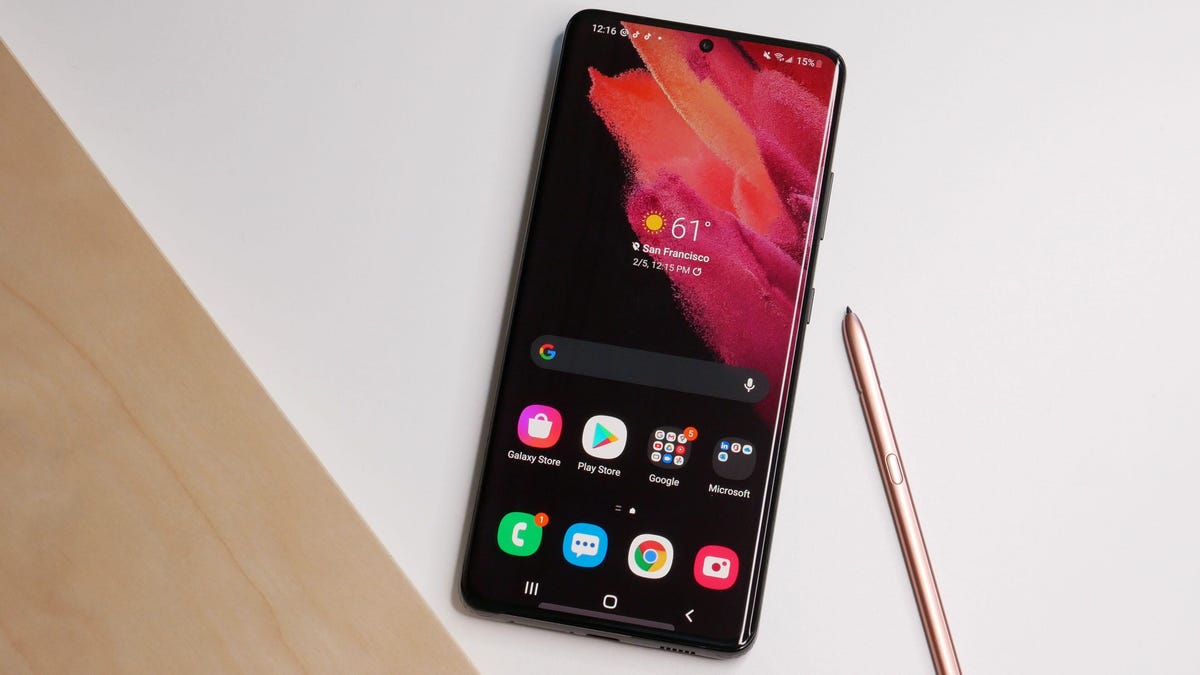
Certain Samsung devices have Wireless PowerShare for charging other devices.
Sarah Tew/CNET
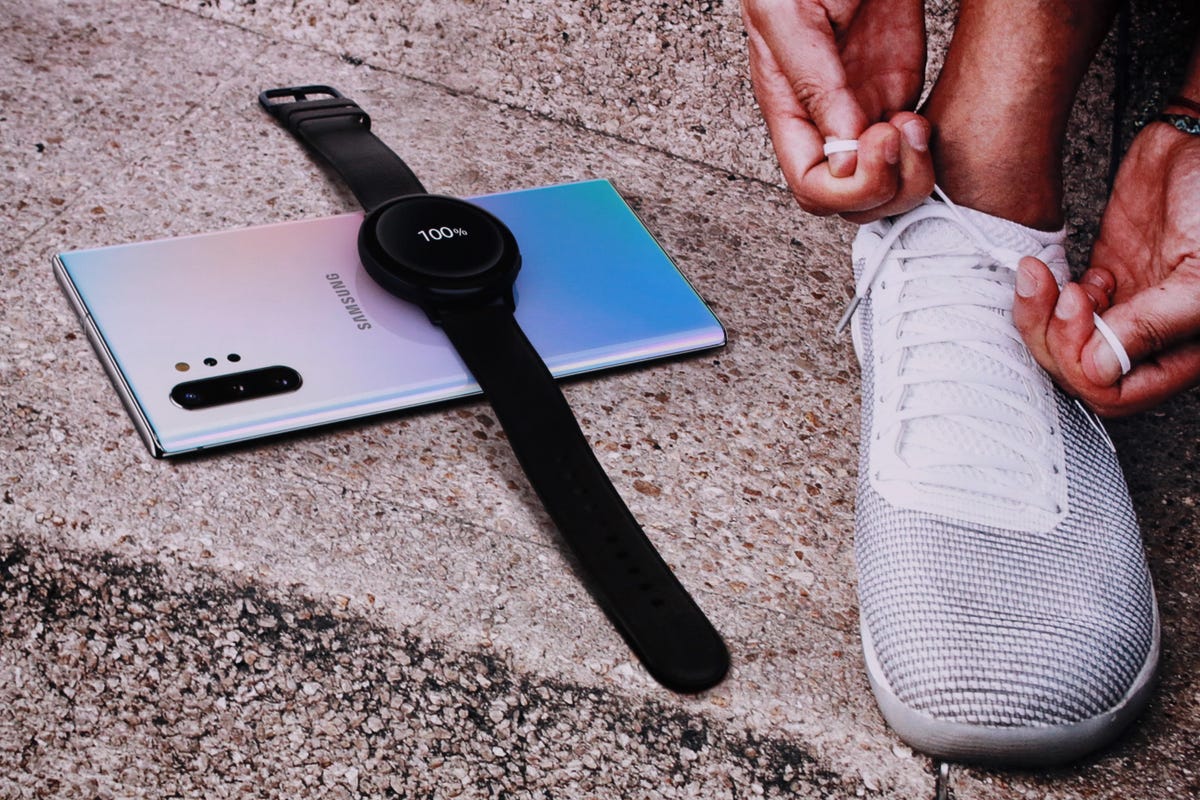
Many Android phones have reverse wireless charging, which is exactly what it sounds like. You can use the back of phones like the Galaxy S22 and Pixel 7 to charge other devices, like a smartwatch or earbuds. While it’s likely not a must-have for most people, I can imagine it being very useful for avid AirPods users.
No one likes being stuck on their morning commute with a dead pair of AirPods. Having the option to get just enough juice to make it through my 30-minute train ride by placing my AirPods on the back of my phone for a few minutes could be a game changer. Yes, you’ll have to sacrifice some of your phone’s battery. But if you’re traveling to a destination where you’ll easily be able to charge your phone once you arrive — like the office — it might be worth that tradeoff.
The return of Touch ID
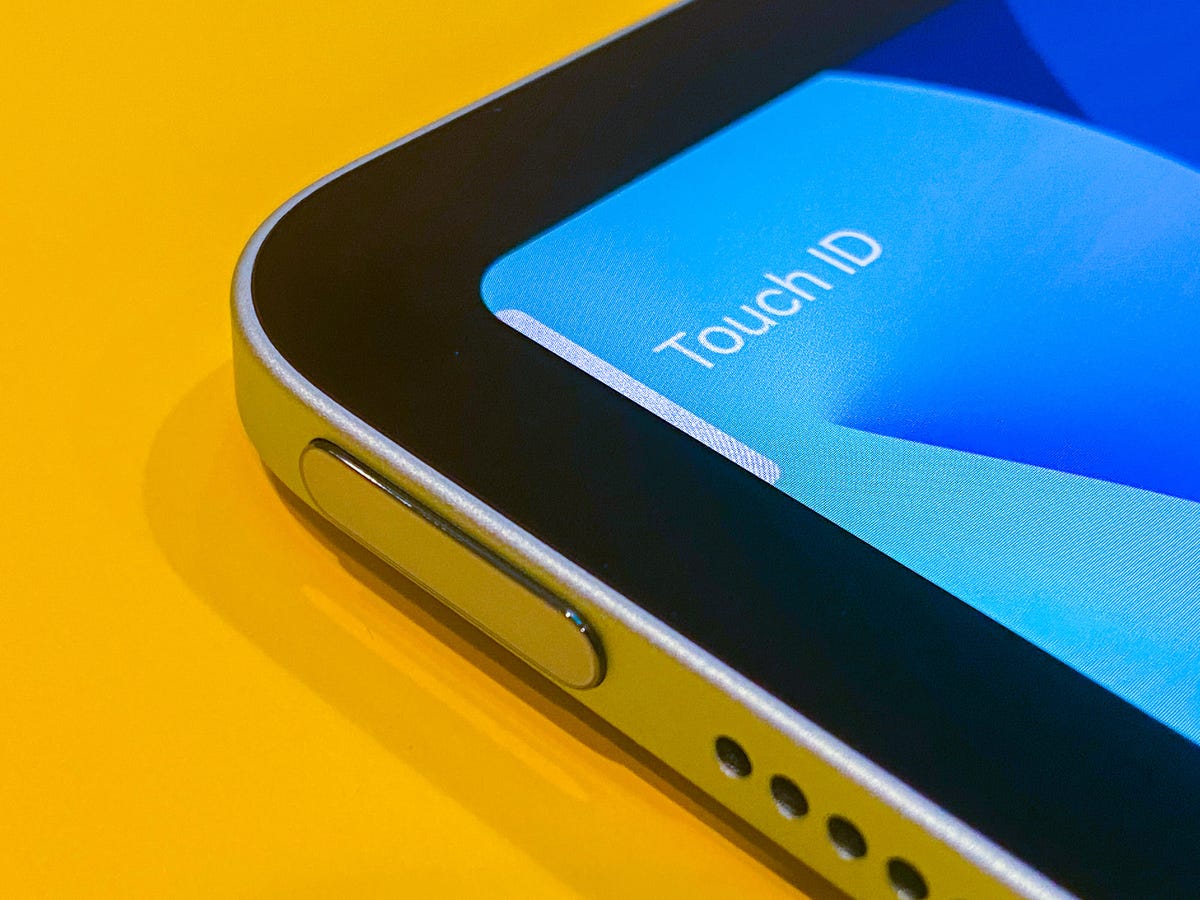
The iPad Air includes Touch ID in the power button.
Scott Stein/CNET
While Face ID is convenient in many situations, there are instances in which using your finger to unlock your phone is just more practical. That’s why I’m hoping Touch ID makes a comeback on the iPhone. Maybe you haven’t had time to set up Face ID so that it works with a mask yet, or perhaps you’re just not holding your iPhone at the right angle for Face ID.
Apple clearly sees the value in fingerprint recognition, considering the top button on the latest standard iPad and iPad Air have Touch ID. Doing the same for the iPhone 15 would add more convenience, giving users the choice to use Face ID or Touch ID depending on the situation. Most Android phones have both a fingerprint reader and some form of facial recognition, so it would be great to see iPhone users get the same options.
It’s unclear whether Apple will ever bring Touch ID back to the iPhone. While the analyst Kuo previously predicted that future iPhones would get an under-display fingerprint sensor, he changed his outlook in March 2022.
The iPhone 14 Pro and Pro Max already address many of the previous shortcomings of Apple’s smartphones. The updates I’m hoping to see in the iPhone 15 may not seem revolutionary, but they’re bound to make everyday tasks like charging and unlocking your phone a bit easier.
You’d probably be a little creeped out if someone kept track of where you went each day over the holidays, right? Believe it or not, that’s what Google and other companies routinely do online. Google offers many helpful apps, but if you have one of the tech giant’s apps on your iPhone or Android device, there’s a chance the company knows your location. Even if your Google account’s location history is disabled, some Google apps could still be storing your location with a timestamp.
After a 2018 investigation by the Associated Press, Google added features to make it easier to control what location and other data is saved, and what is deleted with features like Your Data in Maps and Search, which give you quick access to your location controls.
However, Google was sued by several states in January 2022 over its use of location data. The lawsuits alleged that Google makes it “nearly impossible” for people to prevent their location from being tracked. Google defended itself against the accusations, saying that the claims were inaccurate and based on outdated assertions of its settings.
The good news is that there are settings you can check to make sure Google isn’t tracking you. We’ll tell you how to check and turn off Google tracking, and what the outcomes of doing so might be.
Now playing:Watch this:Stop Google from storing your location and data history…
4:34
Turn off Google’s location tracking
Here’s how to stop Google’s ability to log your location.
1. Open Google.com on your desktop or mobile browser, and log into your Google account by using the button in the top right corner.
2. Select your user icon in the top right corner and select Manage your Google account.
3. Select Privacy & personalization.
4. Under Things you’ve done and places you’ve been, select Location history inside the History settings box. This opens Activity controls.
5. Beneath LocationHistory, select the button on the right that reads Turn off. This opens a pop-up window.
6. Scroll to the bottom of this window and select Pause.
Turning off location history only removes where you’ve been from the Google Maps Timeline feature, which logs your location with certain data at a specific time. Google’s support page on the matter says that even when turned off, “some location data may continue to be saved in other settings,” like your web and app activity. Google told us that it uses this data to make features more personalized and helpful, and that this information is never shared with third parties or advertisers. But if you still aren’t comfortable with that, with a few more steps, you can stop Google from knowing where you are 24/7.
Stop Google from storing your locations from Maps.
Angela Lang/CNET
What does this stop Google from storing?
Pausing this setting prevents Google from storing location markers associated with specific actions and stops storing information collected from searches or other activity. Turning it off keeps your approximate location private and other places you go — like your home address.
Note that to use certain features effectively, like the Maps app, Google will still need to access your location. However, completing the steps above prevents it from storing any future activity. When Google timestamps your activity within a general area, it is within a span of more than 1 square mile with typically more than 1,000 users to protect personal privacy. Google’s help page on the matter says this helps them to detect unusual activity, such as a sign-in from another city, while maintaining personal privacy.
However, you can grant Google permission to use your precise location — your exact location, like a specific address — for the best search results for where you are.
Pros and cons of turning off Google tracking
Turning off this default setting does have some drawbacks. While Google’s settings may seem intrusive to some, they also help cultivate an ultra-personalized online experience, such as helping people find nearby businesses instead of ones in another city, or seeing personalized ads. They help give users more relevant information instead of random information, according to Google.
Turning off tracking means you’ll see less relevant ads, less helpful search recommendations and get a less personalized experience overall using the search engine and its apps and services. For those who enjoy personalized ads, turning off tracking will prevent Google from predicting what you might care about. However, for those who prioritize privacy over everything, turning this setting off may be worth the loss of specificity.
The bottom line: You can maintain your privacy and lose the personalized internet experience, or continue to see relevant ads and search suggestions instead of more random, unfiltered information.
Now playing:Watch this:Google knows where you are
6:00
Delete old location history
Disabling tracking will prevent Google from storing new location information, but it doesn’t delete any prior data gathered. Here’s how to delete that information.
1. Open Google.com on your desktop or mobile browser, and log into your Google account by using the button in the top right corner.
2. After logging in, select your user icon in the top right corner and select Manage your Google account.
3. Select Privacy & personalization.
4. Under Things you’ve done and places you’ve been, select Location history inside the History settings box. This opens Activity controls.
5. Select Manage history near the bottom of the page. This opens a map with a timeline in the top left corner. The map shows where you’ve been and the timeline shows where you were at what time.
6. To delete your location for a certain date, select the date in the timeline. That date will then be displayed below the timeline. Select the trash icon to the right of the date. In the pop-up window, select Delete day.
7. To delete all your location history at once, select the trash icon near the bottom right corner of the map near the Map and Satellite display options.
8. In the pop-up window, select the box that reads I understand and want to delete all Location History. Select Delete location history.
Stop Google from collecting your web and app activity
When you make a new Google account, Google minimizes the amount of data it collects by only keeping 18 months’ worth of web and app activity by default — anything older than that is deleted automatically. Here’s how to stop Google from collecting your future web and app activity.
1. Open Google.com on your desktop or mobile browser, and log into your Google account by using the button in the top right corner.
2. After logging in, select your user icon in the top right corner and select Manage your Google account.
3. Select Privacy & personalization.
4. Under Things you’ve done and places you’ve been, select Web & App Activity inside the History settings box. This opens Activity Controls.
6. Select Turn off underneath Web & App Activity.
7. Scroll to the bottom of the pop-up window and select Pause.
1. Open Google.com on your desktop or mobile browser, and log into your Google account by using the button in the top right corner.
2. After logging in, select your user icon in the top right corner and select Manage your Google account.
3. Select Privacy & personalization.
4. Under Things you’ve done and places you’ve been, select Web & App Activity or Location History inside the History settings box. This opens Activity Controls for the setting you want to change.
6. Select Choose an auto-delete option under Auto-delete.
7. Select your desired timeframe (3 months, 18 months or 36 months) from the Auto-delete activity older than drop-down menu.
8. Select Next.
9. Select Got it.
Delete all of your Google web and app activity
Even if you’ve stopped Google from collecting your web and app activity, Google has your data from before. Here’s how to delete your previous web and app activity.
1. Open Google.com on your desktop or mobile browser, and log into your Google account by using the button in the top right corner.
2. After logging in, click your user icon in the top right corner and select Manage your Google account.
3. Click Privacy & personalization.
4. Under Things you’ve done and places you’ve been, select Web & App Activity inside the History settings box. This opens the Activity Controls.
5. Select Manage allWeb & App Activity near the bottom of the screen.
6. Under Search your activity, click Delete on the right.
7. The new window will display the options to delete your Web & App Activity from the Last hour, Last day, All time or a Custom range. Select All time.
8. A new window will open and ask you to confirm you would like to delete your activity, which will be displayed. Select Delete.
On a chilly Saturday afternoon in San Francisco, I was under a patio heater with a group of friends when someone said we should get a group photo. What happened next was surprising. Instead of using his phone to take a commemorative photo, my friend pulled out a point-and-shoot camera. I thought to myself, “Wait. The phone killed the point-and-shoot camera years ago. Why didn’t he just use his iPhone?” Granted it was the high-end Sony RX100 VII, which is an excellent compact camera and one of the few point-and-shoots still made today.
Phones from Apple, Samsung and Google include some of the best phone cameras you can buy, like the iPhone 14 Pro, Google Pixel 7 Pro and Samsung Galaxy S22 Ultra. But for professional photographers and filmmakers, that’s not always enough. The holy grail is being able to have a truly large image sensor like the one you’d find in a high-end mirrorless camera and a lens mount that could attach to your phone. Sounds simple enough right? Wrong.
Everyone from Samsung to Panasonic, Sony and Motorola has tried to make this dream a reality in some way. Now Xiaomi, the world’s third largest phone-maker (behind Samsung and Apple) is the latest to rekindle the quest for the phone camera holy grail. The company has a new prototype phone that lets you mount a Leica M lens on it.
But this is just a concept. If you’re wondering whether phones will ever make dedicated pro cameras obsolete the way they did with point-and-shoots, the answer is a resounding no. The past decade has shown us why.
Why phone cameras are limited
First, it’s important to understand how your phone’s camera works. Behind the lens is a tiny image sensor, smaller than a single Lego brick. Sometimes there are headlines that Sony, Sharp or, years ago, Panasonic put a 1-inch sensor in a phone. Sadly, that name doesn’t refer to the actual dimensions and in reality, a 1-inch image sensor is about 0.6 of an inch diagonally or, for the sake of approximation, two Lego bricks. The 1-inch sensor is the hoverboard of cameras, but it’s still one of the largest to be put into a phone.
Dedicated cameras have sensors that are closer to 12 Lego bricks (positioned side-by-side in a four-by-three rectangle) and most come with a lens mount that lets you change lenses. The “holy grail” is to put one of these larger sensors into a phone.
But bigger sensors are more expensive than the little ones used in your iPhone and there are space considerations. A lens for a phone camera sensor is relatively small. But lenses for a full-frame sensor are larger and require more space between the back of the lens and the sensor. Phones simply lack this room without becoming significantly thicker.
Every year we see Apple, Samsung and the like take small steps toward improving phone photography. But phone camera hardware has largely hit a ceiling. Instead of radical camera improvements, we get modest upgrades. This could be a sign that companies have honed in on what consumers want. But it could also be a consequence of space and size limitations of tiny sensors.
Instead smartphone-makers use computational photography to overcome a tiny sensor’s limitations — smaller dynamic range and light sensitivity. Google, Apple, Samsung all use machine learning algorithms and artificial intelligence to improve the photos you take with your phone.
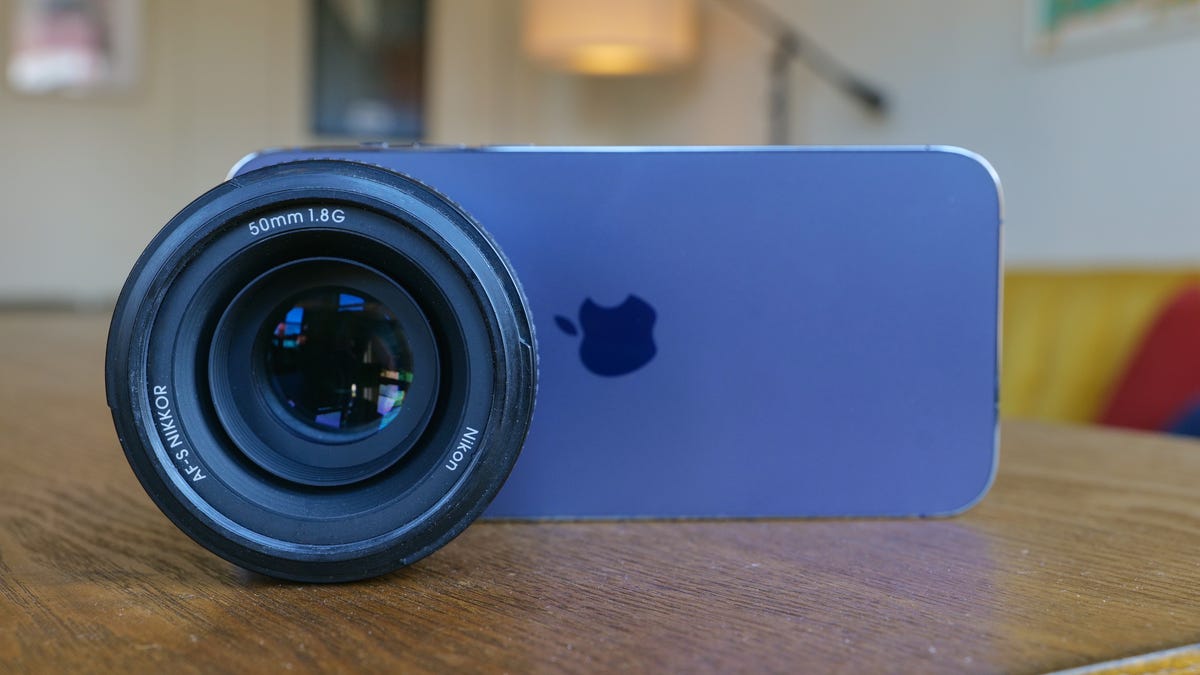
But hardware is also important. Earlier this month Tim Cook, Apple’s CEO, shared a photo on Twitter, above, of a visit to Sony in Japan. While it’s been widely assumed that Apple uses Sony’s image sensors in the iPhone, this is the first time Cook formally acknowledged it. And as CNET readers already know, Sony phones like the Xperia 1 IV have some of the best camera hardware found on any phone sold today.
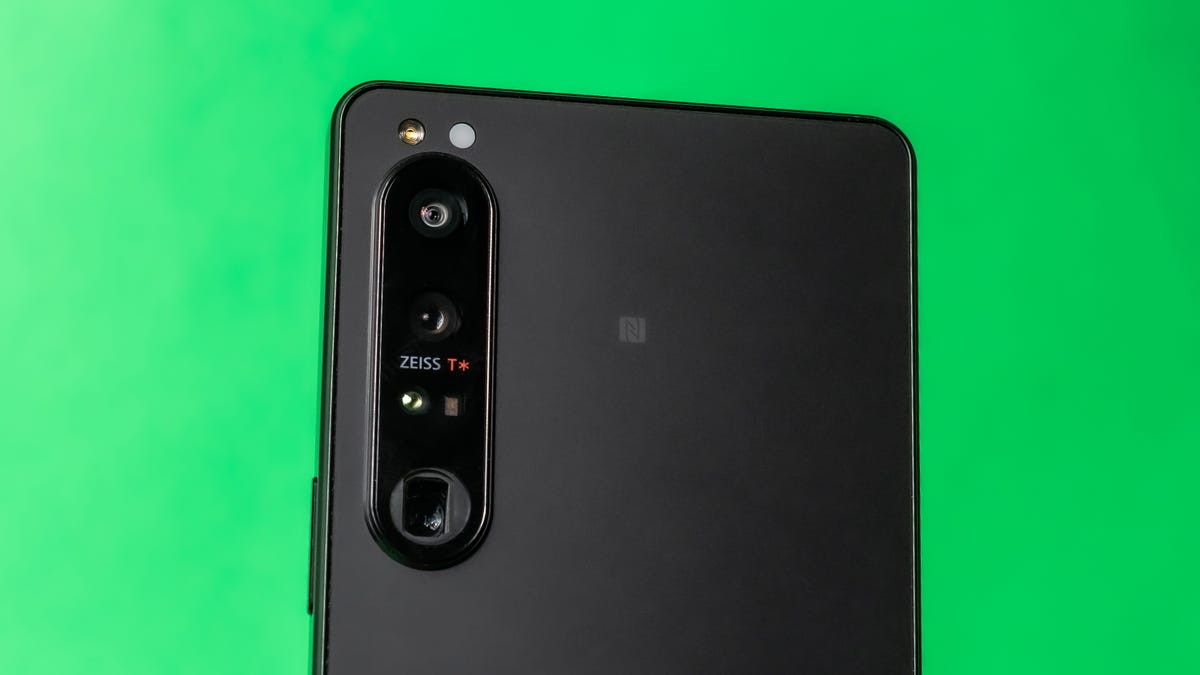
The Xperia 1 IV won a CNET Innovation award for its telephoto camera, which has miniature lens elements that actually move back and forth, like a real telephoto lens. The result is that you can use the lens to zoom without cropping digitally, which degrades the image. Can you imagine an iPhone 15 Pro with this lens?
The bottom cutout on the Sony Xperia 1 IV’s camera bump is for the telephoto camera. The phone has a lens with elements that actually move to zoom in — a first on a modern phone.
James Martin/CNET
The Xiaomi 12S Ultra Leica lens prototype is so 2013
That brings us to Xiaomi, which is the latest company attempting to merge pro-level cameras with your phone. In November, Xiaomi released a video of a phone camera concept that shows a Leica lens mounted on a 12S Ultra phone. This prototype is like a concept car: No matter how cool it is, you’ll never get to drive it.
The Chinese company took the 12S Ultra and added a removable ring around its circular camera bump. The ring covers a thread around the outside edge of the camera bump onto which you can attach an adapter that lets you mount Leica M lenses. The adapter’s thickness is the same distance that a Leica M lens needs to be positioned away from the sensor in order to focus.
A few caveats: The Xiaomi 12S Ultra concept uses an exposed 1-inch sensor, which as I mentioned earlier, isn’t actually 1-inch. Next, this is purely a concept. If something like this actually went on sale, it would cost thousands of dollars. A nice dedicated camera like the Fujifilm X100 V, which has a much bigger sensor, costs $1,399 in comparison.
Xiaomi isn’t the first phone-maker to try this. In 2013, Sony took an image sensor and put it on the back of a lens that has a grip to attach to the back of a phone. The idea is to use your phone’s screen as the viewfinder for the camera system, which you can control through an app. Essentially you bypass your phone’s cameras.
Sony made several different versions of this “lens with a grip” and used sensors that were just a bit bigger than those found in phone cameras. Sony also made the QX-1 camera, which had an APS-C sized sensor that in our Lego approximation is about six bricks positioned side-by-side in a three-by-two rectangle. That’s not as large as a full-frame sensor, but vastly bigger than your phone’s image sensors.
From left to right: a Sony lens, the QX-1, a phone grip and a Sony Xperia phone.
Sony
The Sony QX-1 has a Sony E-mount, meaning you can use various E-mount lenses or use adapters for Canon or Nikon lenses. Because the QX-1 is controlled with Bluetooth, you could either attach it to your phone or put it in different places to take photos remotely.
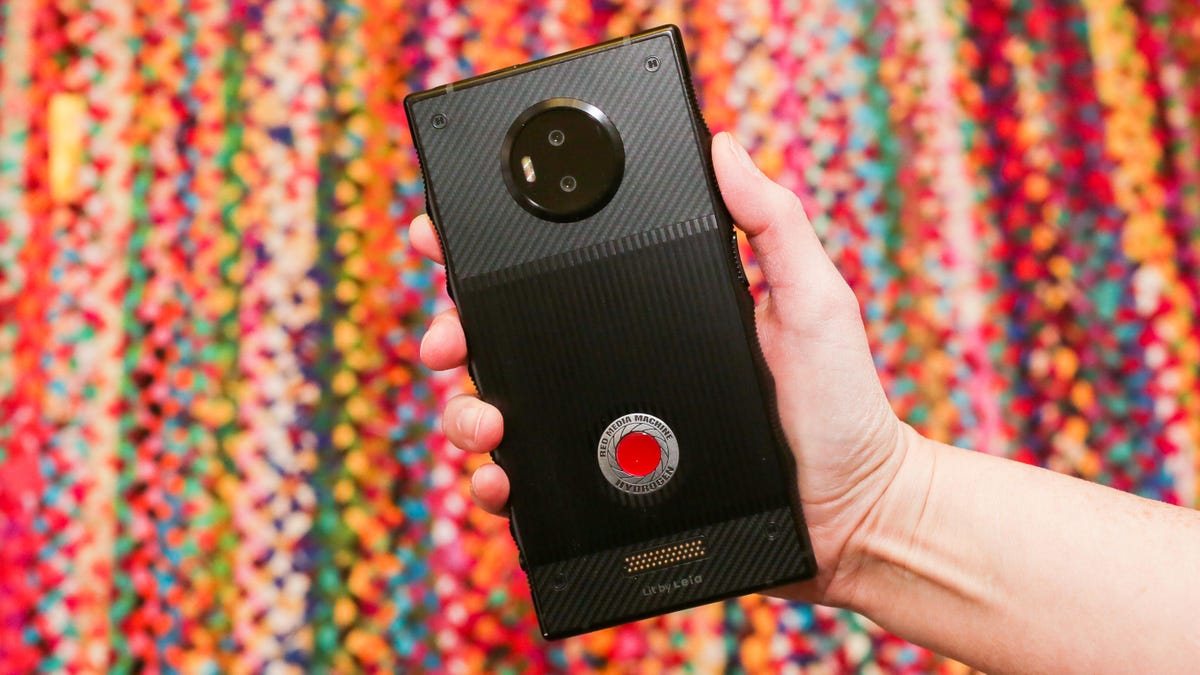
The QX-1 came out in 2014 and cost $350. Imagine having something like this today? I would definitely buy a 2022 version if Sony made it, but sadly the QX-1 was disconitntued a few years after it went on sale. That’s around the time that Red, the company that makes cinema cameras used to film shows and movies like The Hobbit, The Witcher, Midsommar and The Boys, made a phone called the Red Hydrogen One.
The Red Hydrogen One was a beast of a phone with a lot of hope and hype.
Sarah Tew/CNET
Despite being a phone made by one of the best camera companies in the world, the $1,300 Red Hydrogen One’s cameras were on par with those from a $700 Android phone. The back of the phone had pogo pins designed to attach different modules (like Moto Mods), including a “cinema camera module” that housed a large image sensor and a lens mount, according to patent drawings. The idea is that you would use a Hydrogen One and the cinema mod to turn the phone into a mini-Red cinema camera.
A diagram that shows the Red Hydrogen One phone and attachable modules for a battery and a cinema camera with sensor and lens mount.
Red
2023 will show that pro cameras won’t be killed off by our phones
There aren’t any rumors that Apple is making an iPhone with a camera lens mount, nor are there murmurs of a Google mirrorless camera. But if Xiaomi made a prototype of a phone with a professional lens mount, you have to imagine that somewhere in the basement of Apple Park sits an old concept camera that runs an iOS-like interface, is powered by the iPhone’s A-series chip and able to use some of the same computational photography processing. Or at least that’s what I’d like to believe.
How amazing would photos look from a pro-level dedicated camera that uses the same processing tricks that Apple or Google implement on their phones? And how nice would it be to have a phone-like OS to share those photos and videos to Instagram or TikTok?
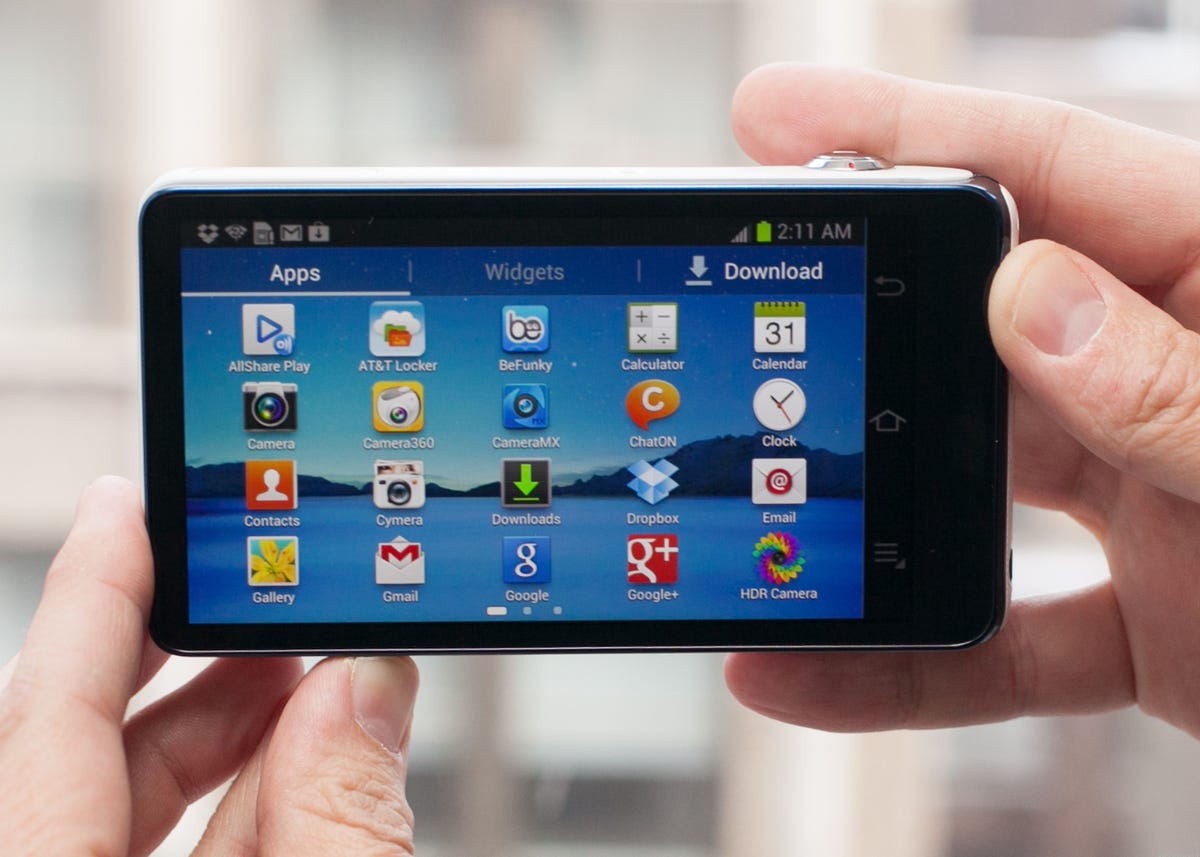
The Samsung Galaxy Camera was a point-and-shoot that ran on Android. The menu had apps just like a phone.
I don’t think Apple will ever release a standalone iOS-powered camera or make an iPhone with a Leica lens mount. The truth is that over the past decade, cameras have gotten smaller. The bulky dSLRs that signified professional cameras for years are quickly heading into the sunset. Mirrorless cameras have risen in popularity. They tend to be smaller, since they don’t need the space for a dSLR mirror box.
If there is a takeaway from all of this, it’s just a reminder of how good the cameras on our phones have gotten in that time. Even if it feels like they’ve plateaued, they’re dependable for most everyday tasks. But they won’t be replacing professional cameras anytime soon.
If you want to step up into a professional camera, find one like the Fujifilm X100 V or Sony A7C, that pack a large image sensor, a sharp lens and can fit into a coat pocket. And next time I’m at a dinner party with friends, I won’t act so shocked when someone wants to take a picture with a camera instead of a phone.