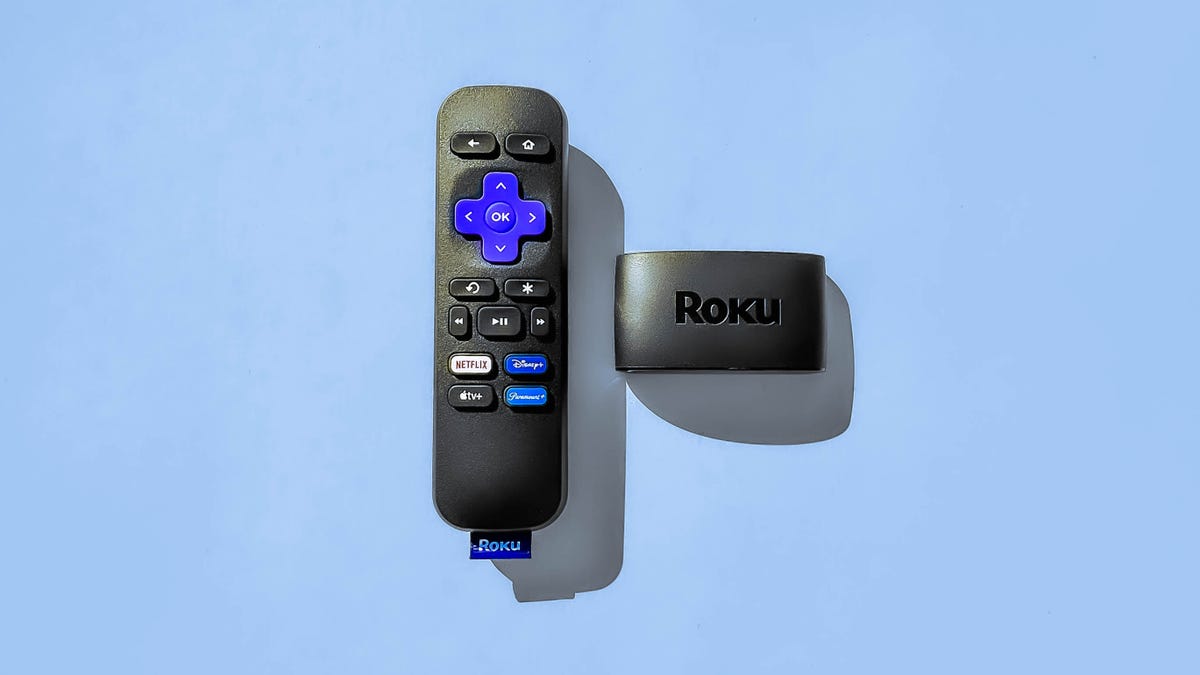
Roku has surpassed 70 million active users, the streaming platform said Thursday. It reached the milestone shortly after the close of 2022, during which Roku users streamed 87.4 billion hours of content on the platform. That was a 19% increase from 2021 and the most hours streamed on any platform in Canada, the US and Mexico, the company said.
The release didn’t claim that Roku had the most active users, a distinction that almost certainly falls to Amazon’s Fire TV, which last reported 50 million active users in 2020.
Roku’s full report on active users and streaming hours is due out in February.
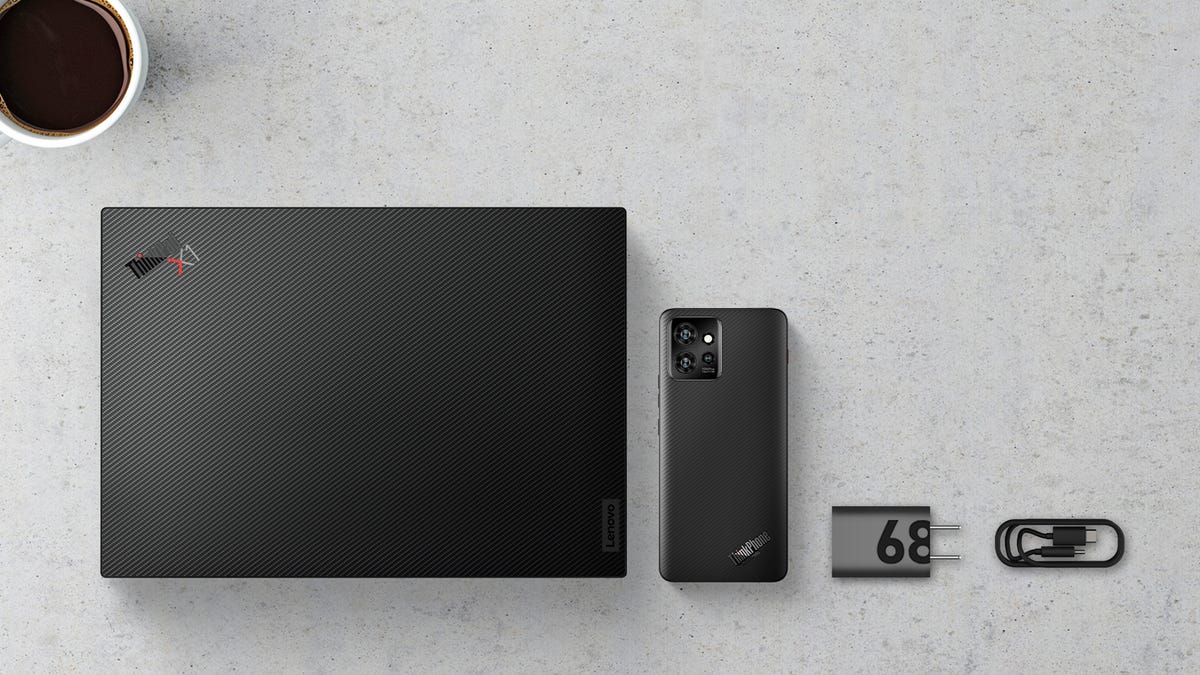
Lenovo’s popular ThinkPad laptop line is finally getting a mobile sidekick. The ThinkPhone by Motorola, announced at CES, will have a similar aesthetic to that of the ThinkPad computers, down to their signature red button. Motorola, which is owned by Lenovo, appears to have focused on three specific areas for the business-focused ThinkPhone: security, durability and productivity. Motorola has not said how much the device will cost.
Among the ThinkPhone’s most interesting features is its customizable red key, which can be used to launch certain apps or features, such as the Walkie Talkie functionality in Microsoft Teams. It sounds similar to the programmable button on Samsung’s XCover6Pro, a phone that was also developed for enterprise and industrial uses.
It’s a work-oriented device, so the ThinkPhone unsurprisingly includes a variety of productivity features that make it easier to connect the phone to your PC. Many of these features are already available through Motorola’s existing Ready For software, which you can find on previously launched phones like the Motorola Edge 20 and Edge 20 Plus. These include the ability to use the ThinkPhone as your laptop’s webcam for video calls, automatic connectivity to your Windows laptop via Wi-Fi when it’s nearby, drag-and-drop file transfers between the ThinkPhone and your Windows computer and a unified clipboard. The difference, however, is that some of these features can be accessed with the ThinkPhone’s red key, making it stand out from Motorola’s other devices.
ThinkPhone by Motorola next to a ThinkPad laptop
Motorola
Motorola is also positioning the ThinkPhone as ideal for storing sensitive work-related information. The device has a separate processor called Moto KeySafe, which isolates PINs, passwords and other sensitive data. Lenovo and Motorola’s ThinkShield and Moto Threat Defense software can also be found on the device. The ThinkPhone also has tools that allow IT departments to manage aspects like lock screen settings and network alerts.
As for durability, the ThinkPhone is MIL STD 810H certified and is constructed from an aramid fiber that Motorola says is stronger than steel. It also has Gorilla Glass Victus and should be able to withstand drops from up to 1.25 meters. Like most modern phones, the ThinkPhone has IP68 water resistance.
Many of the ThinkPhone’s other specifications are similar to the ones found on standard flagship smartphones. The phone has a 6.6-inch display, Android 13 and runs on Qualcomm’s Snapdragon 8 Plus Gen 1 processor. There’s a 50-megapixel main camera and a 13-megapixel ultrawide camera along with a 32-megapixel selfie camera.
The announcement comes as there’s been more emphasis on cross-platform compatibility between smartphones and laptops throughout the industry. Apple’s MacOS Ventura update, for example, introduced the ability to use your iPhone as a Mac webcam and seamlessly move FaceTime calls between your iPhone and Mac computer. Google’s Phone Hub feature lets you do things like check your phone’s signal or battery status, sync notifications and access photos from the camera roll on your Chromebook.
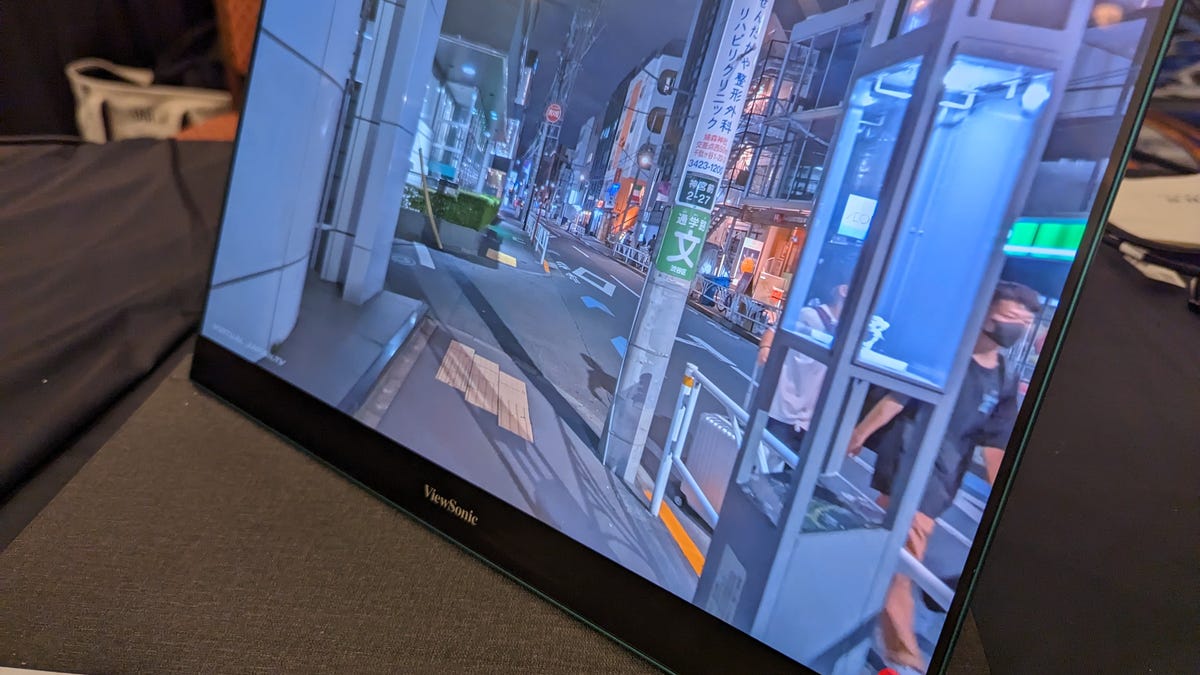
With so many screens flashing at CES 2023, it can be hard to find one that causes stops and swivels heads. Well, ViewSonic’s VX16-OLED portable 4K monitor did just that with its slim profile and striking metal chassis.
Now, there are plenty of portable monitors on the market. Most tend to be IPS LCD displays that run thicker and require more juice. The VX16-OLED sips power, only requiring 6 to 7 watts. That means it can easily run off a battery bank or a laptop USB port.
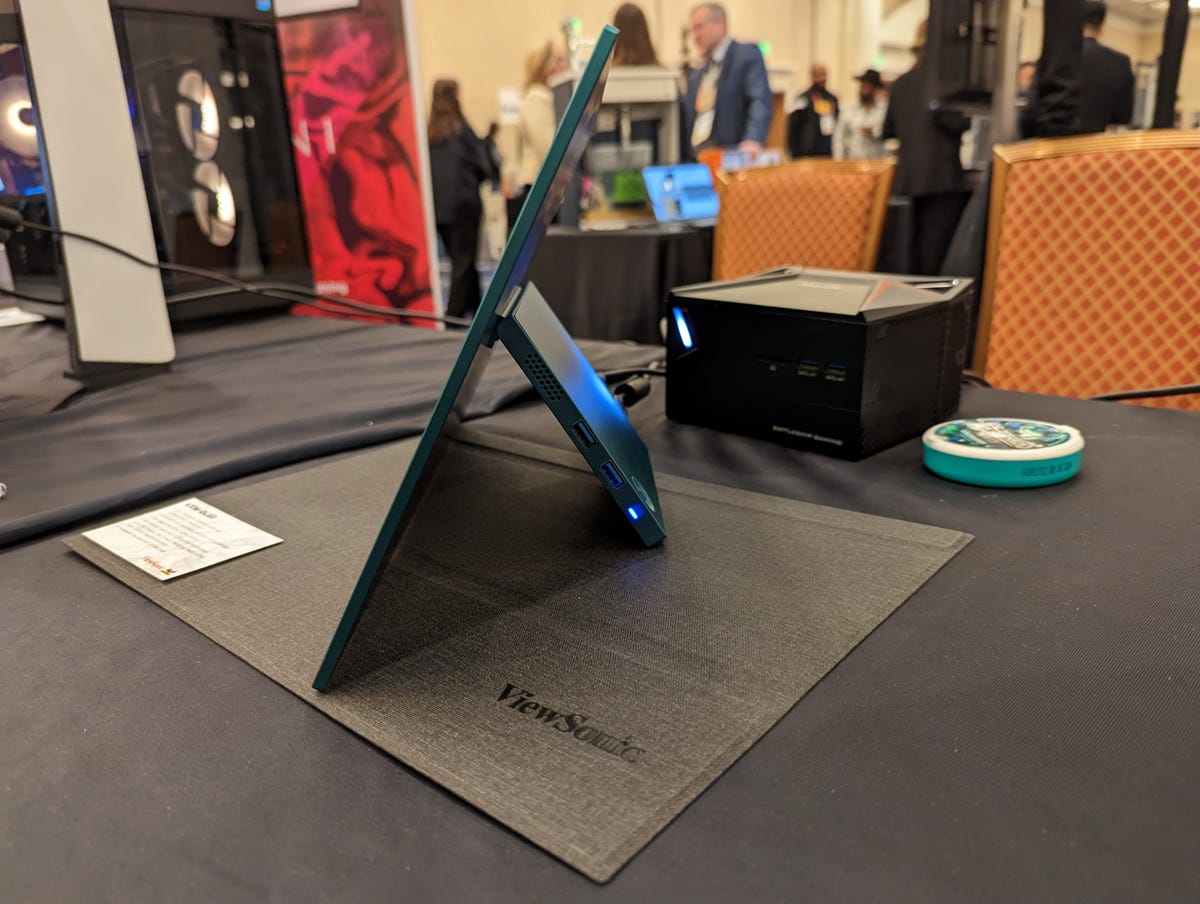
All the components are housed in the stand, allowing for a thin screen profile. It’s clever design that removes the weight from the screen and shifts the center of gravity to the pivot point.
ViewSonic’s VX16-OLED portable 4K monitor being shown off at CES 2023.
CNET
It’s thin enough to easily fit in a backpack. I can also see it being a solid monitor for gaming on the go. Attaching it to a PlayStation 5 or Nintendo Switch at tournaments could be a welcome alternative to lugging around a more traditional monitor. Unfortunately, its 60Hz refresh rate means it’ll be better suited for fighting games or standard computer tasks. First-person shooter fans might want something with a 144Hz refresh rate.
ViewSonic’s Ray Hedrick said that making a gaming version of the VX16-OLED isn’t out of the question.
Image “burn-in” is a point of concern with OLED computer screens: This is what happens when certain colored pixels die out from being overused. Considering there are many static elements on a screen when computing, OLED tend to not be the best option. Hedrick said the company feels pixel shifting should prevent burn-in and that the company’s testing shows that it will hold up through a standard three-year or extended five-year warranty period.
The $400 price suggests ViewSonic is gearing this towards professionals, who demand strong color accuracy and resolution. Either way, the portable monitor space will be worth watching.
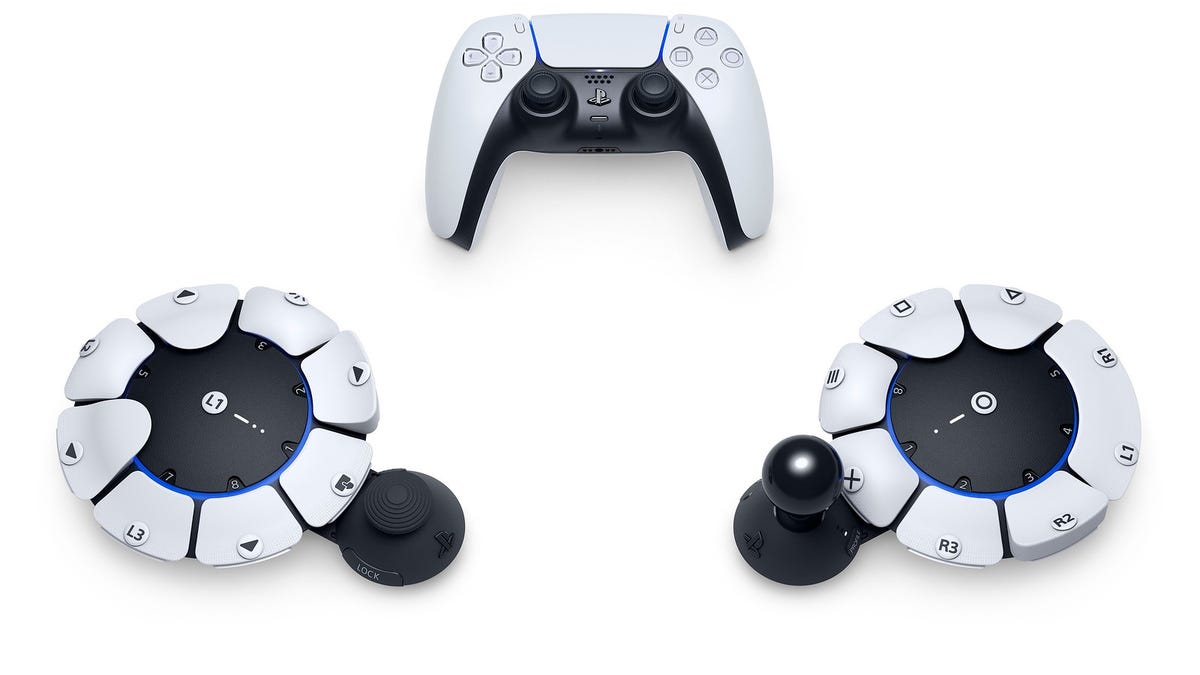
Sony has a new gaming controller designed to be customizable for people with disabilities.
Project Leonardo, unveiled Wednesday at CES 2023 in Las Vegas, is the codename for a new PlayStation 5 accessibility kit that Sony Interactive Entertainment CEO Jim Ryan said “will allow players with disabilities to play more easily, more comfortably and for longer periods.”
Like Microsoft’s similar Xbox Adaptive Controller, Project Leonardo is designed to work right out of the box. The circular hub features swappable components such as an analog joystick and eight buttons, as well as a suite of software options for PS5. It can be used as a standalone controller or paired with another Project Leonardo controller or DualSense wireless controller.
Sony said it collaborated on the project with accessibility groups AbleGamers, SpecialEffect and Stack Up to ensure it’s highly configurable to range of players with challenges such as limited motor control, difficulty holding a controller for long periods and difficulty pressing small clusters of buttons accurately.
“Our team tested over a dozen designs with accessibility experts, looking for approaches that would help address key challenges to effective controller use,” Sony designer So Morimoto said in a blog post. “We finally settled on a ‘split controller’ design that allows near free-form left/right thumbstick repositionability, can be used without needing to be held, and features very flexible button and stick cap swapping. The controller can also flexibly accept combinations of accessibility accessories to create a unique aesthetic.”
Sony didn’t announce a price or when the controller would be available.
This story is part of 12 Days of Tips, helping you make the most of your tech, home and health during the holiday season.
An iPhone is an amazing little device, letting you fit a flashlight, camera and computer in your pocket. It gives you access to the entire worldwide web on the go, letting you browse through page after page of information online at high speeds. But even the latest iPhone 14 Pro and Pro Max models might start to feel sluggish over time. One of the simplest New Year’s resolutions you can make is to start clearing your iPhone cache every month.
Whether you’re browsing in Chrome, Safari or elsewhere on your iPhone, your cache builds up digital clutter over time. Clearing your cache gives your browser a new start, which can speed up your browsing whether you’re using iOS 15 or iOS 16. (And if you’re trying to get your phone to run faster, try managing your iPhone’s storage.)
Think of your browser cache like a digital refrigerator. It helps you store leftovers like website data so those pages can load faster the next time you visit them. The problem, though, is that those leftovers eventually go bad, in the sense that they no longer match the data the sites actually need to load. That’s the equivalent of your fridge being full of stale or outright moldy food. At that point, pages will actually load slower and formatting might look wrong.
That’s why clearing your cache can help: It gives sites a fresh start in your browser and frees up some space in your storage. Your phone no longer has to spend time searching through fuzzy fruit and chunky milk to find what it needs.
Note that clearing your cache will sign you out of sites you’re currently logged into. Still, it’s generally worth that mild inconvenience every month or so to keep things moving quickly.
Here are step-by-step guides on how to clear your cache on your iPhone based on the browser you use.
How to clear your iPhone cache in Safari
Safari is the default browser on iPhones, and you can clear your Safari cache in a few short steps. Starting with iOS 11, following this process will affect all devices signed in to your iCloud account. As a result, all your devices’ caches will be cleared, and you’ll need to sign in to everything the next time you use them. Here’s what to do.
1.Open the Settings app on your iPhone.
2. Select Safari from the list of apps.
3. Go to Clear History and Website Data.
4. Choose Clear History and Data in the pop-up box.
Chrome is another popular browser for iPhone users. The overall process for clearing your Chrome cache requires a few more steps, and you’ll need to do things through the Chrome browser itself. Here’s how.
1. Open the Chrome app.
2. Select the three dots in the bottom right to open more options.
3. Scroll across the top and select Settings.
4. Select Privacy and Security in the next menu.
5. Then select Clear Browsing Data to open up one last menu.
6. Select the intended time range at the top of the menu (anywhere from Last Hour to All Time).
7.Make sure that Cookies, Site Data is selected, along with Cached Images and Files. Finally, hit Clear Browsing Data at the bottom of the screen.
If you’re a Firefox devotee, don’t worry. Clearing the cache on your iPhone is pretty straightforward. Just follow these steps.
1. Click the hamburger menu in the bottom right corner to open up options.
2. Choose Settings at the bottom of the menu.
3. Select Data Management in the Privacy section.
4. You can select Website Data to clear data for individual sites, or select Clear Private Data at the bottom of the screen to clear data from all selected fields.
Clearing your cache removes the website data your phone stored locally to prevent having to download that data upon each new visit. The data in your cache builds over time and can end up slowing things down if it becomes too bulky or out of date. (My phone had about 150MB of data stored in Chrome when I checked.) Clearing that data gives sites a fresh start, which may fix some loading errors and speed up your browser. However, clearing your cache also signs you out of pages, so be prepared to sign in to everything again.
How often do I need to clear my cache?
Most people only need to clear their caches once every month or two. That’s generally the point when your browser will build up a cache large enough to start slowing things down. If you frequent a large number of sites, you should err on the side of clearing your cache more often.
There are plenty of great deals on phones and phone plans out there, but if you’re on AT&T and are looking for the absolute best deals to take advantage of, we’ve got you covered. We’ve focused specifically on deals that are available for current customers, meaning we aren’t highlighting offers that require you to add a new line, since most people want to upgrade phones they have on the plans they already have, not add a bunch of extra lines to “save” money.
It’s also worth noting that carriers constantly update their deals. AT&T has some pretty compelling offers available now, though the best deals often require you to be on one of the carrier’s unlimited plans.
Get the best price with CNET Shopping.
Love shopping online but don’t have time to compare prices or search for promo codes? Our CNET Shopping extension does that for you, so you always get the best price.
In general, the best offers usually happen around new phone launches (February or March for Samsung Galaxy S phones; September for Apple iPhones; fall for Google Pixel phones) or the holidays, but AT&T’s deals right now are pretty great.
While some manufacturers, particularly Apple and Samsung, offer deals on their own websites and stores, most people look to carriers to buy new devices. We’ll keep this page updated regularly with some of the best deals we’re seeing on AT&T’s website.
Best AT&T phone deals
Many of AT&T’s phone deals are available to both new and existing customers, though trade-ins are often required to get the advertised prices. It’s worth noting that these deals are split across 36 months of bill credits, meaning you’ll need to remain an AT&T customer for at least three years in order for the phone to get paid off. If you cancel before that period is over you’ll be responsible for any remaining charges associated with it.
Our researched and curated deals picks are below, but if you’d like a more customized deeper dive, check out Navi, an independent marketplace (and CNET partner) that aggregates information on service plans and phone deals.
AT&T has a pretty solid discount on the iPhone 14 right now, with the trade-in of an older iPhone. Trading in an iPhone 13 Pro Max 128GB will net you the full deal value as long as everything works and nothing is broken. The same trade-in price and stipulations will work for a Samsung Galaxy S22 Ultra 5G 128GB as well. If you have a phone that is a little older, you could still qualify for discounts of $350 or $800, depending on the model.
AT&T’s offer for Samsung devices might not be quite as high as its discount for iPhones right now, but the carrier is offering up to $800 off the latest Samsung devices like the Galaxy Z Fold 4 and Z Flip 4, along with the S22 Ultra, S22 Plus and S22 base models.
Like the iPhone deal, the trade-in credit depends on your phone being in good condition.
That $1,000 trade-in credit for the iPhone? It also applies to Google’s new Pixel 7 Pro. The list of eligible phones that qualify for a trade-in is more substantial, too, so even an older model could get you up to $1,000 off the Pixel 7 Pro.
AT&T has a number of deals for those who don’t have a phone to trade in, including discounts on the Apple iPhone 13, Motorola Moto G Stylus 5G, Samsung Galaxy S21 FE 5G and more. All these deals, however, require you to be on an unlimited plan and finance the phone on a 36-month installment plan.
Under this deal, the iPhone 13 would start at $5 per month for the 128GB model. For the Moto G Stylus 5G it would be $1 a month, while the Galaxy S21 FE 5G is $5.
If you’re looking to make the switch to AT&T, there are a few deals on various plans that may make you lean toward one or the other. Promotions on plans are less common these days, though oftentimes you can get some free extras (like streaming service subscriptions and music subscriptions) with enrollment in some of the higher-end 5G plans from each carrier. AT&T, however, no longer offers a free streaming service like HBO Max to new subscribers who don’t already have it on their plans.
AT&T includes 5G access with all of its plans, with the biggest difference for most people on its latest plans being how much hotspot data you get. There are also differences in how much “high-speed” data you get, though even on its cheapest Starter plan AT&T says it will only slow your speeds “temporarily” if you’re in an area where the network is “busy.”
As for savings, your company may also offer a corporate discount on plans, but you will need to check with them to see if that applies to personal accounts. AT&T also offers a host of discounts depending on your profession.
Are you a teacher, or is someone on your family plan a teacher? You could save on your wireless bill. AT&T offers a teacher discount on its plans that could save serious money depending on which plan you have. The cheapest price for four lines is $26.25 per month for its Starter plan, while the Premium plan is the most expensive at $38. If you want one line, the price for the Starter plan is $49.
Teachers can verify their eligibility by heading to AT&T’s website here. The carrier says the deal is open to “certified/licensed K-12 teachers at public or private schools, or college or university faculty members or instructors.”
You will also need to be on AT&T’s Unlimited Starter, Extra or Premium plans.
AT&T has a deal for nurses and physicians that’s identical to the teachers’ deal mentioned above, with up to the same $27 discount per line per month on wireless plans.
As with the teachers’ deal, you need to verify your employment with AT&T, with the offer open to those who are “certified or licensed doctors, nurses, or physician assistants.” You can’t combine this discount with the teachers’ offer. You will also need to be on AT&T’s Unlimited Starter, Extra or Premium plans.
AT&T offers the same discount on plans to active-duty military, veterans and first responders. As with the nurses’ and teachers’ deals, you only need one person on your plan to meet these qualifications to be eligible for the discount, which will vary depending on how many lines you have.
First responders can check their eligibility at this website, while active-duty military members can sign up here with their .mil email addresses. Veterans can sign up here.
Are AT&T deals available to existing or only new customers?
Like the rest of the wireless industry, AT&T now has offers available for both new and existing customers. While there are some additional perks and discounts to switchers, most of the deals are under the same terms.
How do AT&T phone discounts work?
It’s easy to see up to $800 off the price of something and get excited, but make sure you know what you’re signing up for. AT&T’s applies these discounts as bill credits that are usually spread out across a 36-month period. Sometimes, part of the discount amount is given in the form of a prepaid gift card (for a trade-in) and the rest is done as bill credits, but that’s specified when it’s happening.
What happens if you leave AT&T before the 36 months are up?
If you don’t stick with AT&T through the full 36 months of bill credits, you’ll be responsible for all the remaining charges. Before canceling or transferring your service to another carrier, be sure to communicate with the carrier to understand the actual cost of what you’ll owe to make sure you can cover that before making the move.
Get the best price with CNET Shopping.
Love shopping online but don’t have time to compare prices or search for promo codes? Our CNET Shopping extension does that for you, so you always get the best price.
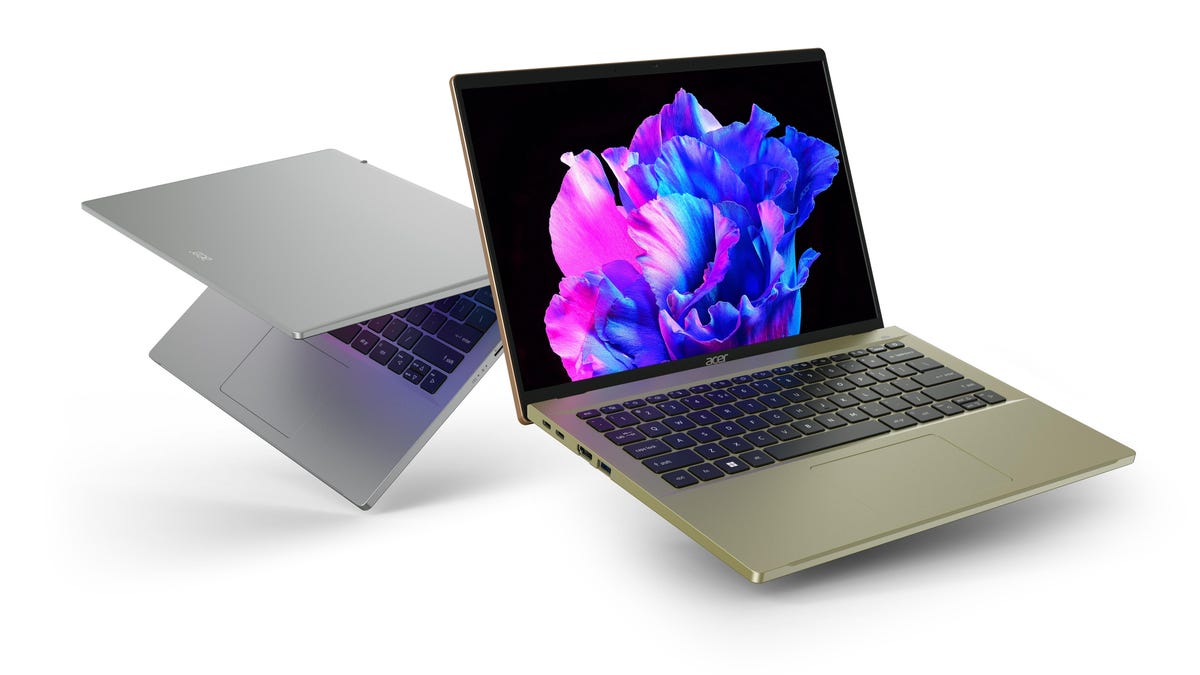
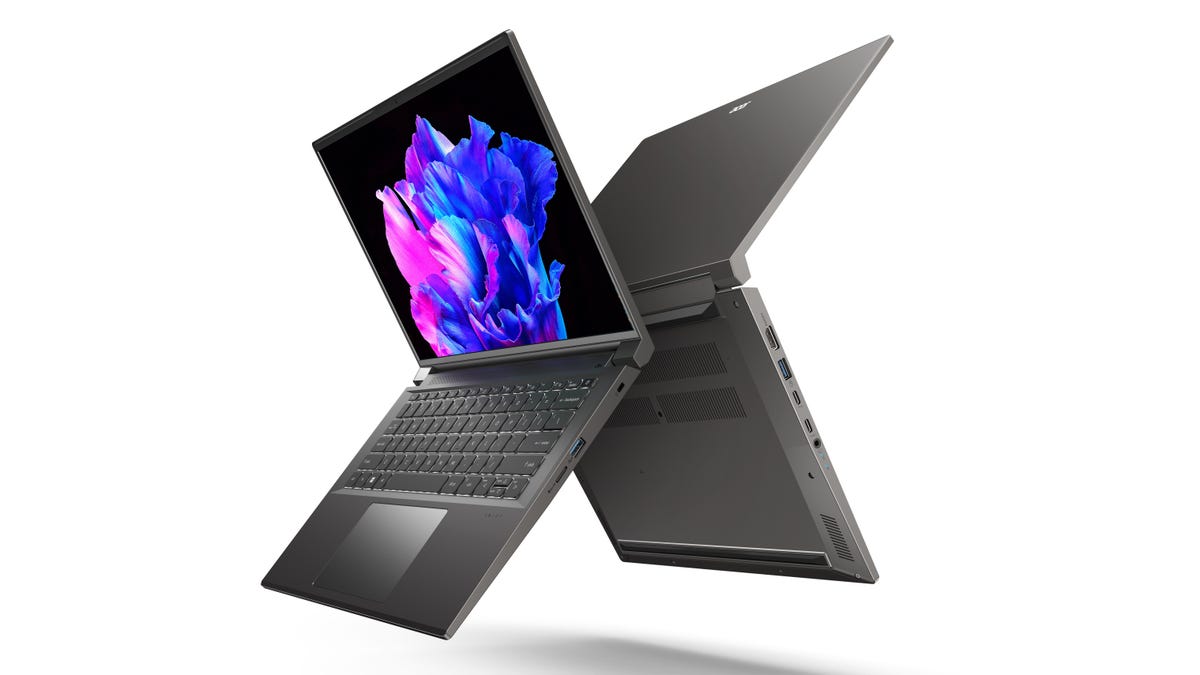
There are going to be a lot of OLED laptops this year and Acer is doing its part to make that happen. At CES 2023, the PC maker announced four new models in its ultraportable Swift line and all but one have an OLED display option.
Acer released two OLED laptops in 2022, the 14-inch Swift 3 OLED and the 16-inch Swift Edge. The new Swift Go 14 and 16 are thin-and-light laptops falling somewhat in between those models in size and weight. The Swift Go models are powered by 13th-gen Intel Core U- or H-series processors. The Go 14 will be available with AMD Ryzen 7000 series processors, too. The Swift Go 16 features a 16-inch 3.2K OLED display with a 120Hz refresh rate, while the Swift Go 14 has a 90Hz 14-inch 2.8K OLED display.
Aside from the OLED displays, the design and features sound like a pretty standard premium laptop for work, school or home. That includes a 1440p webcam with enhanced video conferencing features like AI noise reduction, background blur and auto framing.
Acer Swift X 14.
Acer
If those sound good but you wish the 14-inch Go came with a discrete graphics option, Acer has the Swift X 14. It’s slightly bigger and heavier than the Swift Go 14 but gives you the option of either Nvidia GeForce RTX 3050 or 4050 GPUs. It is Intel-only with 13th-gen Intel Core H-series processors. It’ll be offered with the same 14-inch 2.8K OLED display as the Swift Go 14.
The OLED attraction is understandable. Colors are vibrant, viewing angles are wider and contrast and brightness are great. Viewed side by side with an average laptop LCD and you can easily see the quality difference. They do generally add to the cost of a laptop though, and, perhaps more importantly, they hurt battery life.
However, for those concerned with battery life, the Swift Go 14 and 16 and the Swift X 14 will be available with LCD options. Or you can choose the new Swift 14 with either a WQXGA (2,560×1,600) or WUXGA (1,920×1,200) touchscreen LCD covered with antimicrobial Gorilla Glass. It, too, will be running on Intel’s 13th-gen Core H-series processors, it weighs 2.6 pounds (1.2 kilograms) and comes with other premium features from the Swift Go like Thunderbolt 4 USB-C ports and a 1440p webcam.
The Swift 14 is expected to be available in March starting at $1,400, which converts to about 1,160 or AU$2,050. The Swift Go 14 is expected to be available in May starting at $850, while the Go 16 is expected to start at $800 in June. The Swift X 14 is expected in April starting at $1,100.