Latest News

  • Cricket Livestream: How to Watch India vs. England, 2nd Test From Anywhere

    Cricket Livestream: How to Watch India vs. England, 2nd Test From Anywhere

    After an electrifying first encounter, India and England go head-to-head once more for the second test of the series in Visakhapatnam.

    The tourists stunned India with a performance for the ages in the first test, as England battled its way to a 28-run victory in a tense finish.

    That win was spearheaded by a superb 196-run stint by Ollie Pope and an equally important 7-62 from spinner Tom Hartley on his debut.

    India’s hopes of bouncing back have taken a hit with batsman K.L. Rahul and all-rounder Ravindra Jadeja both ruled out of the second test through injury, adding to a lengthy absentee list that includes reliable run-machine Virat Kohli.

    Below, we’ll outline the best live TV streaming services to use to watch the second match of the series, no matter where you are in the world.

    England batsman Ollie Pope celebrating holding aloft a bat with his right hand.

    India vs. England: When and where?

    India take on England in the second match of this test series at the Dr. Y. S. Rajashekar Reddy ACA-VDCA Cricket Stadiumin Visakhapatnam from Friday, Feb. 2, until Tuesday, Feb. 6. Play is set to start each day at 9:30 a.m. IST local time in India — that’s 4 a.m. GMT in the UK, 3 p.m. AEDT in Australia, and at 11 p.m. ET or 8 p.m. PT in the US on Thursday, Jan. 3.

    How to watch India vs. England, 2nd test online from anywhere using a VPN

    If you find yourself unable to view this test match locally, you may need a different way to watch the action — that’s where using a VPN can come in handy. A VPN is also the best way to encrypt your traffic and stop your ISP from throttling your speeds, and it’s also a great idea if you’re traveling, find yourself connected to a Wi-Fi network, and want to add an extra layer of privacy for your devices and logins.

    With a VPN, you’re able to virtually change your location on your phone, tablet or laptop to get access to the game. Most VPNs, like our Editors’ Choice, ExpressVPN, make it really easy to do this.

    Using a VPN to watch or stream sports is legal in any country where VPNs are legal, including the US, UK and Australia, as long as you have a legitimate subscription to the service you’re streaming. You should be sure your VPN is set up correctly to prevent leaks: Even where VPNs are legal, the streaming service may terminate the account of anyone it deems to be circumventing correctly applied blackout restrictions.

    Looking for other options? Be sure to check out some of the other great VPN deals taking place right now.

    Livestream India vs. England in the US

    This second test in the series will be available to watch live on dedicated cricket streaming service Willow TV.

    Stream the 2nd test in India for free

    The second test between India and England will be available to watch in the host nation on sport network Sports 18. That means you’ll be able to watch for free via its OTT platform JioCinema.

    Watch India vs. England in the UK

    This series is being shown exclusively live in the UK by TNT Sports.

    Stream India vs. England in Australia

    Pay-TV network Foxtel and its streaming platform Kayo are showing the second test match of this series Down Under.

    Quick tips for streaming India vs. England using a VPN

    • With four variables at play — your ISP, browser, video streaming provider, and VPN — your experience and success when streaming this test match live may vary.
    • If you don’t see your desired location as a default option for ExpressVPN, try using the “search for city or country” option.
    • If you’re having trouble getting the game after you’ve turned on your VPN and set it to the correct viewing area, there are two things you can try for a quick fix. First, log in to your streaming service subscription account and make sure the address registered for the account is an address in the correct viewing area. If not, you may need to change the physical address on file with your account. Second, some smart TVs — like Roku — don’t have VPN apps you can install directly on the device itself. Instead, you’ll have to install the VPN on your router or the mobile hotspot you’re using (like your phone) so that any device on its Wi-Fi network now appears in the correct viewing location.
    • All the VPN providers we recommend have helpful instructions on their main site for quickly installing the VPN on your router. In some cases with smart TV services, after you install a cable network’s sports app, you’ll be asked to verify a numeric code or click a link sent to your email address on file for your smart TV. This is where having a VPN on your router will also help, since both devices will appear to be in the correct location.
    • And remember, browsers can often give away a location despite using a VPN, so be sure you’re using a privacy-first browser to log in to your services. We normally recommend Brave.
  • AudioQuest DragonFly Cobalt Review

    AudioQuest DragonFly Cobalt Review

    A portable headphone amp might seem anachronistic in this age of Bluetooth headphones. Why be tethered to wires when wireless is the future? While many BT headphones offer impressive sound quality, they’re inherently limited in their design. Built-in batteries and electronics take up space and add to the overall cost. Many manufacturers of wired headphones and earbuds offer models that, in theory, offer similar prices as BT models but with better or more drivers. Others have models that have drivers that are too power-hungry to be driven well by built-in batteries.

    You could power these wired headphones from any headphone jack, but built-in ports like that rarely have much power. Instead, a portable headphone amp can give audiophile headphones the juice they need without tying you to a chair or desk.

    Which brings us to the DragonFly Cobalt from AudioQuest. It has been out for a few years, but is now 30% cheaper and going forward will be the only model in the DragonFly line. Roughly the size of a small thumb, it connects to any phone or computer via USB. Inside is an amp and a DAC, or digital-to-analog converter, that claim to elevate the listening experience. We shall see. Or hear. We shall hear.

    Specs and such

    A closeup of the DragonFly Cobalt.
    • DAC Chip: ESS ES9038Q2M
    • Max sampling rate/frequency: 24-bit/96kHz
    • Amp chip: ESS Sabre 9601
    • Power: “2.1 volts”

    The Cobalt looks like a USB thumb drive, if anyone remembers those. Included is a short dongle that converts the USB-A on the Cobalt to USB-C for use with phones and many laptops. To connect to Apple products you unsurprisingly need a special adapter, which is available separately. You also get a small pleather case, which is a nice touch though I don’t imagine it will get much use.

    Inside the Cobalt is a ESS Sabre 9601 headphone amp and a ESS ES9038Q2M DAC. The Cobalt maxes out at 24-bit/96kHz, which is less than some USB DACs. There isn’t a ton of music available at higher rates, but there is some. Personally I think there is value in higher-than-CD sampling rates (16/44.1) but I’m skeptical of anyone who says they can hear a difference between 96 and 192kHz.

    The claimed power rating of “2.1 volts” is unclear and practically misleading. Nearly all amplifiers are rated in watts and it’s easily the most recognizable audio spec. Watts is volts times amps, and no device like this is putting out anything close to 1 amp. So no doubt “2.1” is far more impressive a number than whatever milliwatts this (or any, to be honest) headphone amp provides. For comparison, the older and cheaper DragonFly Black had a claimed 1.2 volts while the similar iFi Go Link (review coming soon), claims 70mW into 32 ohms and and 2.05V into 600 ohms (which converts to 7mW).

    The dragonfly on the DragonFly lights up different colors with different sampling rates: Red for Standby, green for 44.1kHz, blue for 48kHz, yellow for 88.2kHz, light blue for 96kHz, and purple for MQA. At least, that’s the theory. Rarely did this match up with the claimed sampling rates on content I tested with my Pixel 7. It matched better, or at least faster, with my Sony NW-A306 portable media player.

    Sound

    The Cobalt with its included USB-C adapter.

    I tested the Cobalt using some high-end headphones, two of which are borderline what could be considered “portable.” At least in the sense that I don’t think most people would walk around with them. Those would be the Audeze LCD-3 ($1,945) and the Sendy Audio Apollo ($500). These are headphones made for sitting in one place and enjoying. I also used the Meze Audio Rai Penta in-ear monitors ($1,100) which aren’t particularly difficult to drive, but have excellent clarity. Why use ultra-expensive, and in two cases huge, headphones to test a $200 amp? Well, if it can power these it can power just about anything. I used a mixture of CD-quality and high-resolution FLAC from Qobuz.

    Not wanting to listen in a vacuum, so to speak, I compared the Cobalt to several other amp/DACs, starting with the headphone jack on my computer and then the analog output of my Pixel 7 via a USB-C-to-1/8th analog dongle. I also compared the Cobalt to the iFi Audio hip-dac2. This is also technically a portable headphone amp, and priced similarly to the Cobalt. However, it’s much, much larger, and has a rather cumbersome connection process that’s not something I’d expect most people to use walking around.

    The AudioQuest DragonFly Cobalt on a green background.

    With the Cobalt vs the (admittedly anemic) desktop PC’s headphone jack using the LCD-3s, the sound via the Cobalt sounded fuller at the same volume level. Percussion had a tighter, more immediate attack. Most notably, I was able to get a much higher volume with better bass via the Cobalt. With the PC’s volume control all the way up, I could get a sound that was a little higher than typical listening volume. With the Cobalt, that same approximate volume was achieved with a setting around 60, with 75 being plenty loud and 100 being beyond comfortable. Not bad for a thumb drive-sized device and huge planar magnetic headphones. Admittedly, the sound at maximum wasn’t as clean as it was at lower volumes.

    With the Sendy Apollos there was better clarity with the Cobalt compared to the computer’s built-in headphone jack. Switching to my phone’s output via the dongle, the Apollos had fuller bass when played through the Cobalt, and sounded more open. Once again, volume was the biggest difference. With the volume control all the way up on my phone, the Apollos were just above what I’d call a normal listening volume. Through the Cobalt, however, maximum volume was louder than I’d listen to for any length of time.

    audioquest-dragonfly-cobalt-1-of-6

    With the Rai Pentas, there was less of a noticeable difference. Despite their price and 5-driver design, they’re not particularly difficult to drive. So even the Pixel 7’s dongle could drive them with enough volume. Was there a little more realism to the overtones and high frequencies with high-resolution tracks? Possibly. For instance, the glockenspiel at the start of “Sloop John B” from the 24-bit, 192 kHz version of Pet Sounds had a richer, more realistic timbre, despite the Cobalt’s downconversion to 96 kHz. It could also have just been a slight change in the tonal balance, since the Rai Pentas have a more mellow sound with lesser amplifiers. I’m not sure I’d bet my house on a blind A-B test either way. The truth is, there is far less difference between modern DACs than everything else in the audio chain.

    Lastly, I donned the LCD-3s again to compare the Cobalt to the iFi Audio hip-dac2. If you’re looking for something that gives you better audio on the go, the hip-dac2 is probably too large. It’s a bit smaller than a flask. That extra space includes beefier electronics, though, so if you usually listen at your desk or seated, this is a potential alternative. Because of that, the hip-dac2 just has more power. Not only can it drive the LCD-3’s louder, it sounds cleaner doing it. The hip-dac2 sounds less compressed at higher volumes. The difference isn’t huge, but is noticeable back to back.

    Go-balt?

    An AudioQuest DragonFly Cobalt glowing green.

    There are two questions that arise from a product and review like this. First, does it improve the sound over a reasonable baseline? Yes, with any hard-to-drive headphone the Cobalt will absolutely sound better than a headphone jack and cheap dongle. Even many easier-to-drive headphones will likely sound at least a little better (or at the very least, louder).

    Second, does it perform well enough to justify its price? That’s a bit harder to say. Do you have headphones that either need an amp or will sound better with one? Do your usual sources limit the performance of your headphones? Since most computers and phones (dongle required or not) have terrible headphone amplifiers, the answer to that latter question is often yes. To the question of price, the DragonFly seems a little expensive. There are a wider variety of amp/DAC dongles like the Cobalt on the market now compared to when the DragonFlys first took flight (pun intended), and many are a lot less money. We’ll be checking some out soon.

    Lastly, if you don’t have headphones that can justify the price of a $200 accessory, this shouldn’t be your first purchase. It’s not going to make $50 headphones sound like $500 headphones. If you’re only ever listening to amp-deserving headphones while seated in one place, the hip-dac2 has a little better sound at the cost of portability and overall convenience (the newer hip-dac 3 has a more user-friendly dual USB-C connection).

    That all said, if you do fit in the above-outlined niche, I will say the Cobalt impressed me more than I expected for its size. For something smaller than a thumb it definitely improved the sound of some great-sounding headphones in a way that was exceptionally portable.


    As well as covering audio and display tech, Geoff does photo tours of cool museums and locations around the world, including nuclear submarines, massive aircraft carriers, medieval castles, epic 10,000-mile road trips, and more.

    He wrote a bestselling sci-fi novel about city-size submarines, and also Budget Travel for Dummies. You can follow him on Instagram and YouTube.

  • Vision Pro: The Apps That Will and Won’t Run on Apple’s Mixed Reality Headset

    Vision Pro: The Apps That Will and Won’t Run on Apple’s Mixed Reality Headset

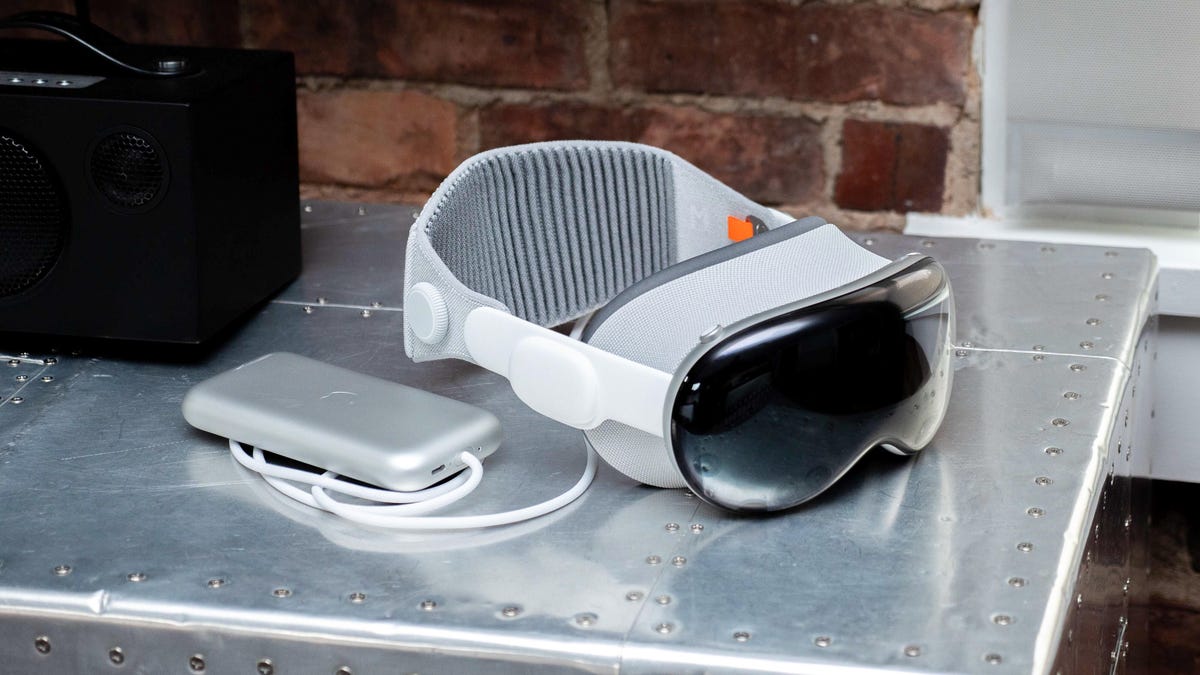
    Apple’s Vision Pro is nearly here, releasing on Feb. 2, and whether you’ve already ponied up for the mixed reality headset or plan to order one, you’re probably wondering which applications will be available — and which won’t be — when you finally get the Vision Pro in your hands.

    Don’t miss: Apple Vision Pro Review: A Mind-Blowing Look at an Unfinished Future

    Interested companies are already lining up: On Jan. 16, Disney announced it will have Disney Plus for the Apple Vision Pro, which will bring 3D movies to Vision Pro users at launch, including Avatar: The Way of Water and Star Wars: The Force Awakens, as well as hyperrealistic Disney environments that allow you to watch movies and TV shows in places like Star Wars’ Tatooine and Marvel’s Avengers Tower.

    However, not every app you might be hoping for will be accessible on the Vision Pro on Day 1.

    In fact, several major companies are choosing to not build exclusive Vision Pro apps for their services, nor make their existing apps compatible, most notably Netflix, according to Bloomberg’s Mark Gurman. Instead, if you want to use Netflix on the Vision Pro, you’ll have to access it through your web browser, just as you would on your computer.

    Not sure if your favorite application will work on the Vision Pro? Here’s a list of which services will and will not work at launch on Apple’s long-awaited headset.

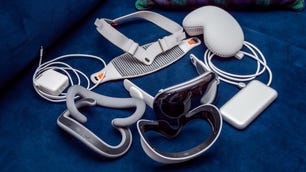
    While you’re here, check out everything that the Vision Pro will come with.

    What kind of applications are there on the Vision Pro?

    On your iPhone, you can really only download one kind of application, and that’s any app in the App Store that’s designed to run specifically on iOS.

    With the Vision Pro, it’s a little different. Two types of apps can run on the Apple headset:

    • Compatible apps: These are iOS/iPadOS apps that are not optimized for the headset but will still work on the Vision Pro when it launches. These apps will appear in a window on visionOS.
    • Native apps: These are optimized apps built specifically for visionOS. You’ll get a more immersive experience with these apps on the Vision Pro.

    Apple announced that over 600 apps with native support for Vision Pro will be available when the headset launches in the US on Friday. And that’s in addition to the over 1 million compatible apps across both iOS and iPadOS.

    However, some apps simply won’t appear on the Vision Pro, because there is no native app nor is the existing iOS/iPadOS app compatible.

    Which applications won’t be available on the Vision Pro?

    As mentioned above, Netflix is a notable absentee from the Vision Pro. Not only is Netflix not building an app for the Vision Pro but its iPhone/iPad app won’t support VisionOS either. A Netflix spokesperson told Bloomberg, “Our members will be able to enjoy Netflix on the web browser on the Vision Pro, similar to how our members can enjoy Netflix on Macs.”

    YouTube is another major service that won’t be building a dedicated app for the Vision Pro. Again, if you want to watch YouTube videos on the Vision Pro, you’ll have to access it via Safari or another web browser. The iPhone/iPad app won’t support VisionOS as well.

    Spotify reportedly isn’t planning on developing an app for the Vision Pro or making its iPhone/iPad app accessible either, and Meta may be skipping the headset as well, according to reports.

    And which applications will be available on the Vision Pro?

    Along with Apple apps such as Apple Arcade (hundreds of games), Apple Music, Apple TV and Safari, at launch, these are a few of the third-party apps that will be available as native or compatible apps on the Vision Pro:

    • Adobe Lightroom (native)
    • Amazon Prime Video
    • Box (native)
    • Crunchyroll (native)
    • Discovery Plus
    • Disney Plus (native)
    • ESPN
    • Fantastical (native)
    • Fubo
    • Imax (native)
    • J.Crew (native)
    • JigSpace (native)
    • Max (native)
    • Microsoft 365 (Word, Excel, PowerPoint, Outlook and more) (native)
    • MindNode (native)
    • MLB (native)
    • Mubi (native)
    • Navi (native)
    • NBA (native)
    • Night Sky (native)
    • Numerics (native)
    • Paramount Plus
    • Peacock
    • PGA Tour Vision (native)
    • Pluto TV
    • Red Bull TV (native)
    • Slack (native)
    • TikTok (native)
    • Tubi
    • Zoom (native)
    • Wayfair (native)
    • Webex (native)
    • Zillow Immerse (native)

    This is obviously not a complete list, considering there are over a million apps that will work on the Vision Pro. And even if your app doesn’t work with the Vision Pro, like Netflix, you can still access it through Safari or another web browser.

    For more on Apple Vision Pro, see what CNET’s Scott Stein learned about the Vision Pro when he tried it out.

  • Meta Quest Will Play Apple’s 3D Spatial Videos Too

    Meta Quest Will Play Apple’s 3D Spatial Videos Too

    There’s a more affordable way to play back Apple’s 3D iPhone 15 Pro-shot spatial videos. Right before Apple’s Vision Pro goes on sale tomorrow, Meta announced that the Quest is getting an update to play spatial videos, too. The update will work on Quest 2, Quest 3 and Quest Pro headsets.

    The support has been rumored recently, but it was confirmed today that the Quest’s upcoming v62 OS update will include the feature. Quest OS updates tend to roll out over the course of weeks versus being instantly available to download, but we’ll have hands-on thoughts as soon as possible to explain how it all works.

    The v62 update is also adding PlayStation 5 DualSense or PlayStation 4 DualShock controller support for the Quest, and browser support for controllers for game streaming. Facebook live-streaming and expanded hand gesture quick actions are also part of the new update.

    Apple’s spatial video format is 3D video shot in 1080p at 30fps, and it can play back as 2D on the iPhone or when shared other places. The Vision Pro plays back the videos via the Photos app, showing 3D videos either in a floating window-like frame or in an expanded, fuzzy-bordered, more immersive frame.

    Apple’s headset has a much sharper display than Meta’s VR headsets. But the Vision Pro costs $3,499, while the recently-released Quest 3 costs $499.

  • Snag Freebies Worth Up to $198 When You Grab the Meta Quest 3 VR Headset

    Snag Freebies Worth Up to $198 When You Grab the Meta Quest 3 VR Headset

    Whether you’re brand new to virtual reality gaming or you’re just looking to upgrade your current VR system, the Meta Quest 3 is the best mixed reality VR headset you can currently get your hands on. Prices start at $499, but Newegg is sweetening the deal with some valuable freebies thrown in with your purchase, including a free game, a free VPN subscription and more. We don’t know how long this offer will last, so we recommend making your purchase sooner rather than later.

    Buying the 128GB model of the Meta Quest 3 will score you Asgard’s Wrath 2 game (a $60 value), absolutely free, as well as a 12-month subscription to NordVPN, which is valued at $70 and is one of our favorite VPN services. Though you can sideload VPN apps onto the Quest, that subscription is primarily useful for your other tech devices and can run on six of them at once. Plus, you’ll also receive a $10 Newegg gift card that you can put toward a future purchase.

    However, if you opt to upgrade to the 512GB Meta Quest 3, you’ll not only get the same free game and NordVPN subscription, but you’ll also get a larger $20 Newegg credit and six months of Meta Quest Plus, worth $48. That’s close to $200 in freebies. Just keep in mind that this package goes for $649.

    If you have the previous-gen Meta Quest 2 and it’s in good condition, there’s no hurry to upgrade. That said, the Meta Quest 3 is the best option on the market right now (especially as an alternative to the $3,500 Apple Vision Pro), thanks to its upgraded processor and mixed reality experiences — and this deal offers a lot of value that offsets some of its cost. Be sure to check out our roundup of Meta Quest 3 deals for all the latest offers.

  • Saturn 3 Ultra Review: A Best-in-Class 3D Printing Behemoth

    Saturn 3 Ultra Review: A Best-in-Class 3D Printing Behemoth

    Updated Feb. 1, 202410:00 a.m. PT

    james-headshot
    Written by James Bricknell
    Our expert, award-winning staff selects the products we cover and rigorously researches and tests our top picks. If you buy through our links, we may get a commission.Reviews ethics statement
    james-headshot

    james-headshot
    James Bricknell Senior Editor
    James has been writing about technology for years but has loved it since the early 90s. While his main areas of expertise are maker tools — 3D printers, vinyl cutters, paper printers, and laser cutters — he also loves to play board games and tabletop RPGs.
    Expertise 3D printers, maker tools such as Cricut style vinyl cutters and laser cutters, traditional paper printers Credentials

    • 6 years working professionally in the 3D printing space / 4 years testing consumer electronics for large websites.
    CNET logoWhy You Can Trust CNET
    16171819202122232425+

    Years of Experience

    14151617181920212223

    Hands-on Product Reviewers

    6,0007,0008,0009,00010,00011,00012,00013,00014,00015,000

    Sq. Feet of Lab Space

    CNET’s expert staff reviews and rates dozens of new products and services each month, building on more than a quarter century of expertise. Read how we test products and services.

    Elegoo Saturn 3 Ultra
    9.2/10 CNET Score

    $400 at Elegoo

    A Saturn 3 Ultra on a workbench

    9.2/ 10
    SCORE

    Elegoo Saturn 3 Ultra

    $400 at Elegoo

    Pros

    • Insanely fast
    • Create beautiful models
    • Excellent price

    Cons

    • The lift-off lid is cumbersome
    • It’s time for wireless monitoring

    Printing with resin is both a magical and dreadful experience. The Saturn 3 Ultra is so good at the magical part that the dreadful part washes away like resin in IPA. It’s easily the best experience I’ve had with resin 3D printing.

    It’s easy to fall into hyperbole when you review a product that you love. I’ll try not to do that, but if you want a resin 3D printer you should buy this one.

    Elegoo Saturn 3 Ultra Spec sheet

    Screen size 10 inch
    Layer height 0.01mm
    Screen resolution 12K
    Official print speed 150mm/h
    Print volume 218.88 x 122.88 x 260mm
    Printer size 305.9 x 273 x 562.5mm
    Carbon filter Yes
    File transfer USB and WiFi

    I’ve always liked Elegoo’s take on resin 3D printers. Its Mars, Saturn and Jupiter printers have offered an affordable way to access resin printing for years and are consistently part of my best 3D printer lineup. In my review of the Saturn 2 I explained that it beat the original Saturn in almost every metric. The Saturn 3 Ultra does that again.

    Mechanically, it feels familiar. The only two stand-out changes are a UV lift-off lid that’s a cloudy grey instead of red and a four-point bed adjustment system. Oh, and the power, USB-A port and Wi-Fi antenna have moved to the side of the machine, which is a handy change. No more reaching to the back of what’s essentially a bowl of toxic soup when you need to change the thumb drive.

    A grey crown on a brown table

    The Wi-Fi on the Saturn 3 is usable, but I’d like to see Elegoo add more monitoring capabilities. Perhaps a temperature gauge and an app that lets you monitor the progress of the print. I’m not asking for a camera like you see on FDM printers, but any kind of monitoring would be welcome. Right now all you can do is send the file to print and while that is helpful, it’s somewhat limiting.

    This is indicative of all resin 3D printers though. FDM printers, with the help of companies like Bambu Lab, and AnkerMake, have started to use apps and cameras to help you monitor your prints from afar. Some even let you print straight from the app. Resin printing has some challenges that make an app harder as you really don’t want to start a print while a model is already on the build plate, but there are opportunities to evolve.

    Where FDM in the 2020s shines is the inclusion of more user-friendly, modern conveniences. An app that gave us some basic information would be a step into the future and help bring resin 3D printing into parity with its filament-based cousins.

    A statue of Cthulhu in a hoodie with a backpack

    The Ultra also pushes the screen resolution from 8K to 12K. While you may not notice the difference on large, smooth models, you can see it in small miniatures and models with a lot of texture. Fotis Mint made this stunning Urban Cthulhu sculpt, and you can see each divot in the fabric and each tooth on the jacket’s zipper.

    The 12K resolution bump didn’t come with a screen size increase. The 10-inch screen is large enough, though, as is the 218.88 by 122.88 x 260mm build volume. I still maintain that the Saturn is the perfect size for making an army of miniatures for your tabletop games and, because of the way resin printers print layers, you can print 15 minis as quickly as you can print one. The 12K resolution also comes in handy on minis. You can even see the sly grin on this wizard lady’s face, even though she’s just 2 inches tall.

    A witch D&D miniature in pink resin

    The real progress that the Ultra has made over previous iterations is the speed. Resin 3D printing has always been fast, after all, it’s essentially a light shining through for 1 or 2 seconds per layer. What makes machines slower is mechanically peeling the model off the screen without damaging either. The Ultra uses a new type of film instead of the standard FEP sheet so it can peel the model away faster decreasing the overall print time substantially.

    Elegoo says that with the right resin — its Rapid Resin to be exact — the Saturn 3 Ultra could print at 150mm/h. That’s three times faster than the Saturn 2 and a blistering speed for a resin printer. I haven’t got it to print that fast, but what I have printed has been much faster than anything I’ve seen before. An entire crown took less than 3 hours to print (1.5 hours per piece), which I wouldn’t have thought possible before using the Saturn 3 Ultra.

    Statues of Lady Death, The witch King, and Urban Cthulhu

    Now we come to the most heinous of crimes and the only real downside of the Saturn 3 Ultra: the lift-off lid. OK, it may not be the end of the world, but lift-off lids are the worst. On a smaller machine like the Mars 3, you can get away with it. But on larger machines like the Saturn, it’s just too cumbersome to be a good idea. Give me a tilt-up lid like the Uniformation GKTwo or double doors. Anything but a lid that requires it to be on a desk with at least four feet of airspace above it. It’s dangerous too as you risk knocking the whole thing over if you aren’t careful.

    That terrible omission aside, the Saturn 3 Ultra is my favorite resin printer. It’s almost impossible to match the combination of quality and speed that you get from it and it’s less than $500. I said it at the top, and I’ll say it again here: If you want to buy a resin 3D printer, it should be this one. It ticks every box you could want.

  • Wolves vs. Man United Livestream: How to Watch English Premier League Soccer From Anywhere

    Wolves vs. Man United Livestream: How to Watch English Premier League Soccer From Anywhere

    Wolves will be hoping to extend their impressive home record on Thursday as they host Manchester United.

    Gary O’Neil’s side are currently on an unbeaten run of eight English Premier League home games, and come into this match boosted by last Sunday’s FA Cup win over local rivals West Brom.

    United boss Erik ten Hag, meanwhile, will be hoping to put the controversy surrounding Marcus Rashford’s off-field behavior to one side as his side look to get their faltering challenge for a top four spot back on track.

    Below, we’ll outline the best live TV streaming services to use to watch the game live wherever you are in the world.

    Side on image of Wolverhampton Wanderers manager Gary O'Neil, smiling, shouting, with his right hand open and raised.

    Wolves vs. Manchester United: When and where?

    Wolverhampton Wanderers host Manchester United at Molineux on Thursday, Feb. 1. Kickoff is set for 8:15 p.m. GMT (3:15 p.m. ET, 12:15 p.m. PT in the US and Canada, and 7:15 a.m. AEDT in Australia on Friday Feb. 2).

    How to watch the Wolves vs. Man United game online from anywhere using a VPN

    If you find yourself unable to view the game locally, you may need a different way to watch the game — that’s where using a VPN can come in handy. A VPN is also the best way to stop your ISP from throttling your speeds on game day by encrypting your traffic, and it’s also a great idea if you’re traveling and find yourself connected to a Wi-Fi network, and you want to add an extra layer of privacy for your devices and logins.

    With a VPN, you’re able to virtually change your location on your phone, tablet or laptop to get access to the game. So if your internet provider or mobile carrier has stuck you with an IP address that incorrectly shows your location in a blackout zone, a VPN can correct that problem by giving you an IP address in your correct, non-blackout area. Most VPNs, like our Editors’ Choice, ExpressVPN, make it really easy to do this.

    Using a VPN to watch or stream sports is legal in any country where VPNs are legal, including the US, UK and Canada, as long as you have a legitimate subscription to the service you’re streaming. You should be sure your VPN is set up correctly to prevent leaks: Even where VPNs are legal, the streaming service may terminate the account of anyone it deems to be circumventing correctly applied blackout restrictions.

    Looking for other options? Be sure to check out some of the other great VPN deals taking place right now.

    Livestream Wolves vs. Manchester United in the US

    Thursday’s Wolves-Man United match is streaming on USA Network, which you can access as part of your cable package or at the NBC Sports website with a valid login, and can be streamed via Sling TV and other more expensive streaming TV services.

    Livestream the Wolves vs. Man United game in the UK

    Premier League rights in the UK are split between Sky Sports, Amazon Prime Video and TNT Sports (previously known as BT Sport). The Wolves-Man United game is exclusive to TNT Sports — showing on its TNT Sports 1, TNT Sports 1 HD and TNT Sports Ultimate in 4K.

    Livestream the Wolves vs. Man United game in Canada

    If you want to stream Wolves vs. Man United live in Canada, you’ll need to subscribe to Fubo. The service has exclusive rights for this Premier League season.

    Livestream the Wolves vs. Man United game in Australia

    Football fans Down Under can watch this EPL fixture on streaming service Optus Sport, which is showing every single Premier League game live in Australia this season.

    Quick tips for streaming the Premier League using a VPN

    • With four variables at play — your ISP, browser, video streaming provider and VPN — your experience and success when streaming EPL matches may vary.
    • If you don’t see your desired location as a default option for ExpressVPN, try using the “search for city or country” option.
    • If you’re having trouble getting the game after you’ve turned on your VPN and set it to the correct viewing area, there are two things you can try for a quick fix. First, log into your streaming service subscription account and make sure the address registered for the account is an address in the correct viewing area. If not, you may need to change the physical address on file with your account. Second, some smart TVs — like Roku — don’t have VPN apps you can install directly on the device itself. Instead, you’ll have to install the VPN on your router or the mobile hotspot you’re using (like your phone) so that any device on its Wi-Fi network now appears in the correct viewing location.
    • All of the VPN providers we recommend have helpful instructions on their main site for quickly installing the VPN on your router. In some cases with smart TV services, after you install a cable network’s sports app, you’ll be asked to verify a numeric code or click a link sent to your email address on file for your smart TV. This is where having a VPN on your router will also help, since both devices will appear to be in the correct location.
    • And remember, browsers can often give away a location despite using a VPN, so be sure you’re using a privacy-first browser to log into your services. We normally recommend Brave.
  • This Microsoft 365 Deal Scores You a Year-Long Subscription for Just $45

    This Microsoft 365 Deal Scores You a Year-Long Subscription for Just $45

    This deal knocks $25 off the usual cost of a Microsoft 365 12-month subscription. For just $45, you’ll get access to Outlook, Word, PowerPoint and Excel for a year. You’ll also get 1TB of OneDrive cloud storage with advanced security features like built-in ransomware detection and recovery, and optional two-step verification for files in the OneDrive Personal Vault.

    By subscribing to Microsoft 365, you’ll be able to access new features and updates right away, rather than being stuck with an out-of-date version, and you’ll be able to use it on up to five devices, for added flexibility. It works with PCs, Macs, iPads, iPhones and Android phones.

    Other features include Microsoft Defender for digital security, OneNote for collaborating, Microsoft Editor for writing assistance, Clipchamp for video editing and Microsoft Teams for group calls. You’ll also have the ability to manage multiple email accounts in Outlook, and when you’re using a PC, you’ll be able to use Publisher and Access as well, which can be useful when you’re creating professional newsletters and flyers or trying to manage large databases. Additionally, you’ll be able to make up to 60 minutes of Skype video calls per month. It’s important to note that app availability and features very per device and platform, and you’ll need to redeem your code within 30 days once you make your purchase.

    While there are ways to access a free version of Microsoft 365, the free apps are limited in terms of functionality. This deal gets you a lot of bang for your buck, so it’s a good idea for anyone looking for a more robust user experience. However, if you do need access for more than one person, StackSocial is also offering a 12-month subscription for a family account that can accommodate up to six users for $75, which is a $25 savings.

    We’ve also rounded up plenty of laptop deals, tablet deals and phone deals if you’re ready to upgrade your current device.

  • Huge Woot Audio Sale Discounts Beats, JBL, Sennheiser and More

    Huge Woot Audio Sale Discounts Beats, JBL, Sennheiser and More

    Buying audio gear can be a costly business, whether you’re looking for a new soundbar, an upgrade on your headphones or some great wireless earbuds. But occasionally a deal crops up that makes all of the prices so much cheaper that you have to make sure you aren’t imagining it. This Woot audio sale is a prime example of that.

    Right now, Woot’s audio sale can save you up to 83% off a range of different items, including some of the biggest names in the game. Beats, Samsung, Sennheiser, JBL and Shokz are all present here, with prices that need to be seen to be believed. But act soon, they’ll only be around until the end of the day on Feb. 7, or while supplies last.

    There are so many discounts here that I won’t list them all, but I do want to highlight a couple of notable items that can now be had for a fraction of their usual price. The Beats Studio Buds are great noise-canceling earbuds and now you can pick up a pair of your own for just $85. There are multiple colors to choose from, all with great ANC and support for transparency mode, too.

    Prefer headphones instead? The Beats Studio3 headphones are now just $160, a price that represents a huge 54% off. And for those who’d rather their headphones leave their ears open to the world, we have the Shokz OpenMove — yours today for just $55 with two colors to choose from. These are our favorite bone-conduction headphones for buyers on a budget and are ideal running headphones.

    The list of products available with a discount at Woot is long and varied, and it even includes things like the Pyramid Universal Compact Converter with 40% off. The biggest discount? The Nakamichi Bluetooth Cube Box speaker, available in multiple flag-based finishes, for just $10 — that’s an 83% saving. And don’t worry if these deals aren’t for you, our list of the best headphone and earbud deals should have something for everyone.

  • Here’s How iOS 17.3’s Stolen Device Protection Works

    Here’s How iOS 17.3’s Stolen Device Protection Works

    Apple released iOS 17.3 on Jan. 22, and the update brought some bug fixes and a few new features, including the long-awaited collaborative playlist feature in Apple Music, to your iPhone. The update also introduces a new security feature called Stolen Device Protection, which aims to protect your data if your iPhone is stolen or falls into nefarious hands.

    CNET Tech Tips logo

    According to Apple, Stolen Device Protection can help protect your accounts and personal information in case your iPhone is stolen. This is an optional feature, but Apple recommends everyone turn it on.

    Here’s how to enable Stolen Device Protection and what to know about the new security feature.

    How to turn Stolen Device Protection on

    After you update your iPhone to iOS 17.3, your iPhone should ask you whether or not you want to turn Stolen Device Protection on. If you didn’t see this screen, or meant to do it later, here’s how to enable the new security feature.

    1. Open Settings.
    2. Tap Face ID & Passcode.
    3. Scroll down the menu until you see Stolen Device Protection.

    If you already have the feature enabled, it will say On next to Stolen Device Protection. If it says Off, tap Turn On Protection directly below Stolen Device Protection.

    What to know about Stolen Device Protection

    The Apple logo in the shape of padlock superimposed over the Settings menu of an iPhone

    According to CNET’s David Lumb, Stolen Device Protection requires you to enter your biometric information at least once to access some of your sensitive settings and information when you’re not in a familiar location, like your home.

    Here are some of the things Apple said you’ll need to enter your biometric information for in order to change or access when you’re in an unfamiliar location:

    • Using passwords or passkeys saved in your Keychain.
    • Using payment methods saved in Safari that autofill.
    • Turning off Lost Mode.
    • Erasing all content and settings on your iPhone.
    • Applying for a new Apple Card.
    • Viewing your Apple Card’s virtual number.
    • Taking certain Apple Cash and Savings actions in your Wallet, like initiating a transfer.
    • Using your iPhone to set up a new device.

    The feature also uses a new mechanism called Security Delay, when changing some settings. If you try to change these settings when you’re in an unfamiliar location, Stolen Device Protection will require you to enter your biometric info twice; once initially and then again after an hour. According to Apple, if you arrive at a familiar location while waiting for the Security Delay to end, your device could prematurely end the delay.

    Here are some of the things Apple said are protected by Security Delay:

    • Turning Stolen Device Protection off.
    • Changing your Apple ID password.
    • Signing out of your Apple ID.
    • Updating your Apple ID account security settings, like adding or removing trusted devices.
    • Adding or removing Face ID or Touch ID information.
    • Changing your iPhone passcode.
    • Resetting all your iPhone’s settings.
    • Turning Find My off.
    A smartphone showing the Apple Pay logo

    Because Stolen Device Protection only protects a handful of settings, you still have to take steps to protect your other information. For example, Apple notes that you can still use your iPhone passcode to make purchases with Apple Pay, so Stolen Device Protection won’t totally protect your finances. While Stolen Device Protection is an optional feature and doesn’t protect everything on your phone, Apple still recommends everyone turn it on.

    How to require Security Delay even when close to home

    If you frequent a coffee shop or you live in an apartment complex and you lose your iPhone, your data could still be at risk since your iPhone might recognize those areas as familiar locations.

    While Apple appears to be working on an option to always require a Security Delay no matter if you’re at a familiar location or not in iOS 17.4, here’s how to always require the Security Delay now.

    1. Open Settings.
    2. Tap Privacy & Security.
    3. Tap Location Services.
    4. Tap System Services.
    5. Tap the toggle next to Significant Locations.

    Now if you have Stolen Device Protection enabled, your iPhone will require a Security Delay to access or change some of the above settings and features, like turning Stolen Device Protection off.

    For more on iOS, you can check out the other new features in iOS 17.3, why you should download the update now and our iOS 17 cheat sheet.